Table of Contents
- Getting Started
- What's New in May 2026
- Dashboard Overview
- Schedule Management
- Open Shifts
- Shift Swap
- Timesheet & Time Tracking
- Time Off Requests
- Mileage Tracking
- Client Management
- Behavior Support Plans (BSP)
- Client Connects
- Employee Management
- Employee Connects
- Communication & Messages
- Announcements
- Service Notes
- Medication Administration
- Incident Reports
- EVV Compliance
- Reports & Analytics
- Administration
- Schedule Templates
- Staff Compliance
- Overtime & Rest Break Rules
- On-Call Scheduling
- Custom Forms
- Billing Reconciliation
- Training
- Documents
- Onboarding
- Profile & Notifications
- Settings & Preferences
What's New in May 2026
This guide has been refreshed to reflect the current AblePath web experience, including the redesigned Employee Connects workflow, employee-facing connect history, updated admin task tools, calendar event management, report scheduling, and cleaner dashboard navigation.
Employee Connects
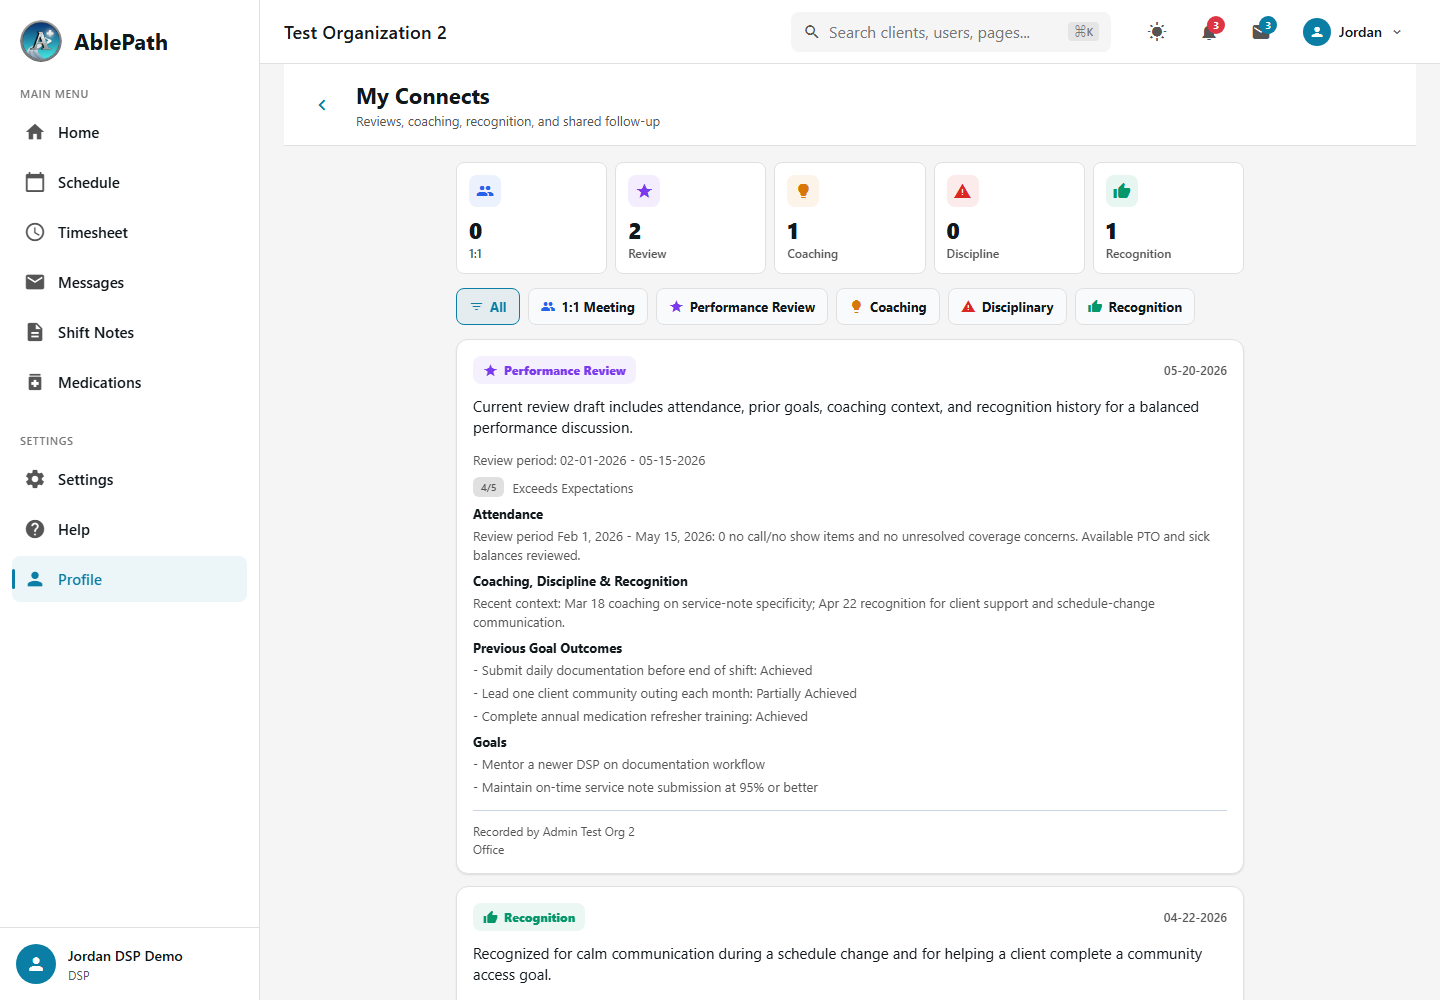
Admins can manage reviews, coaching, recognition, and discipline in a redesigned workspace. Employees can view shared connects from Profile → My Connects.
Review Context
Performance reviews can include attendance summaries, coaching/discipline/recognition context, previous goal outcomes, new goals, and AI-assisted notes.
Calendar Events
Admins can manage non-shift calendar events such as IPP meetings, holidays, trainings, appointments, and organization reminders.
Admin Tasks
Custom forms now support administrative task templates, staff assignments, due dates, repeat rules, and employee task center completion.
Reports
The reports area includes expanded operational, compliance, payroll, billing, audit, and scheduled report workflows.
Navigation
The web UI has a cleaner sidebar, global search, notification badges, and role-based access to admin tools.
Getting Started
Welcome to AblePath, your comprehensive care management platform. AblePath helps organizations manage staff schedules, track time and attendance, maintain client records, and ensure regulatory compliance.
Key Features
Staff Scheduling
Create and manage shifts with drag-and-drop calendar interface
Time Tracking
GPS-verified clock-in/out with EVV compliance
Client Management
Complete client profiles with care plans and authorizations
Medication Tracking
MAR (Medication Administration Record) management
Compliance
Title 17/22 compliance, EVV, and audit-ready reporting
Communication
Secure messaging between staff and care teams
Logging In
To get started, log in with the email address and password provided by your administrator. First-time users will be prompted to set up a new password. If you forget your password, use the "Forgot Password" link on the login page to receive a reset email.
Use the search bar at the top of any page to quickly find clients, employees, or navigate to different sections of the app.
Dashboard Overview
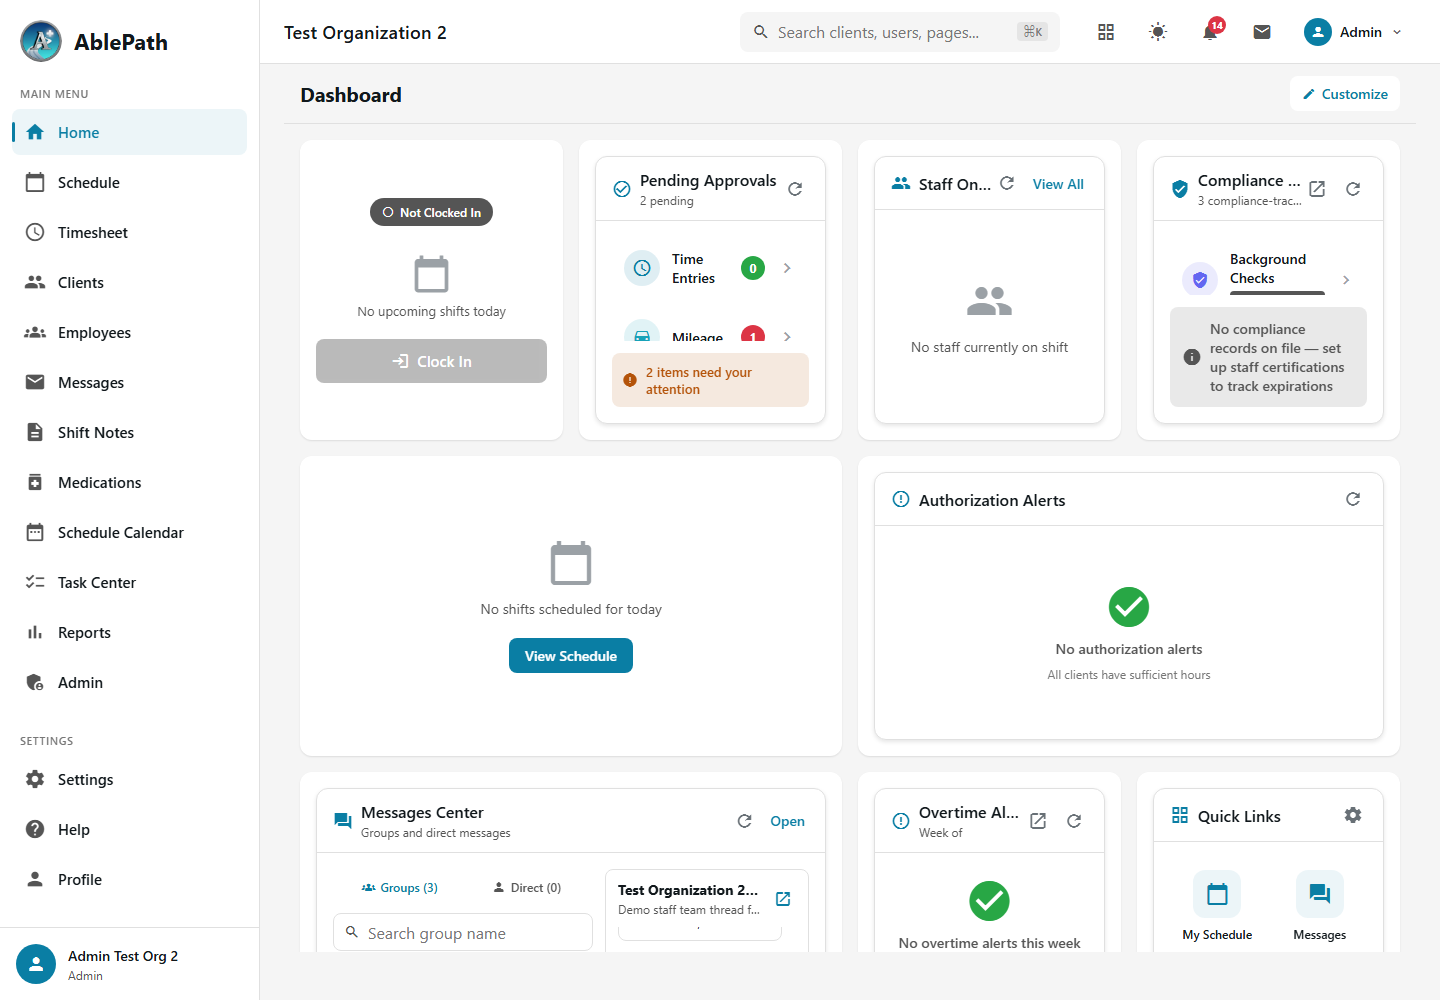
The dashboard provides a real-time overview of your organization's operations. From here, you can monitor staff on shift, view pending approvals, track authorization alerts, and access quick links to common tasks.
Dashboard Widgets
Staff On Shift
View all employees currently clocked in with their assigned clients and duration
Compliance Overview
Track certifications, background checks, TB tests, and other compliance items
Pending Approvals
Review time entries, mileage, and PTO requests awaiting approval
Authorization Alerts
Monitor clients approaching authorization limits
- Locate the Pending Approvals widget Find the widget showing counts for Time Entries, Mileage, and PTO Requests
- Click on the category to review Click "Time Entries", "Mileage", or "PTO Requests" to see pending items
- Review each entry Check the details including employee, client, hours, and any notes
- Approve or reject Click Approve to accept, or Reject with a reason for denial
- View the Staff On Shift widget See all currently clocked-in employees with their assigned clients
- Check shift duration View how long each staff member has been on shift
- Click "View All" for details Access the full list with additional information and actions
Schedule Management
AblePath provides powerful scheduling tools to manage staff shifts. View schedules in calendar or list format, create recurring shifts, handle shift swaps, and ensure proper coverage.
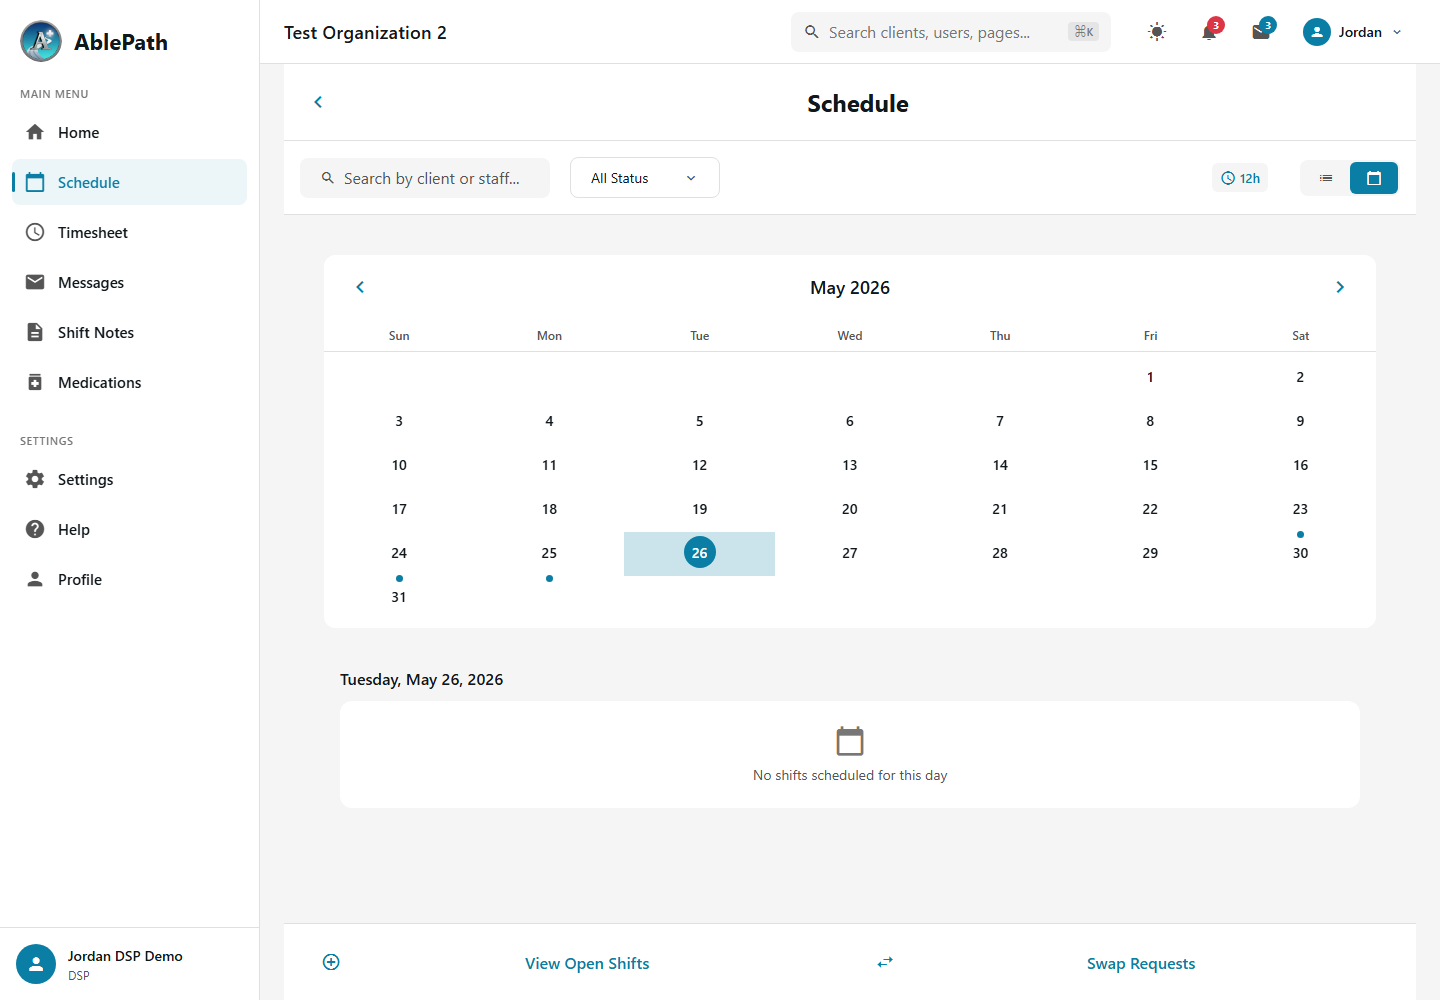
Personal Schedule View
Employees can view their assigned shifts in a calendar format, with quick access to shift details and the ability to request swaps or view open shifts.
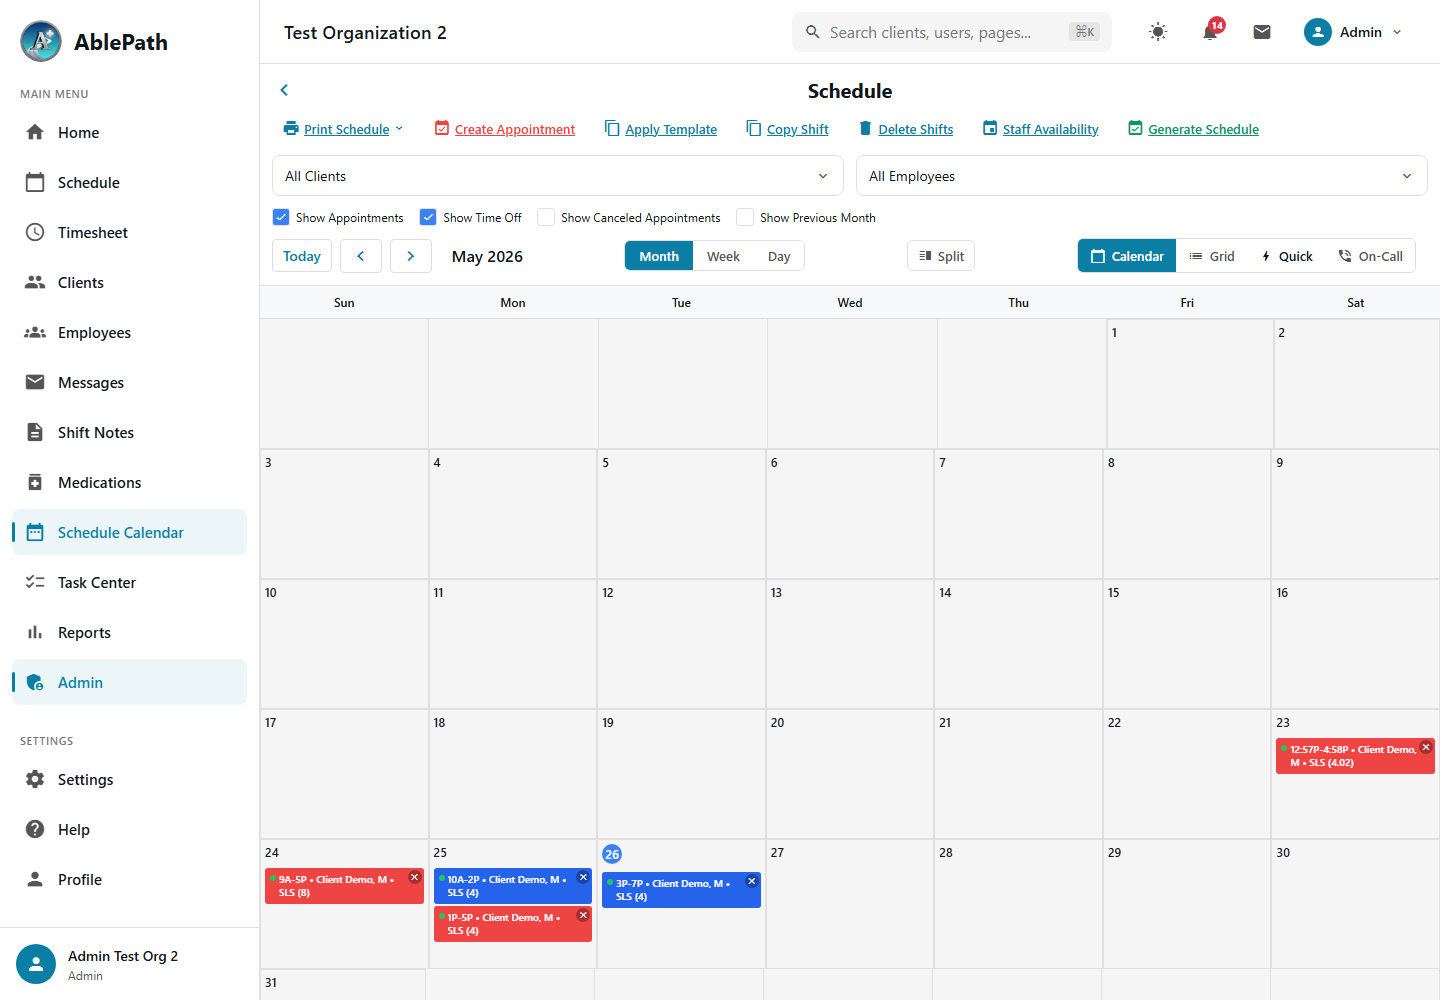
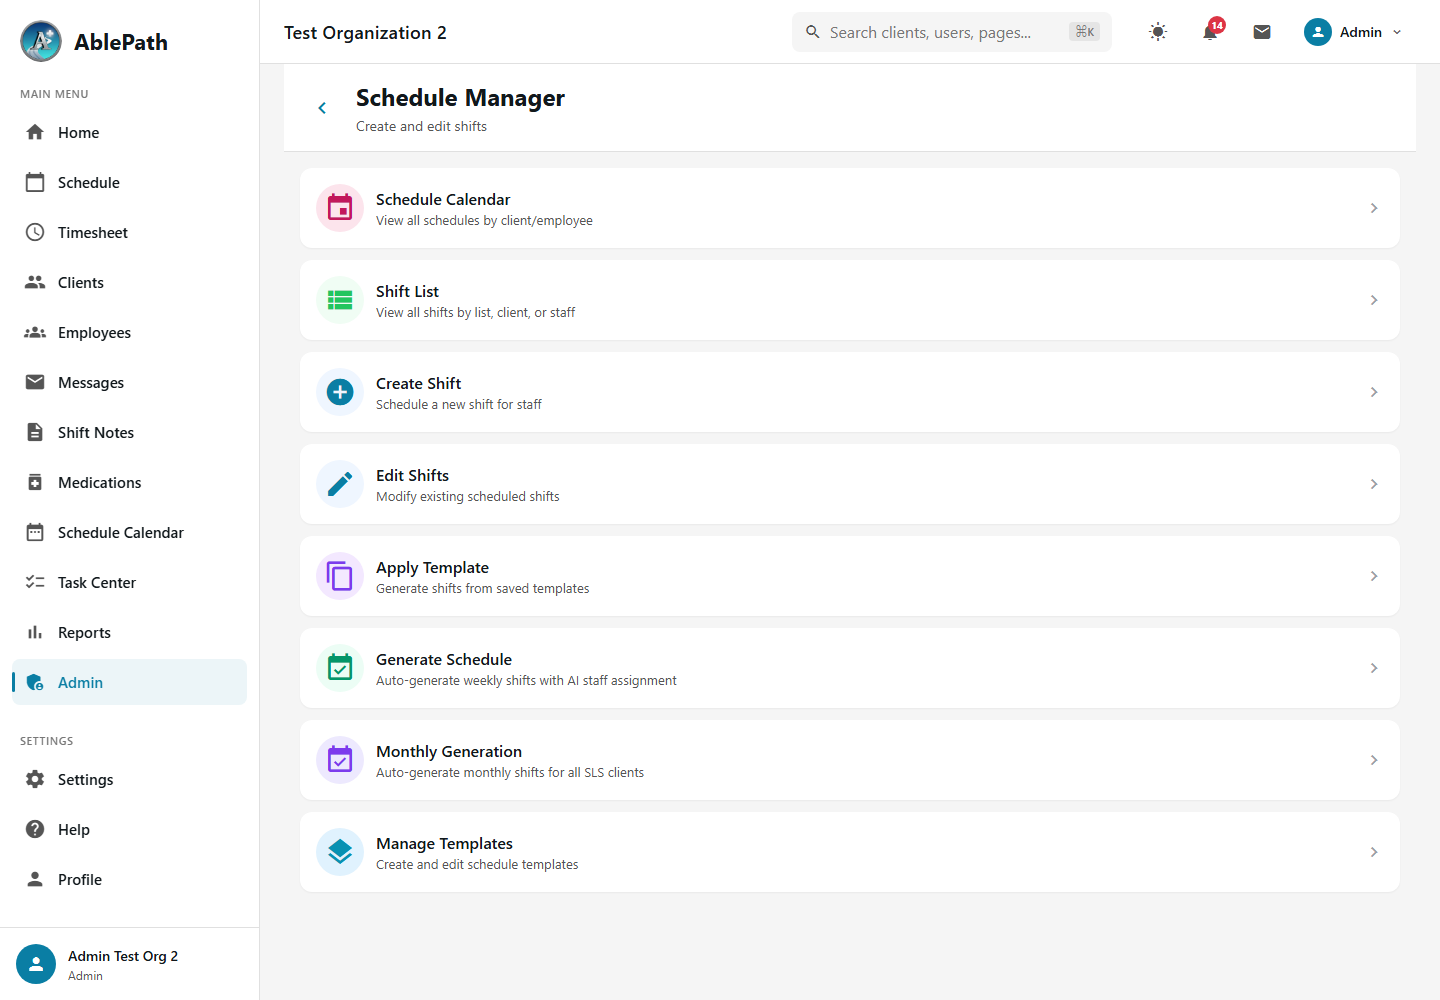
Admin Schedule Calendar
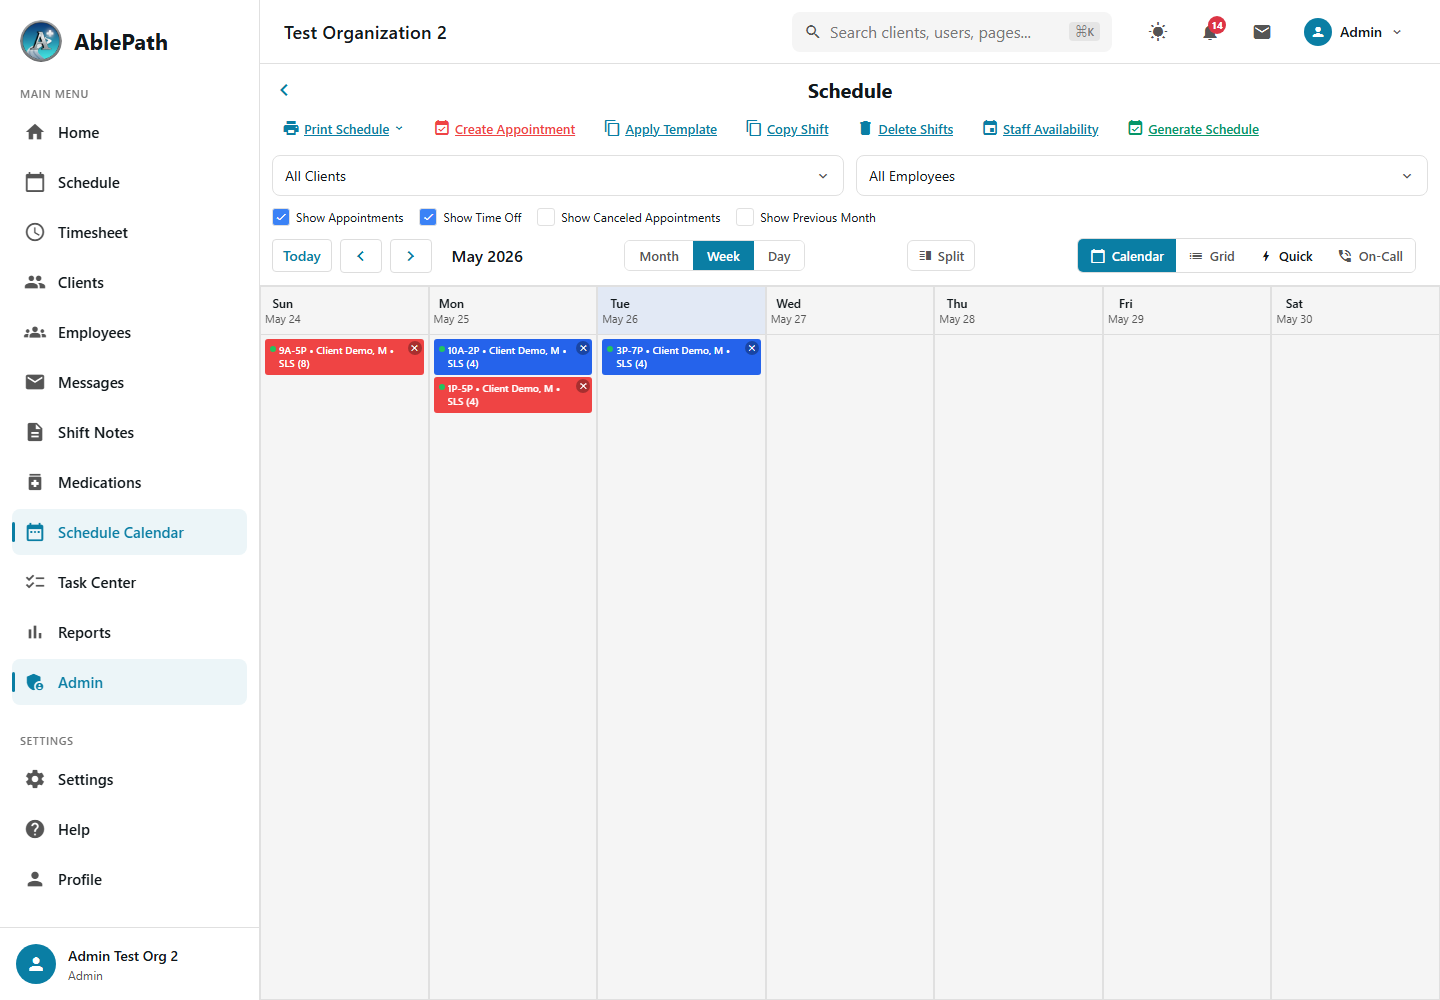
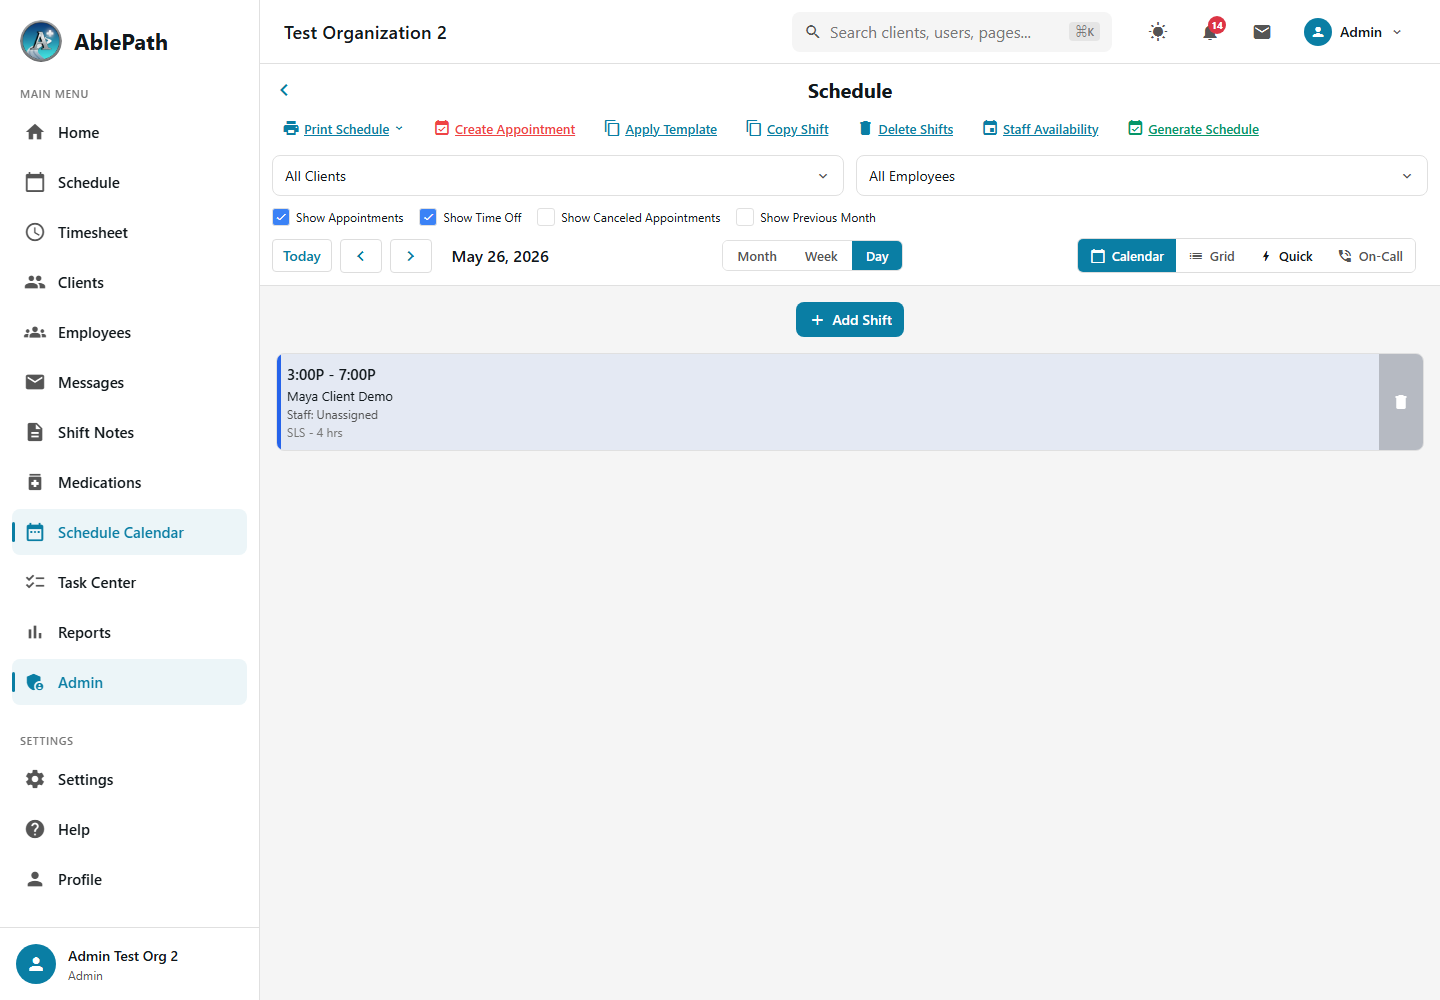
Administrators have access to a comprehensive schedule view showing all staff and clients. The calendar supports month, week, and day views with filtering by client or employee.
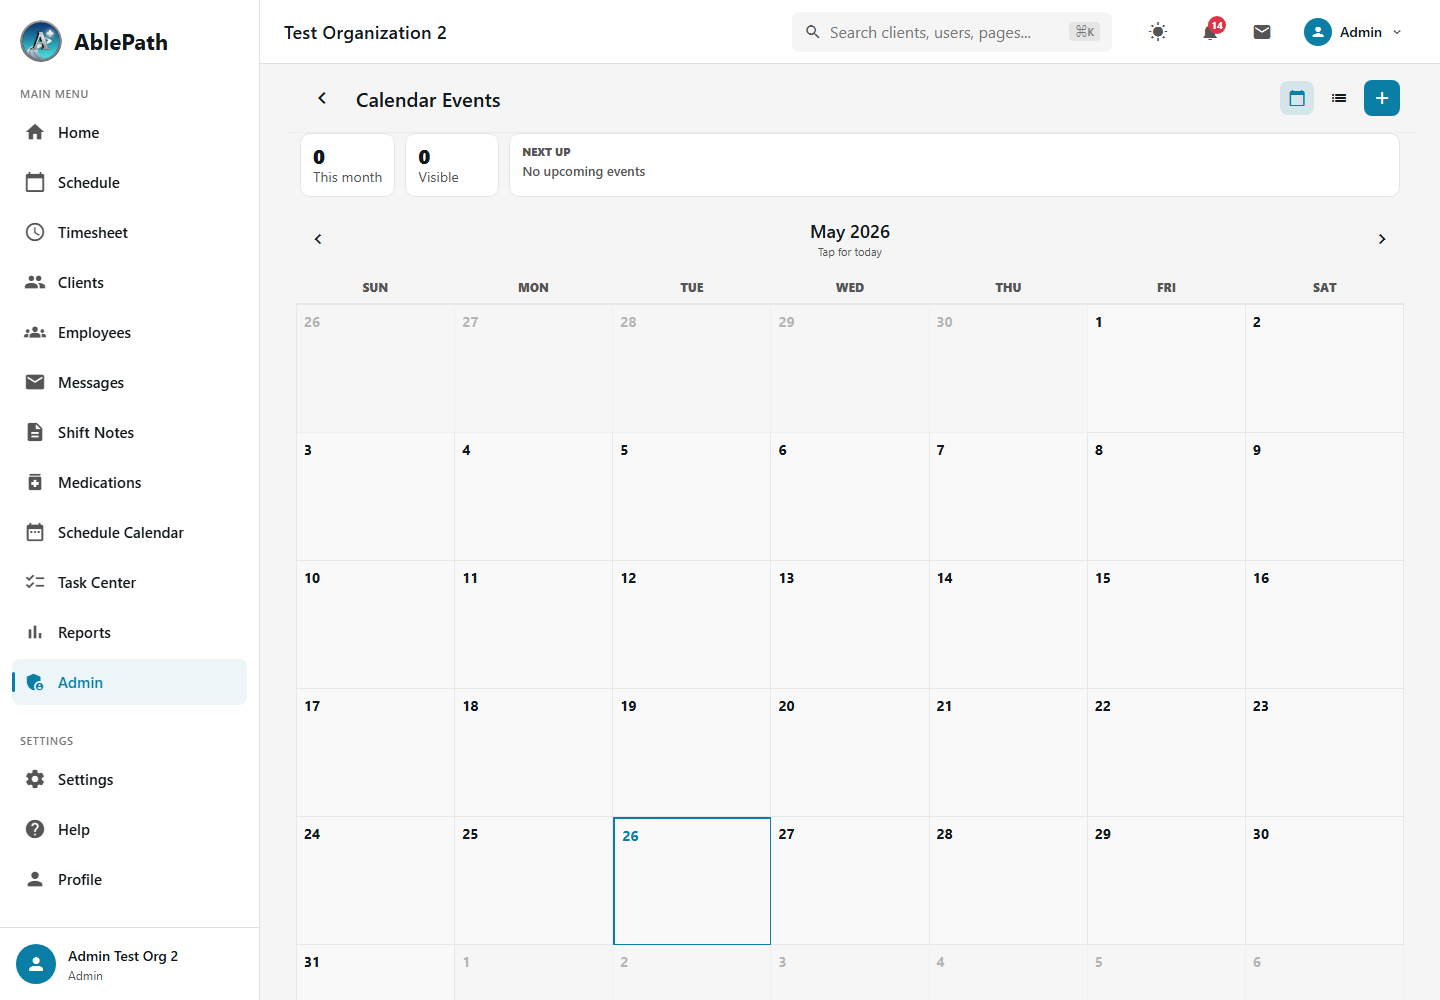
Calendar Events
Calendar Events are for important non-shift items that should appear on schedules, such as IPP meetings, holidays, trainings, appointments, staff meetings, and organization reminders.
Schedule Grid View
The grid view provides a staff-centric layout, showing all employees in rows with their scheduled shifts across the selected time period.
Week View
The week view displays a 7-day overview of shifts, making it easy to see coverage patterns and identify scheduling gaps.
Day View
The day view provides a detailed hour-by-hour breakdown of all scheduled shifts for a specific date, perfect for managing daily operations.
- Navigate to Schedule Calendar Go to Admin → Schedule Calendar or click "Schedule Calendar" in the sidebar
- Click on a date Click on the calendar date where you want to add the shift
- Fill in shift details Select employee, client, service type, start time, and end time
- Set recurrence (optional) Choose to repeat the shift daily, weekly, or on specific days
- Save the shift Click "Create Shift" to save. The employee will receive a notification
- Select shifts to copy Click "Copy Shift" button in the schedule toolbar
- Choose source week Select the week containing the shifts you want to copy
- Select target week Choose the destination week for the copied shifts
- Review and confirm Preview the shifts to be created and click "Copy" to confirm
- Identify open shifts Look for shifts marked as "Open" (no assigned employee)
- Send SOS broadcast Click "Notify Eligible Staff" to alert available employees
- Review pickup requests Check notifications for staff who want to pick up the shift
- Assign the shift Click on the open shift and select an employee to assign it
Create Shift Form
The shift creation form provides a comprehensive interface for scheduling new shifts. It includes searchable selection lists for clients and staff, with quick access to frequently-assigned individuals.
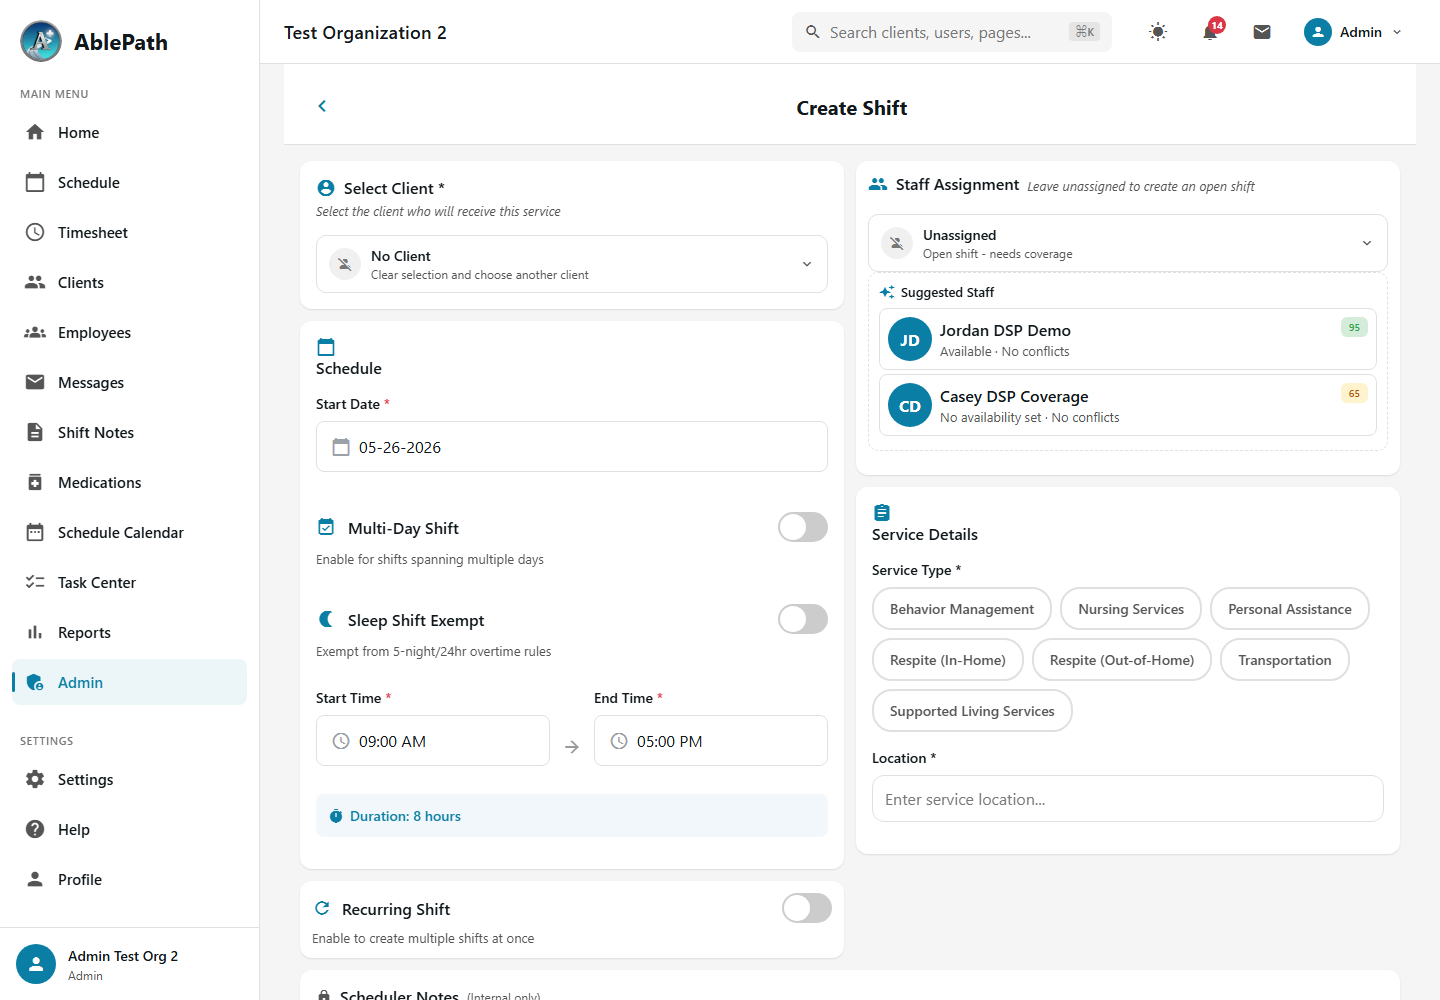
Shift Creation Options
Client Selection
Search and select a client from your active client list. Their address is auto-filled as the location.
Staff Assignment
Assign a specific employee or leave unassigned to create an open shift that staff can claim.
Multi-Day Shifts
Enable for overnight or 24-hour shifts that span across midnight.
Service Types
Select from SLS, IHSS, Day Program, Admin, Meetings, and other configured service types.
Recurring Shifts
Enable the recurring shift option to create multiple shifts at once. Choose from daily, weekly, bi-weekly, or monthly patterns.
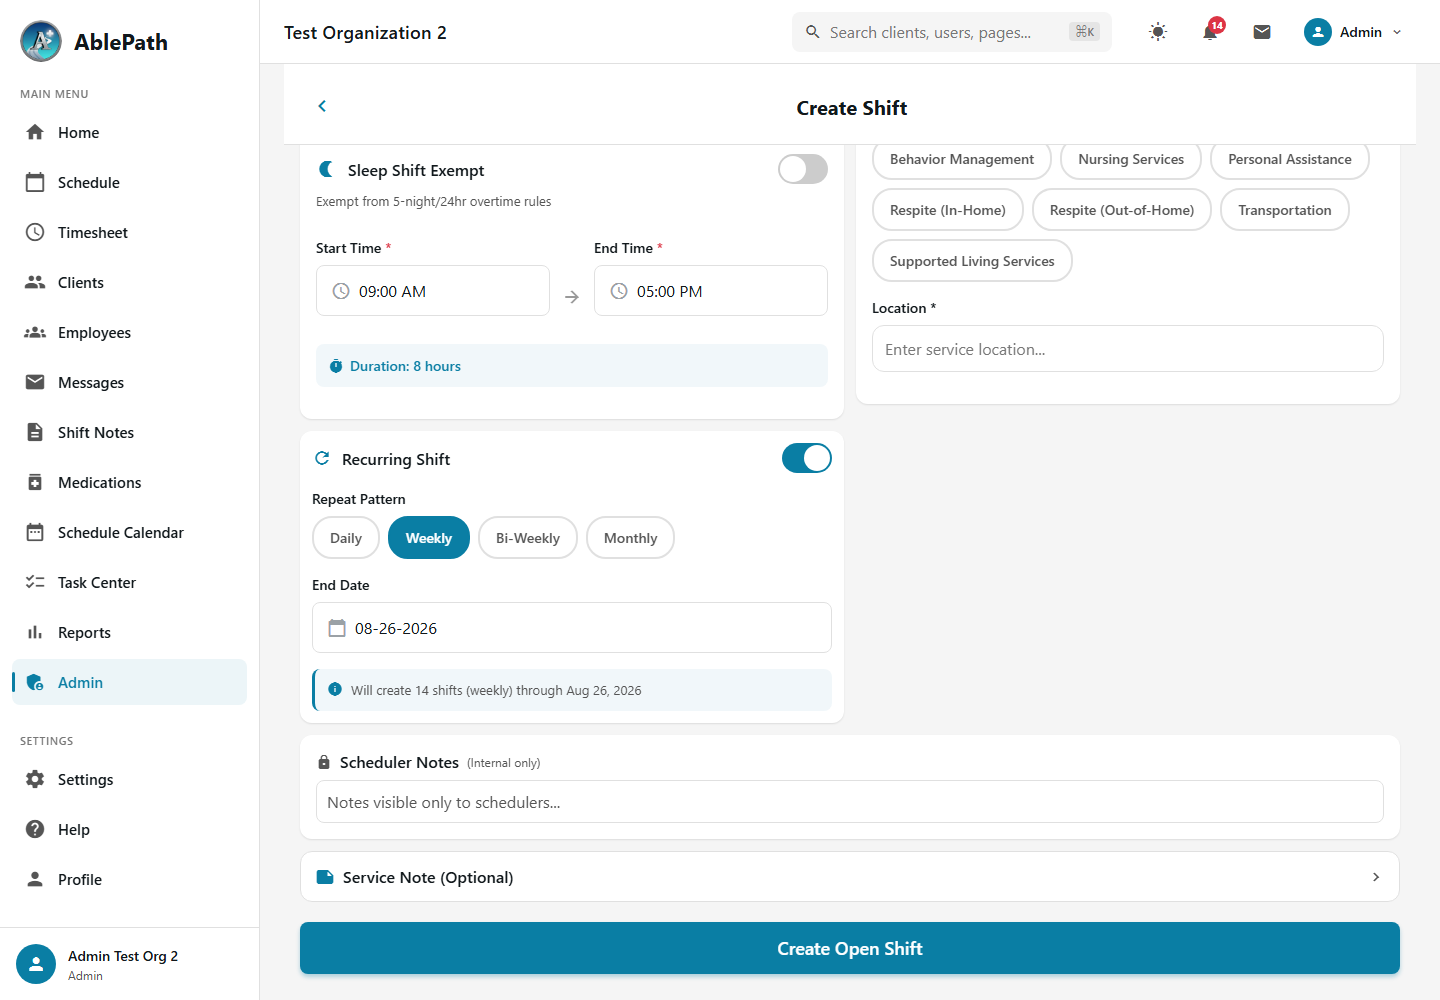
Use the "Copy Shift" feature to quickly duplicate shifts for recurring schedules. You can copy individual shifts or entire weeks.
Open Shifts
Open shifts are scheduled shifts that have not yet been assigned to a specific employee. Staff can browse available open shifts, submit claims with notes, and track their claim status. Administrators review and approve or deny claims.
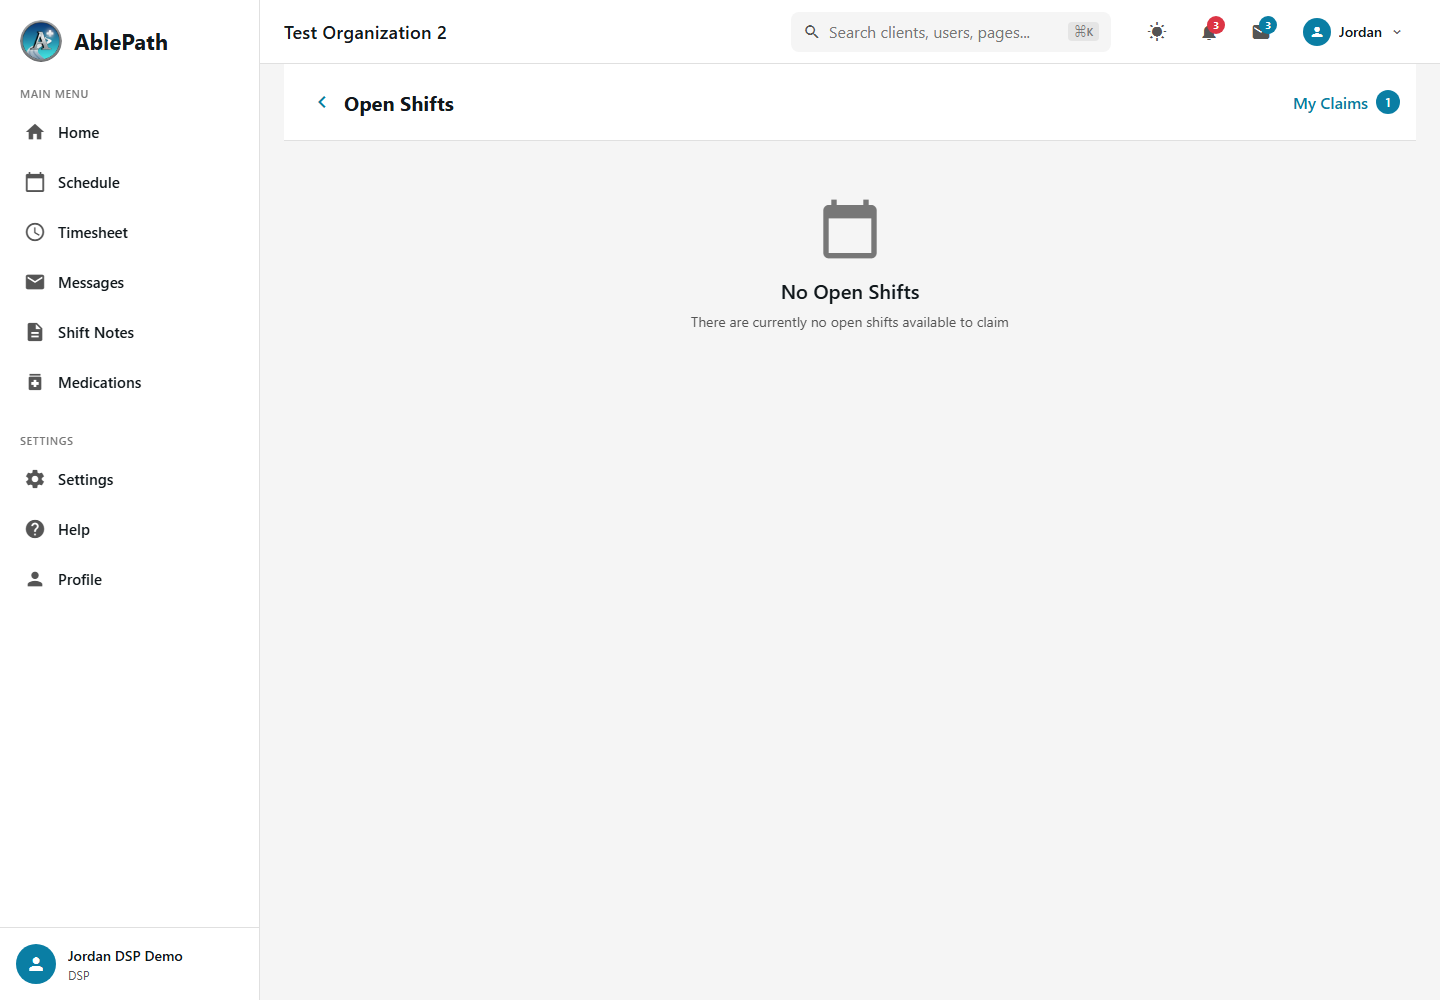
Open Shift Features
Browse Available Shifts
View all unassigned shifts with date, time, client, location, and service type details
Claim a Shift
Submit a claim with optional notes explaining your availability or qualifications
Track Claim Status
View your submitted claims and their status: Pending, Approved, or Denied
SOS Broadcast
Admins can send push notifications to all eligible staff when urgent coverage is needed
- Go to Open Shifts Click "Open Shifts" in the sidebar navigation
- Browse available shifts Review the list of unassigned shifts, checking dates, times, and clients
- Click "Claim" on the shift you want Opens the claim submission form
- Add notes (optional) Explain your availability or relevant experience with the client
- Submit your claim Your claim is sent to a manager for review. You'll receive a notification when it's approved or denied
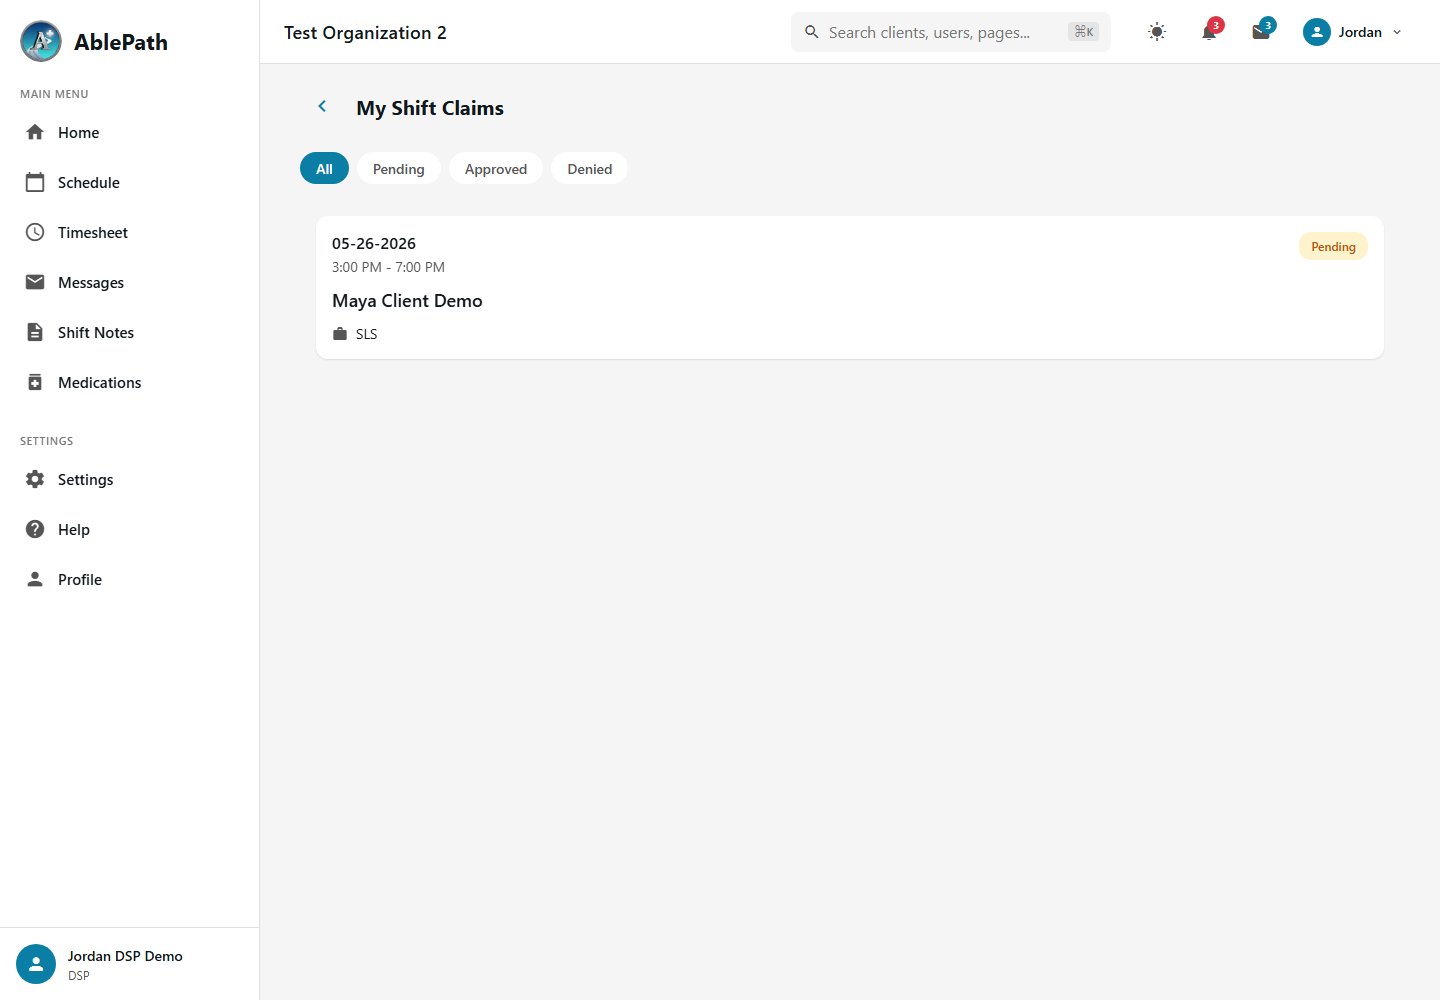
- Go to Open Shifts → Claims Access the claims management view
- Review pending claims See which staff have claimed each shift and their notes
- Approve or deny Click Approve to assign the shift to the claiming employee, or Deny with a reason
Shift Swap
The shift swap feature allows employees to request a swap of one of their assigned shifts with another employee. Swaps require manager approval to ensure coverage continuity and compliance.
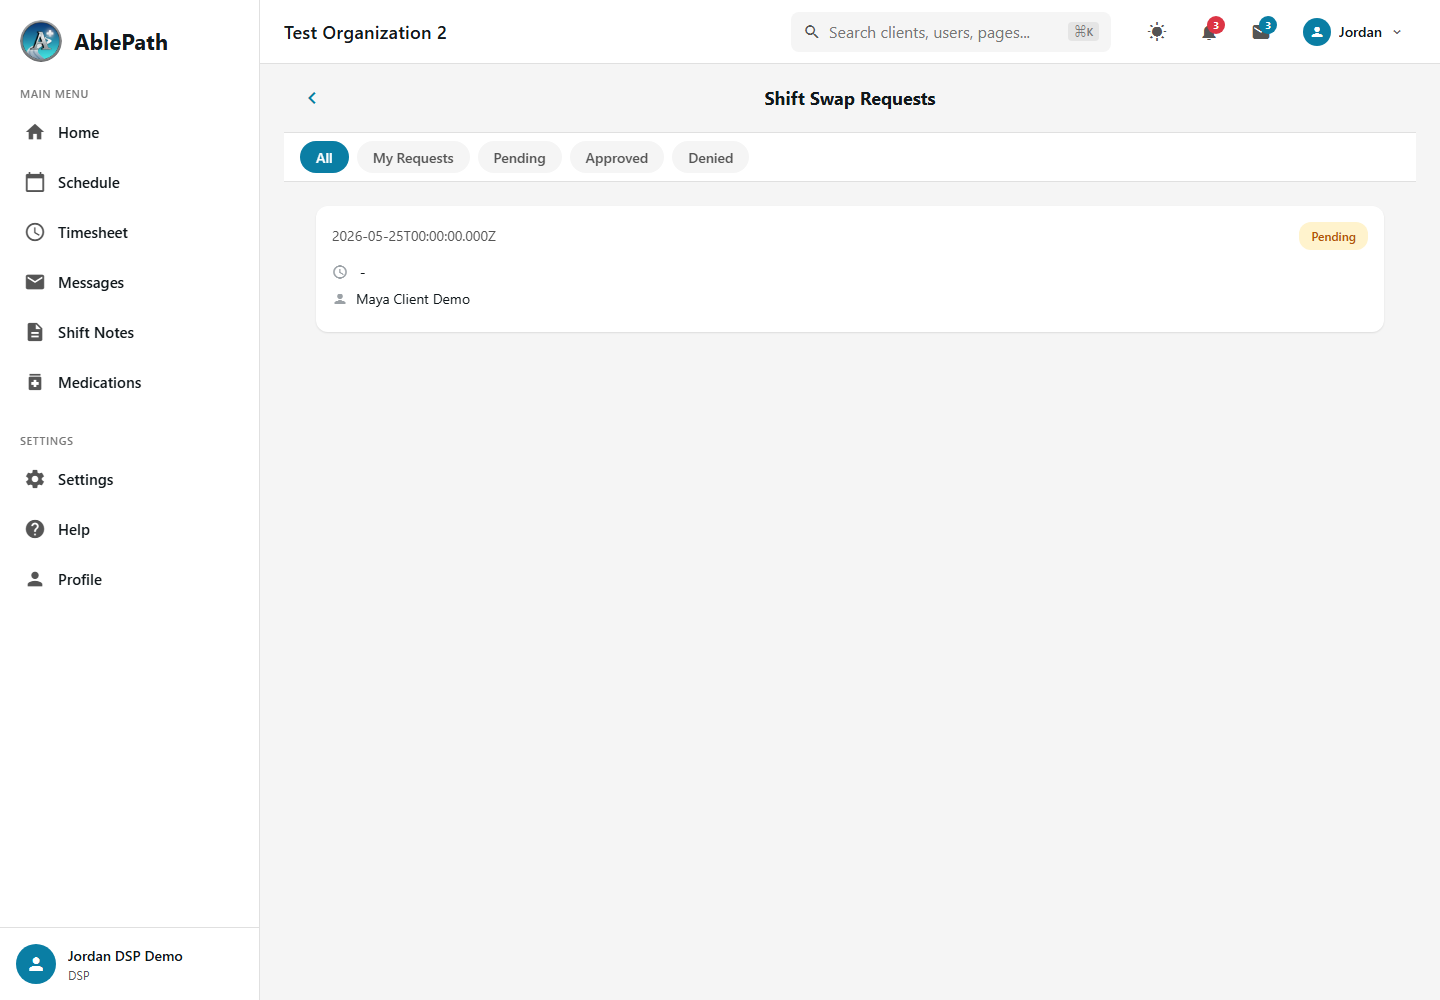
Swap Features
Request a Swap
Select one of your shifts and choose a target employee to swap with
Provide a Reason
Include a reason for the swap request to help managers make informed decisions
Manager Approval
Managers review and approve or reject swap requests before they take effect
Status Tracking
Track swap requests through Pending, Approved, and Rejected statuses
- Go to Shift Swap Click "Shift Swap" from the sidebar or your schedule page
- Click "New Swap Request" Opens the swap request form
- Select the shift to swap Choose one of your upcoming assigned shifts
- Select target employee Choose the staff member you'd like to swap with
- Enter a reason Explain why you're requesting the swap (e.g., scheduling conflict, personal appointment)
- Submit request The request goes to your manager for approval. Both parties are notified of the outcome
Timesheet & Time Tracking
Track employee work hours with GPS-verified clock-in/out. The timesheet view shows weekly summaries, individual entries, and supports batch approvals.
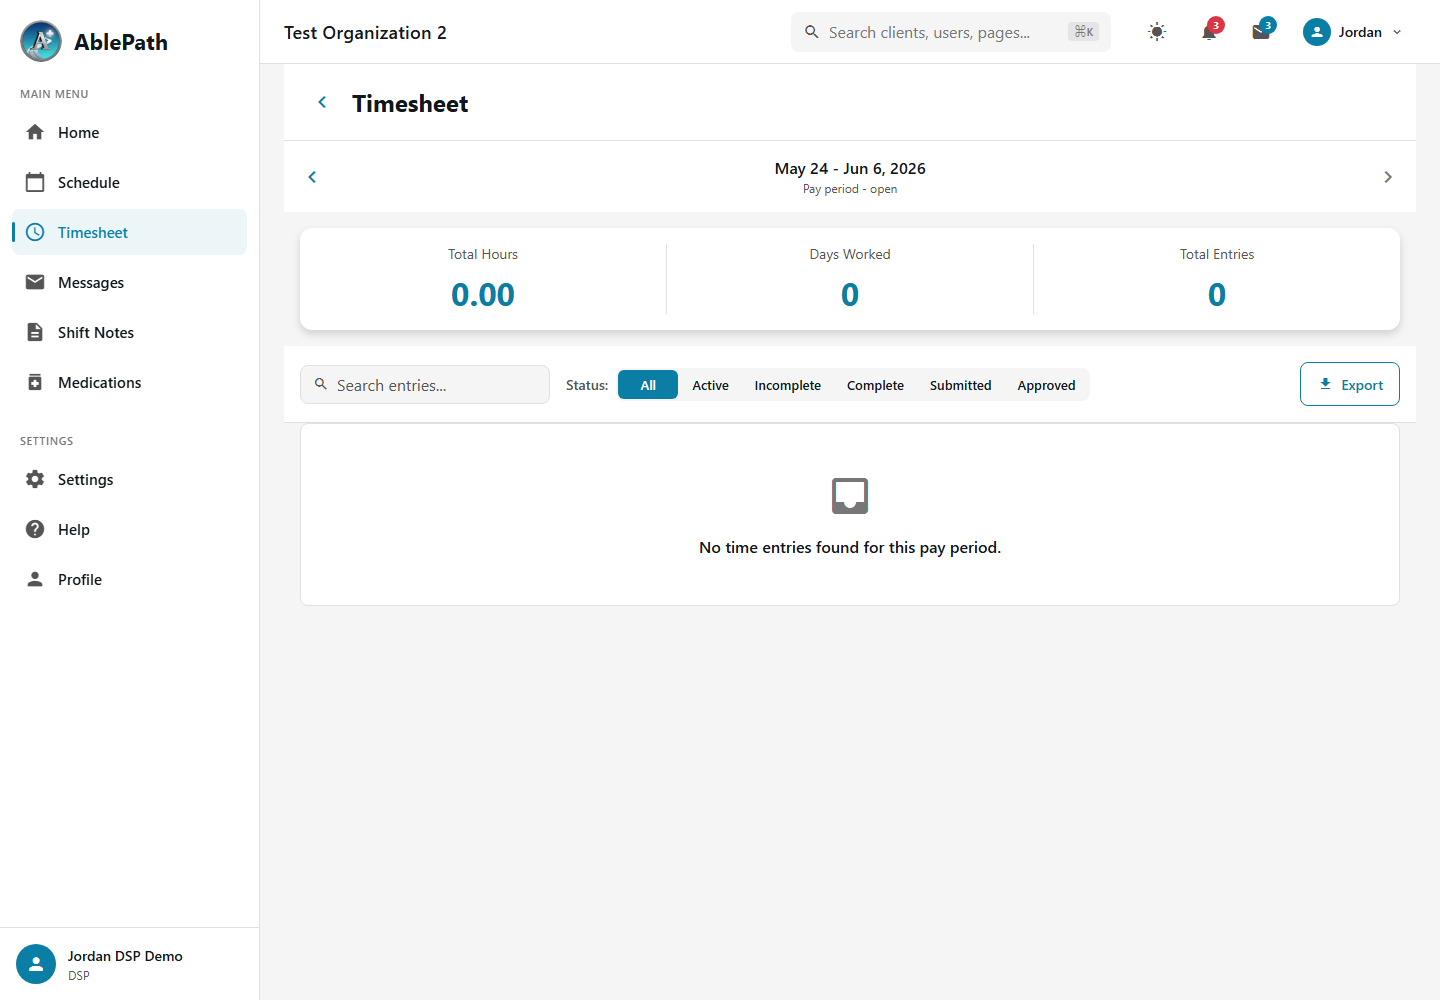
Time Entry Features
GPS Verification
Clock-in/out captures location for EVV compliance
Photo Verification
Optional selfie capture at clock-in for identity verification
Break Tracking
Track meal and rest breaks with California compliance
Mileage Logging
Log travel miles directly from time entries
Approval Workflow
Time entries go through an approval workflow: Active → Pending → Approved. Supervisors can review and approve entries individually or in batch.
- Open your schedule or dashboard Your upcoming shift will show a "Clock In" button
- Verify your location Ensure you're at the client's location (GPS verification required)
- Click "Clock In" Your location will be captured for EVV compliance
- Provide late arrival note (if applicable) If clocking in more than 5 minutes after the shift start time, a modal will prompt you to explain why you are late. This note is saved as a shift note with a [LATE ARRIVAL] prefix
- Take photo if required Some shifts require a selfie for identity verification
- Confirm clock-in Your shift is now active and tracking time
- Open your active shift Go to Timesheet or click on your active shift from the dashboard
- Add break time Enter any meal or rest breaks taken during the shift
- Log mileage (if applicable) Enter miles traveled for reimbursement
- Click "Clock Out" Your location will be captured and total hours calculated
- Complete medication check If the client has scheduled medications, you'll be prompted to confirm all medications were administered during the shift
- Complete service notes You'll be prompted to complete your service documentation for the shift
- Review your time entries Check that all entries are complete with correct hours and breaks
- Fix any incomplete entries Use the "Adjust" button to correct any errors
- Click "Submit Timesheet for Approval" Button appears at the bottom of the timesheet page
- Wait for supervisor approval You'll receive a notification when your timesheet is approved
Timecards View (Admin)
Administrators can view all timecards in a grid format from the Schedule Calendar. Enable "Show actual timecards" to switch from scheduled shifts to actual time entries. This view allows inline editing of clock-in/out times.
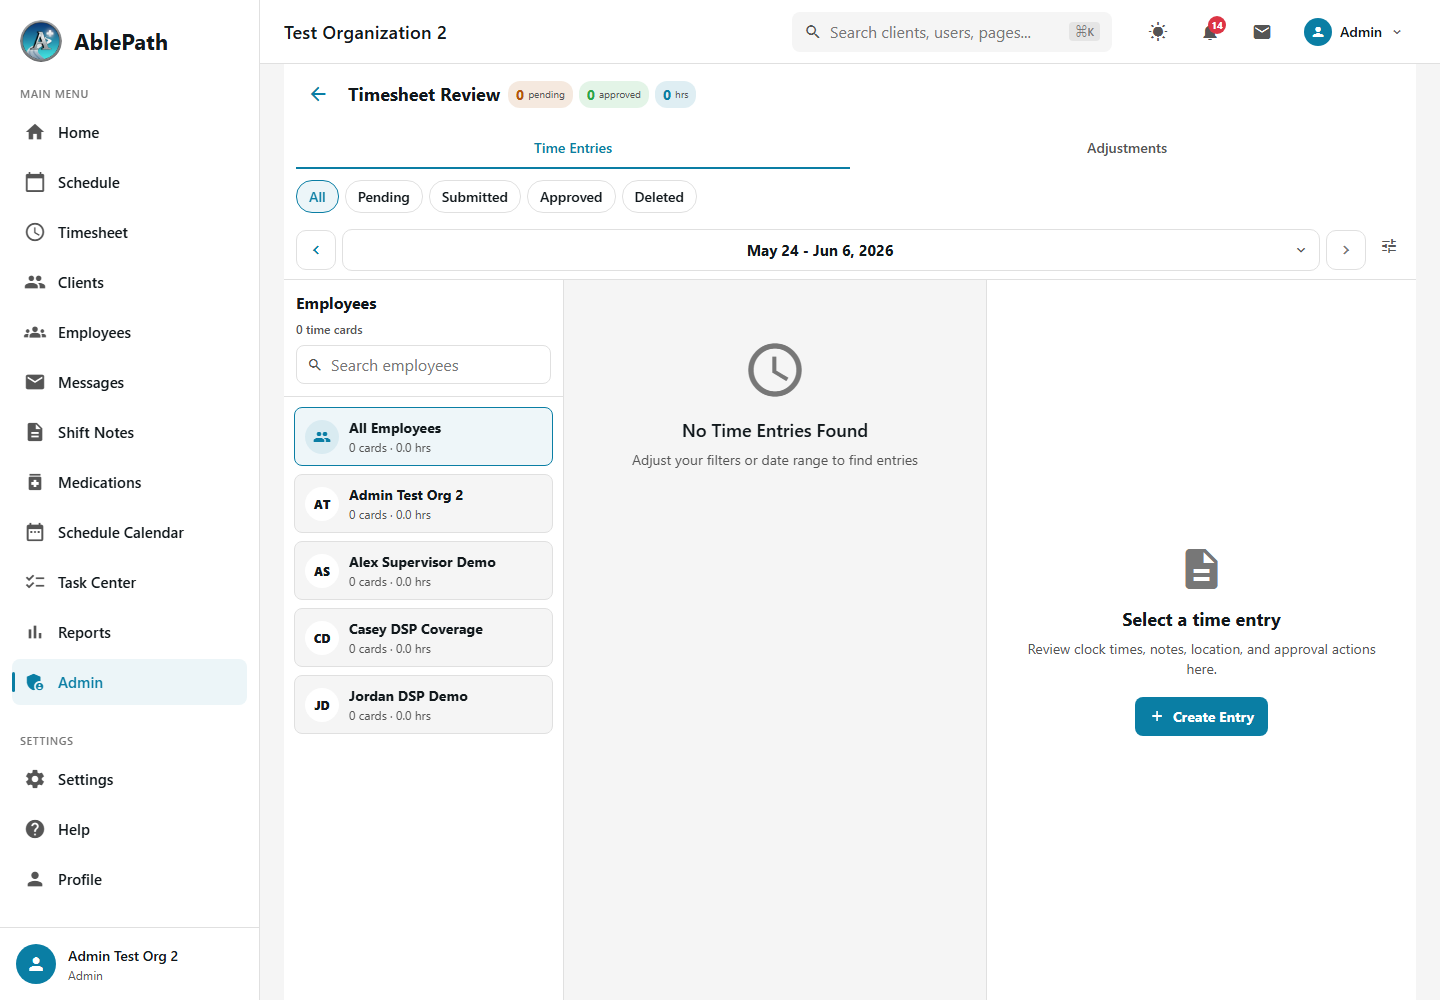
Timecards View Features
Group by Client or Employee
Switch between grouping timecards by client or by employee for different perspectives
Inline Time Editing
Click on any time to adjust clock-in or clock-out times directly (changes auto-save)
Scheduled vs Actual
See scheduled shift times alongside actual clock times to identify variances
Hours Summary
View total hours per client/employee with overtime indicators
- Navigate to Schedule Calendar Go to Admin → Schedule Calendar
- Enable timecards view Check "Show actual timecards instead of scheduled shifts"
- Expand a client or employee Click on a row to expand and see individual time entries
- Click on a time to edit Click the IN or OUT time field and adjust the time
- Changes auto-save The time updates automatically after you stop editing
Time Off Requests
Submit and manage time off requests for PTO, sick leave, personal days, and unpaid leave. Track your PTO balance, view request history, and monitor approval status. Administrators can review and approve requests from the admin dashboard.
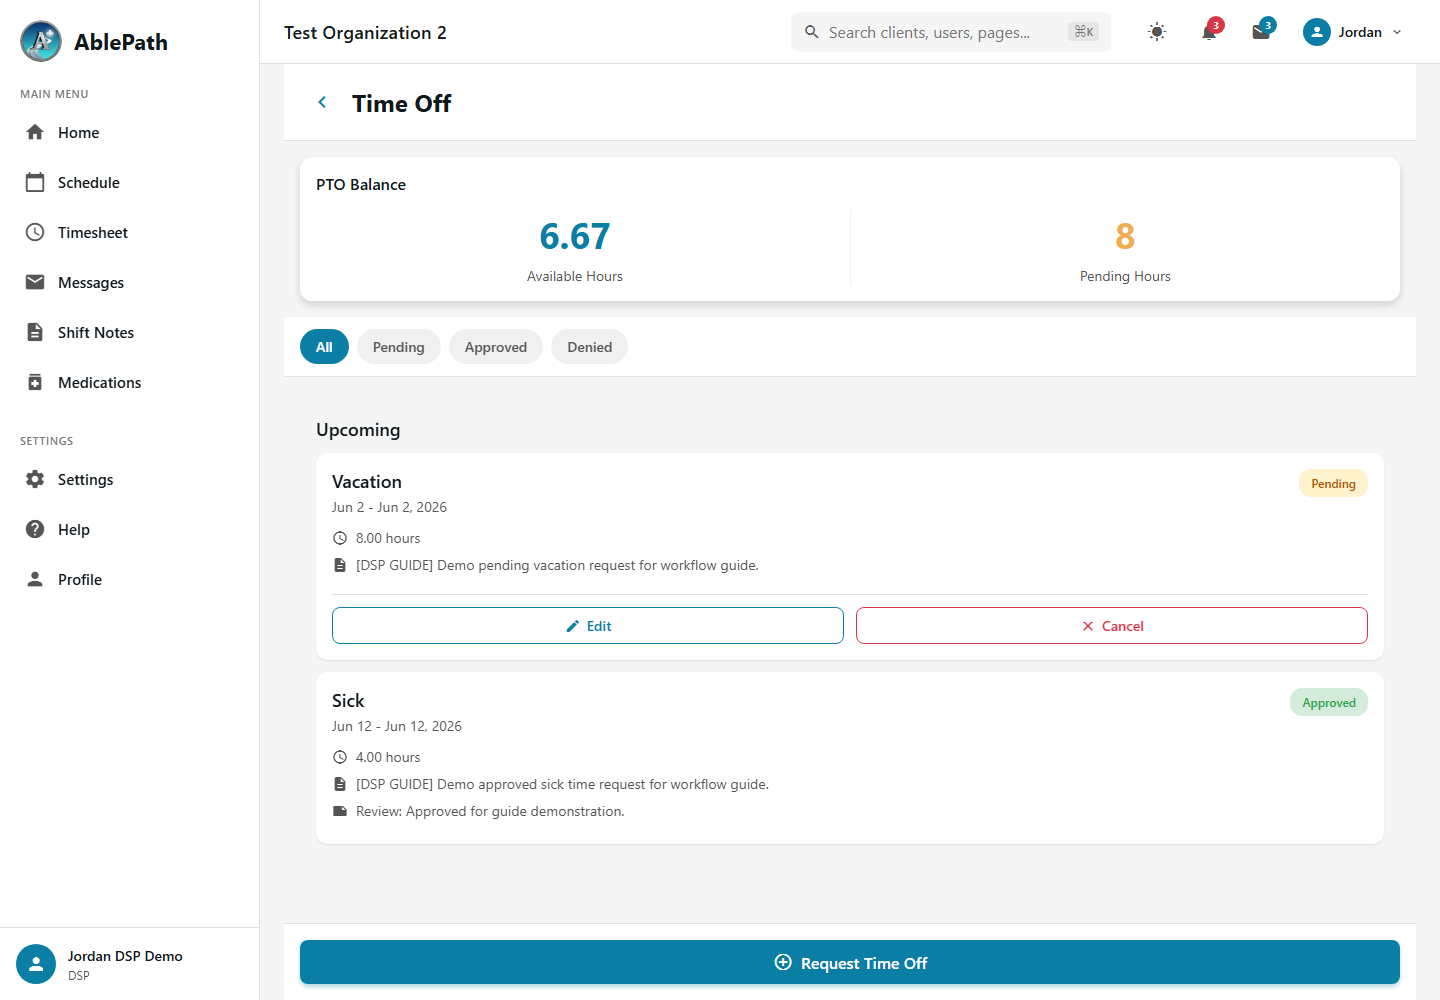
Time Off Features
Request Types
PTO (Paid Time Off), Sick Leave, Personal Day, and Unpaid Leave
PTO Balance
View your current PTO balance and accrual information at a glance
Date Range Selection
Request single days or multi-day ranges with start and end dates
Approval Status
Track requests through Pending, Approved, and Denied statuses
- Go to Time Off Click "Time Off" in the sidebar navigation
- Click "New Request" Opens the time off request form
- Select leave type Choose PTO, Sick, Personal, or Unpaid
- Choose dates Select start date and end date for your time off
- Add a reason (optional) Provide context for your manager to review
- Submit request Your manager will be notified and can approve or deny the request
- Go to the Dashboard or Admin → Time Off Pending requests appear in the Pending Approvals widget
- Review the request Check the dates, leave type, reason, and any scheduling conflicts
- Approve or deny Click Approve to grant the request, or Deny with a reason
Mileage Tracking
Log mileage for work-related travel including client visits, office trips, and training. Track monthly totals and submit entries for reimbursement approval.
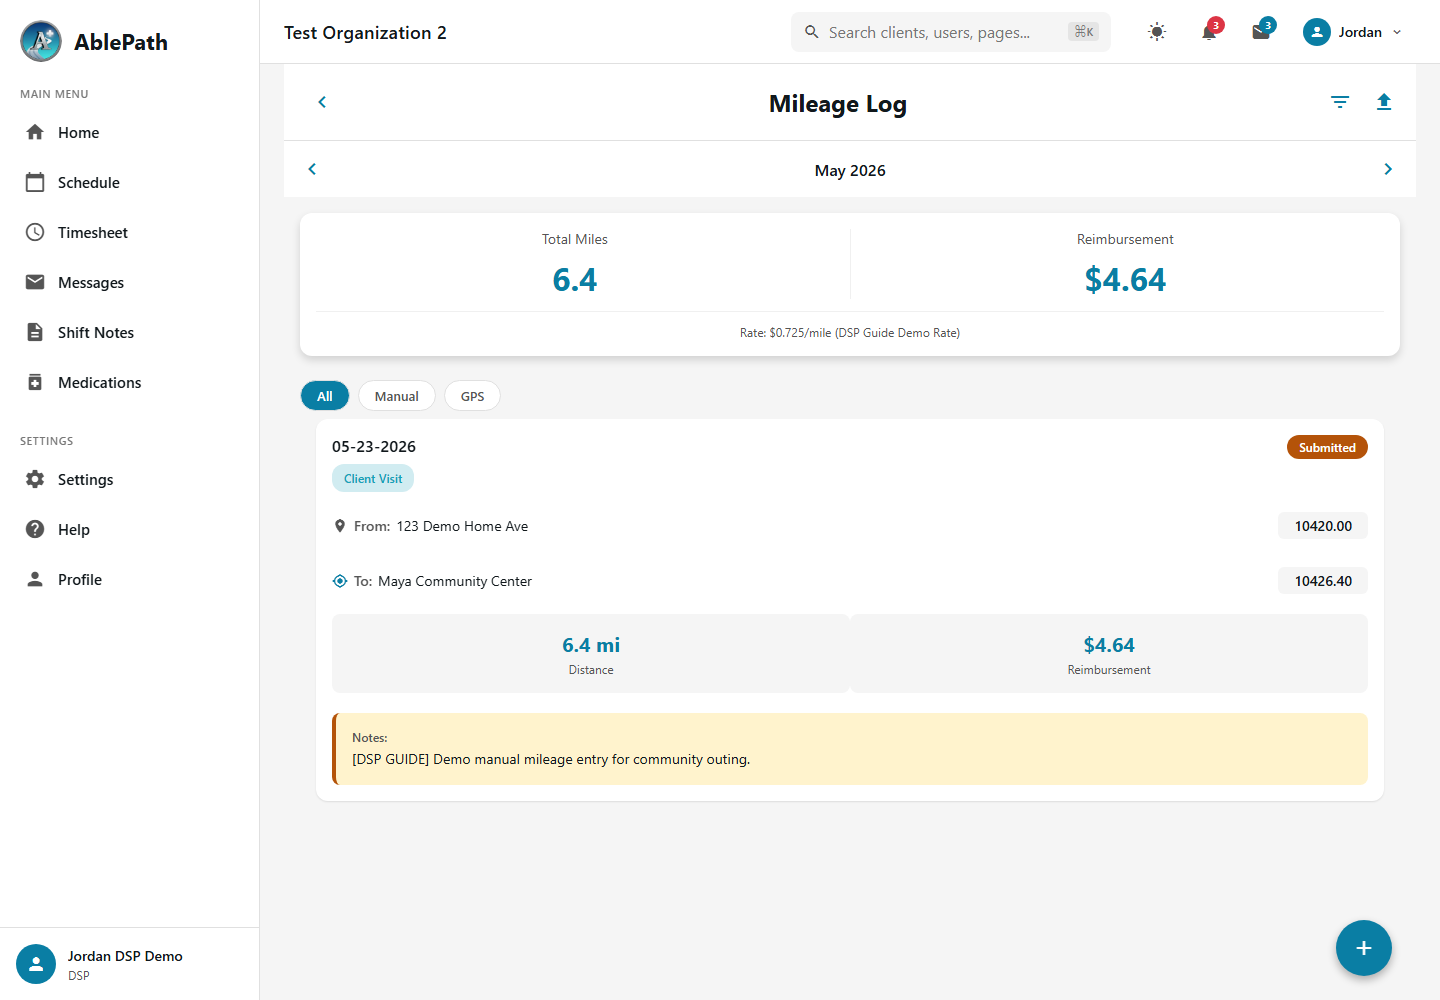
Mileage Features
Trip Purposes
Categorize trips as Client Visit, Office, Training, or Other
Monthly Summary
View total miles and estimated reimbursement for each month
Odometer Logging
Record start and end odometer readings for accurate tracking
Reimbursement Calculation
Automatic calculation based on configured per-mile rate
- Go to Mileage Click "Mileage" in the sidebar, or log from the clock-out flow
- Click "Add Entry" Opens the mileage entry form
- Enter trip details Select date, purpose (Client Visit, Office, Training, Other), and client if applicable
- Enter start and end odometer Record your odometer readings; miles are calculated automatically
- Add notes (optional) Describe the trip destination or reason
- Save entry Entry is saved and included in your monthly mileage summary
Client Management
Manage comprehensive client profiles including demographics, medical information, care plans, authorizations, and emergency contacts.
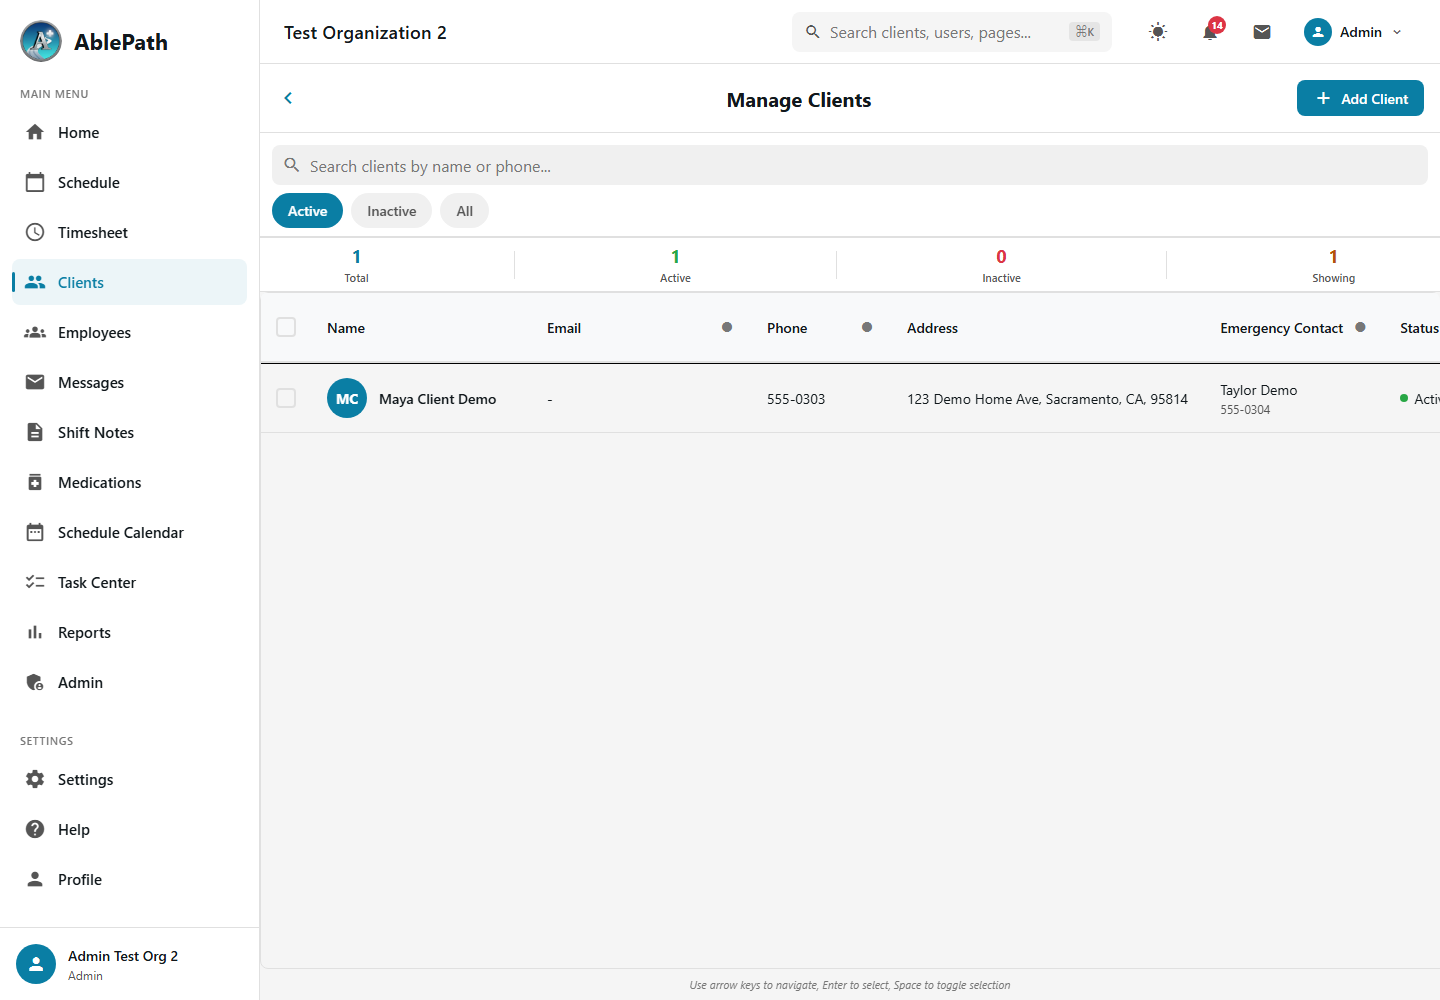
Client Detail Page
Each client has a detailed profile with multiple tabs for organizing information:
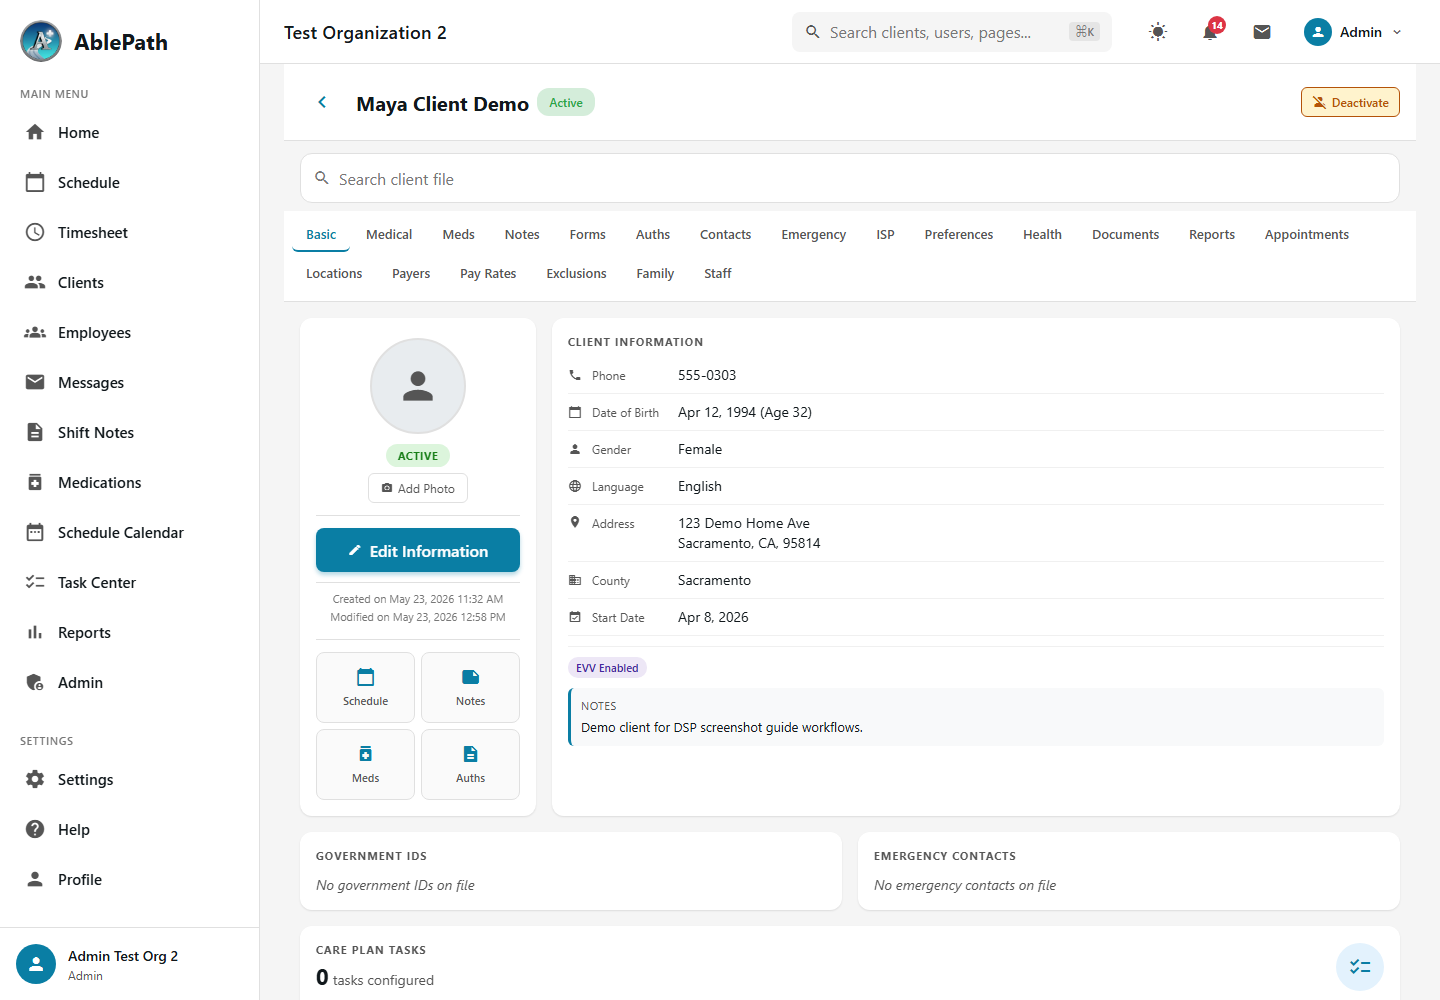
Client Profile Sections
Basic Information
Demographics, contact details, and addresses
Medical Information
Diagnoses, allergies, and health conditions
Medications
Medication list with schedules and instructions
Authorizations
Service authorizations with hours and utilization tracking
ISP (Individual Service Plan)
Goals, objectives, and progress tracking
Documents
Uploaded files and document management
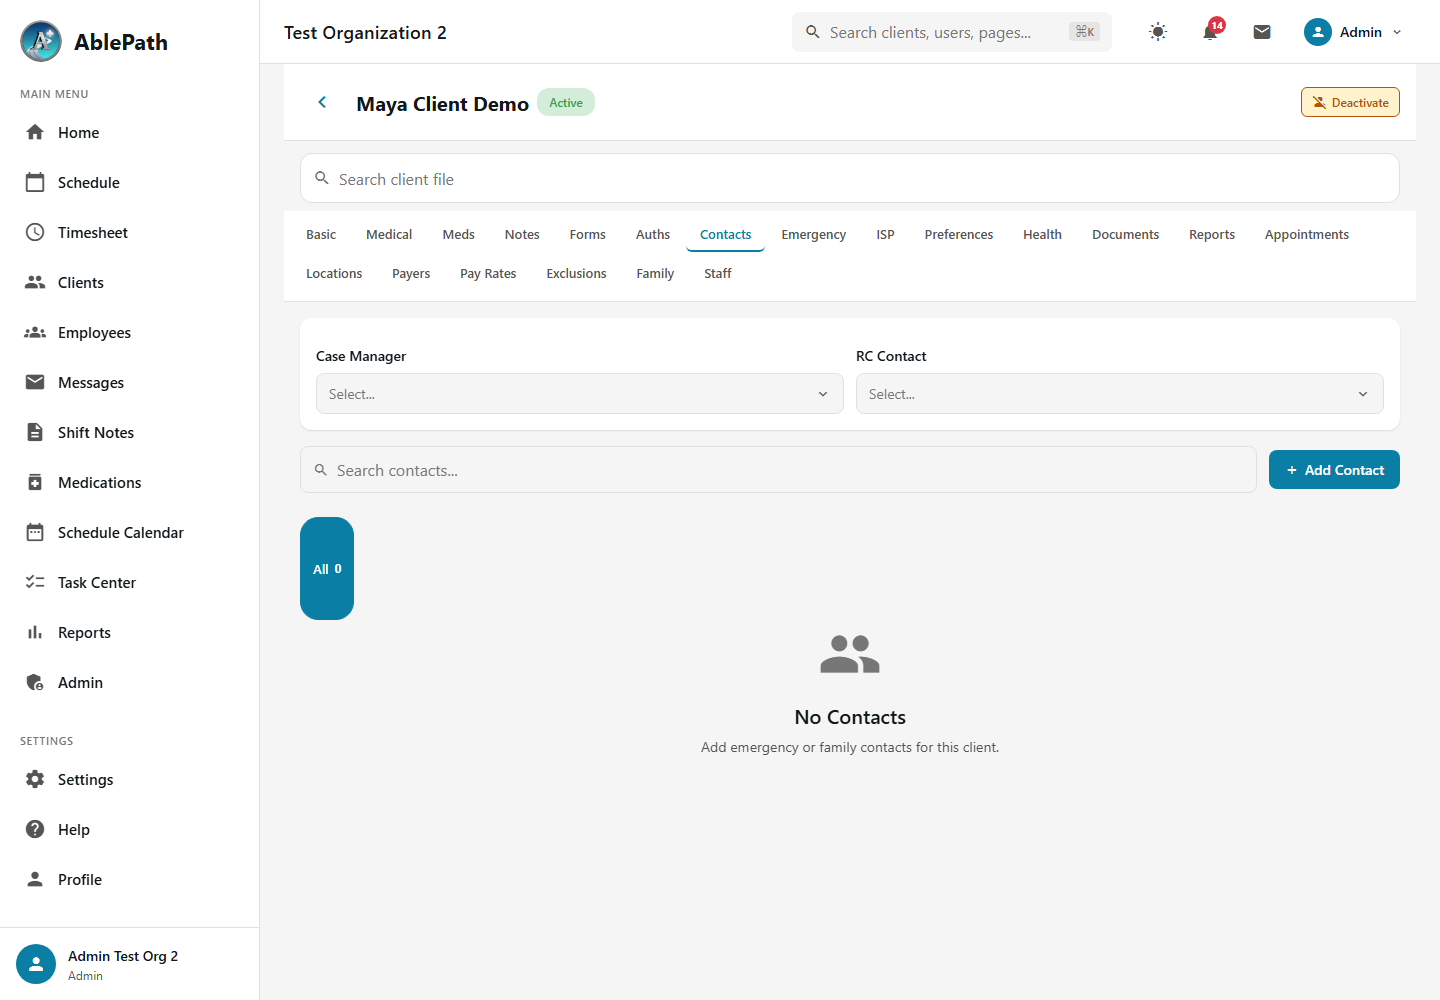
Client Contacts
Manage emergency contacts, family members, physicians, and other important contacts for each client.
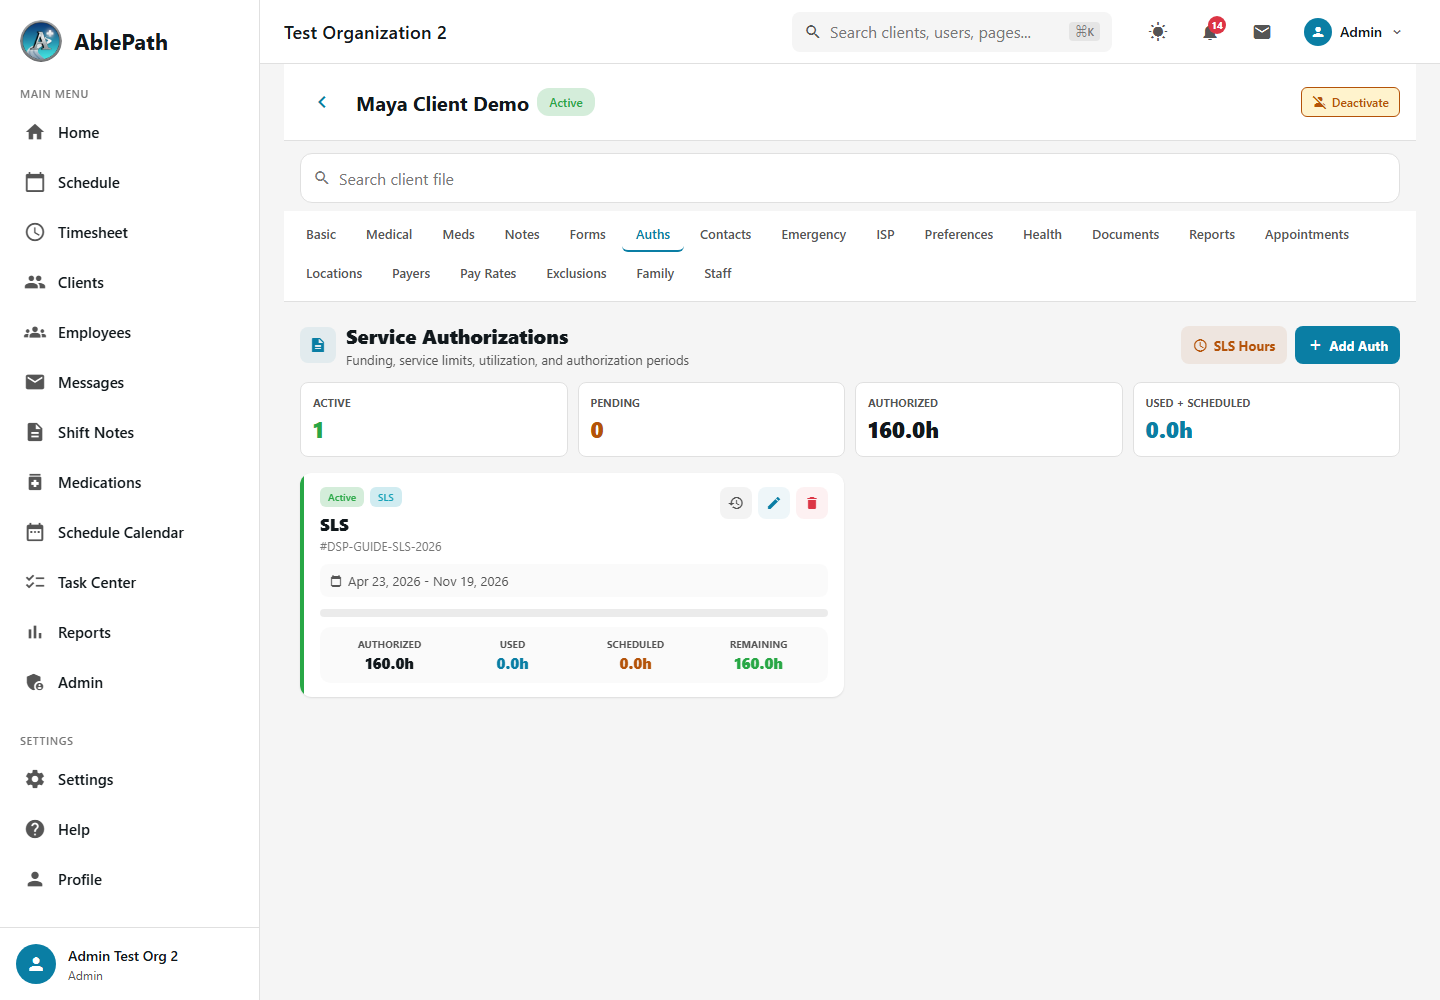
Client Authorizations
Track service authorizations with hours allocated, used, and remaining. Monitor expiration dates and utilization percentages.
Client ISP (Individual Service Plan)
The ISP section contains the client's individualized service plan with goals, objectives, and progress tracking.
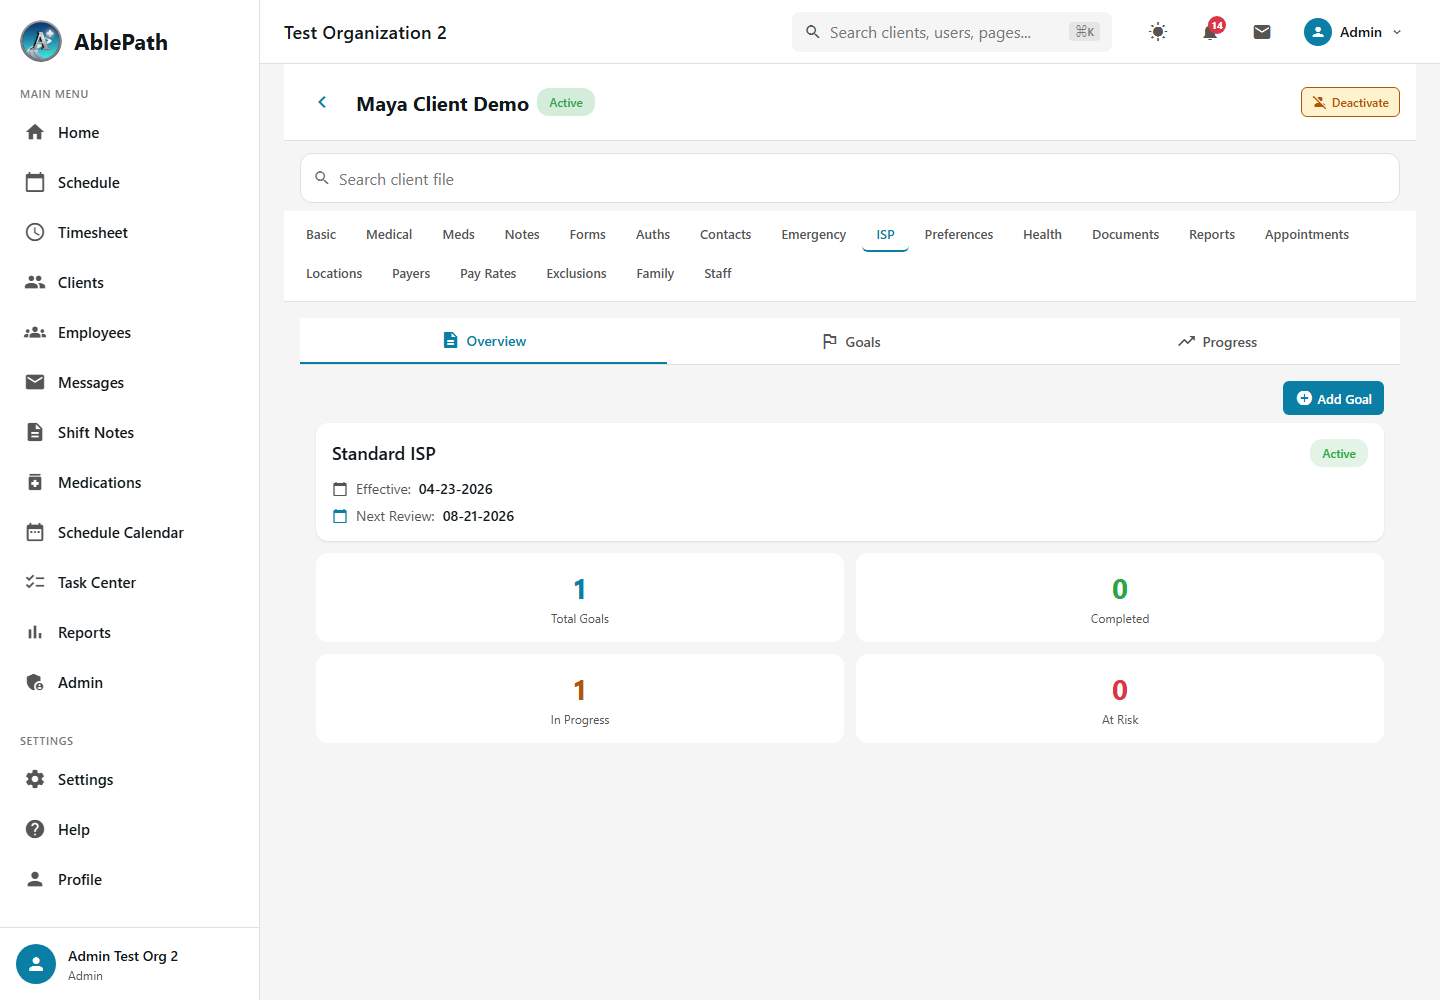
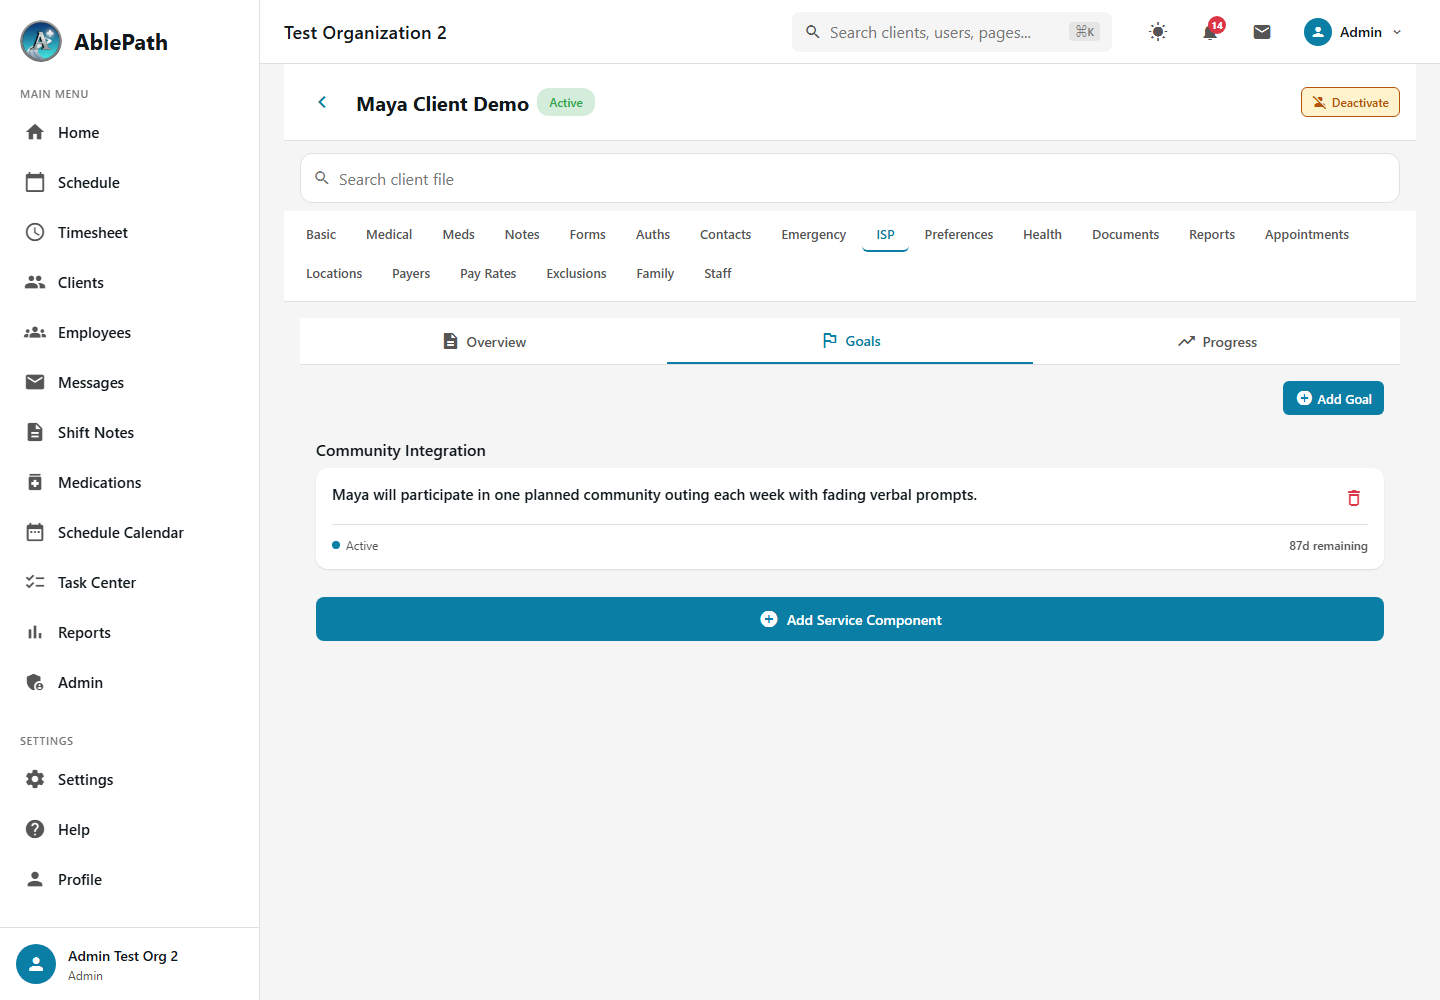
ISP Goals & Objectives
Track progress on individual goals and objectives with measurable outcomes.
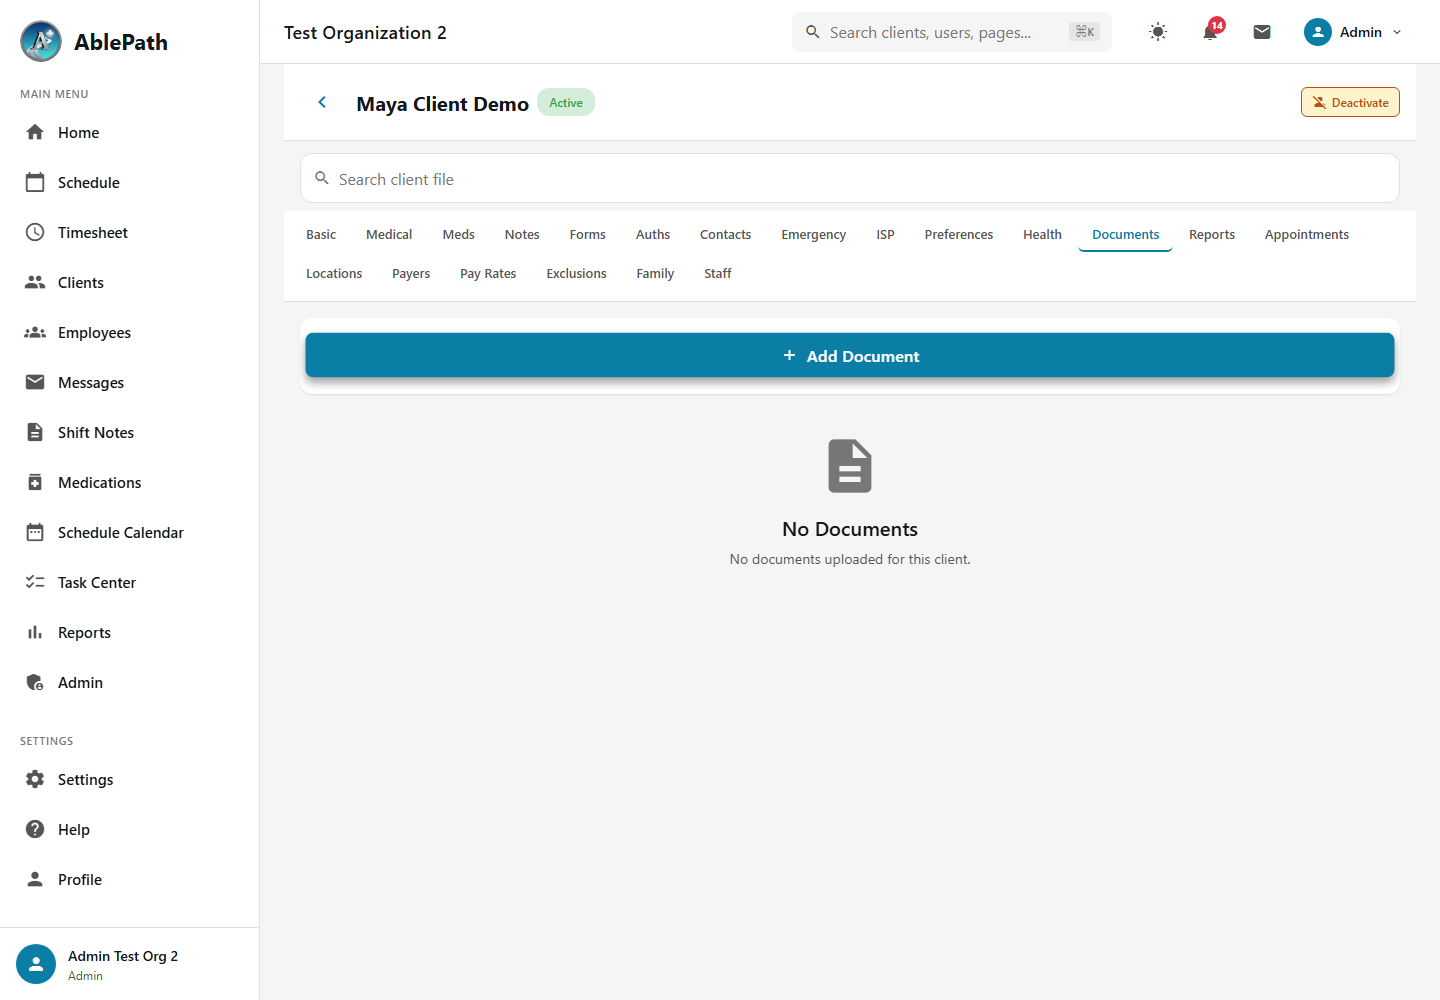
Client Documents
Upload and manage client documents including care plans, assessments, and other important files.
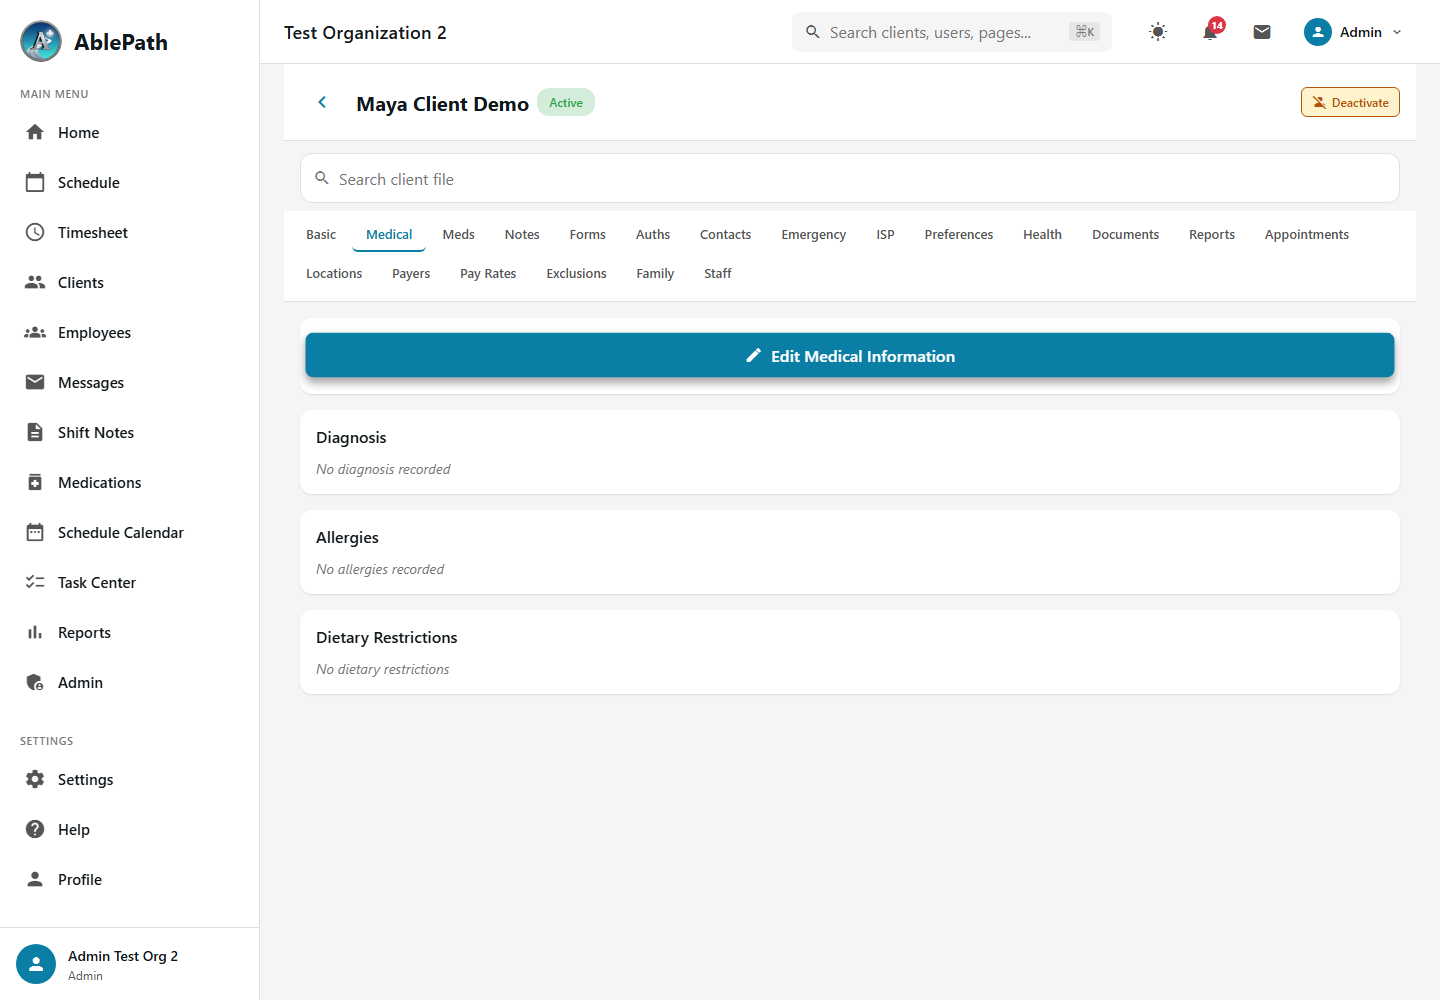
Medical Information
View comprehensive medical information including diagnoses, allergies, dietary restrictions, and physician contacts.
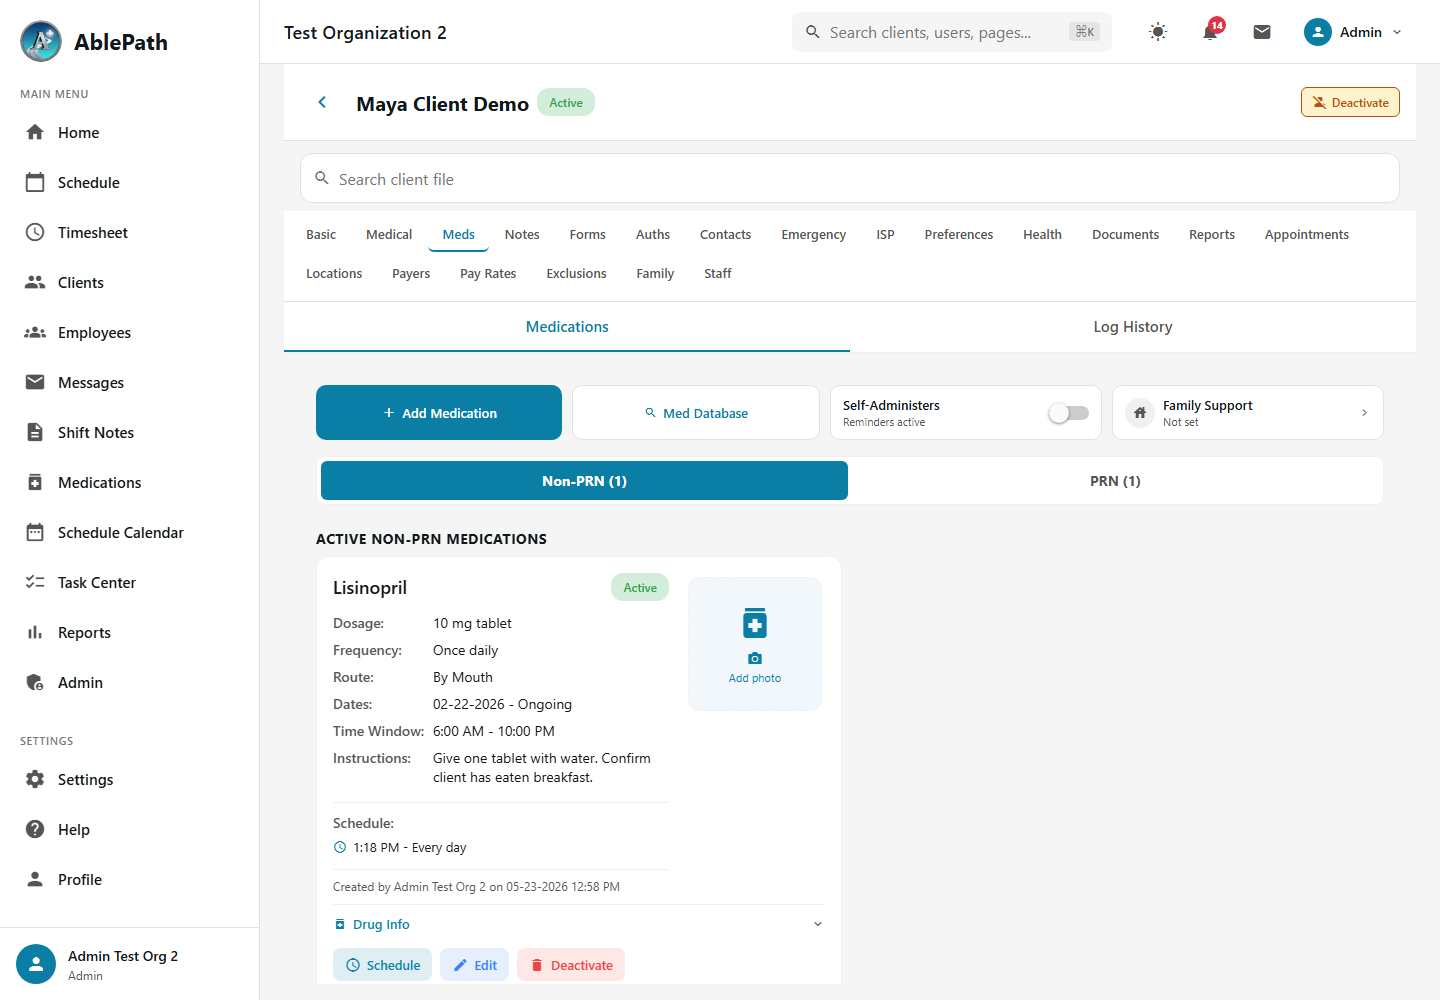
Client Medications
View and manage a client's medications directly from their profile. See current medications, dosages, schedules, and administration instructions.
- Go to Clients page Click "Clients" in the sidebar navigation
- Click "Add Client" Button located at the top right of the client list
- Enter basic information Fill in name, date of birth, contact details, and address
- Add emergency contacts Enter at least one emergency contact with relationship and phone
- Set up service authorization Add the initial authorization with hours, dates, and payer
- Assign care team Add staff members who will work with this client
- Open client profile Search for and click on the client's name
- Go to Authorizations tab Click the "Authorizations" tab in the client profile
- Click "Add Authorization" Opens the authorization form
- Enter authorization details Add payer, service type, authorized hours, start/end dates
- Save the authorization Click "Save" to create the authorization and start tracking hours
- Open client profile Search for and click on the client's name
- Go to ISP tab → Goals Navigate to the ISP section and click on Goals
- Click on a goal to update Select the goal you want to modify
- Add progress notes Document progress toward the goal with specific observations
- Update progress percentage Adjust the completion percentage based on client achievement
Behavior Support Plans (BSP)
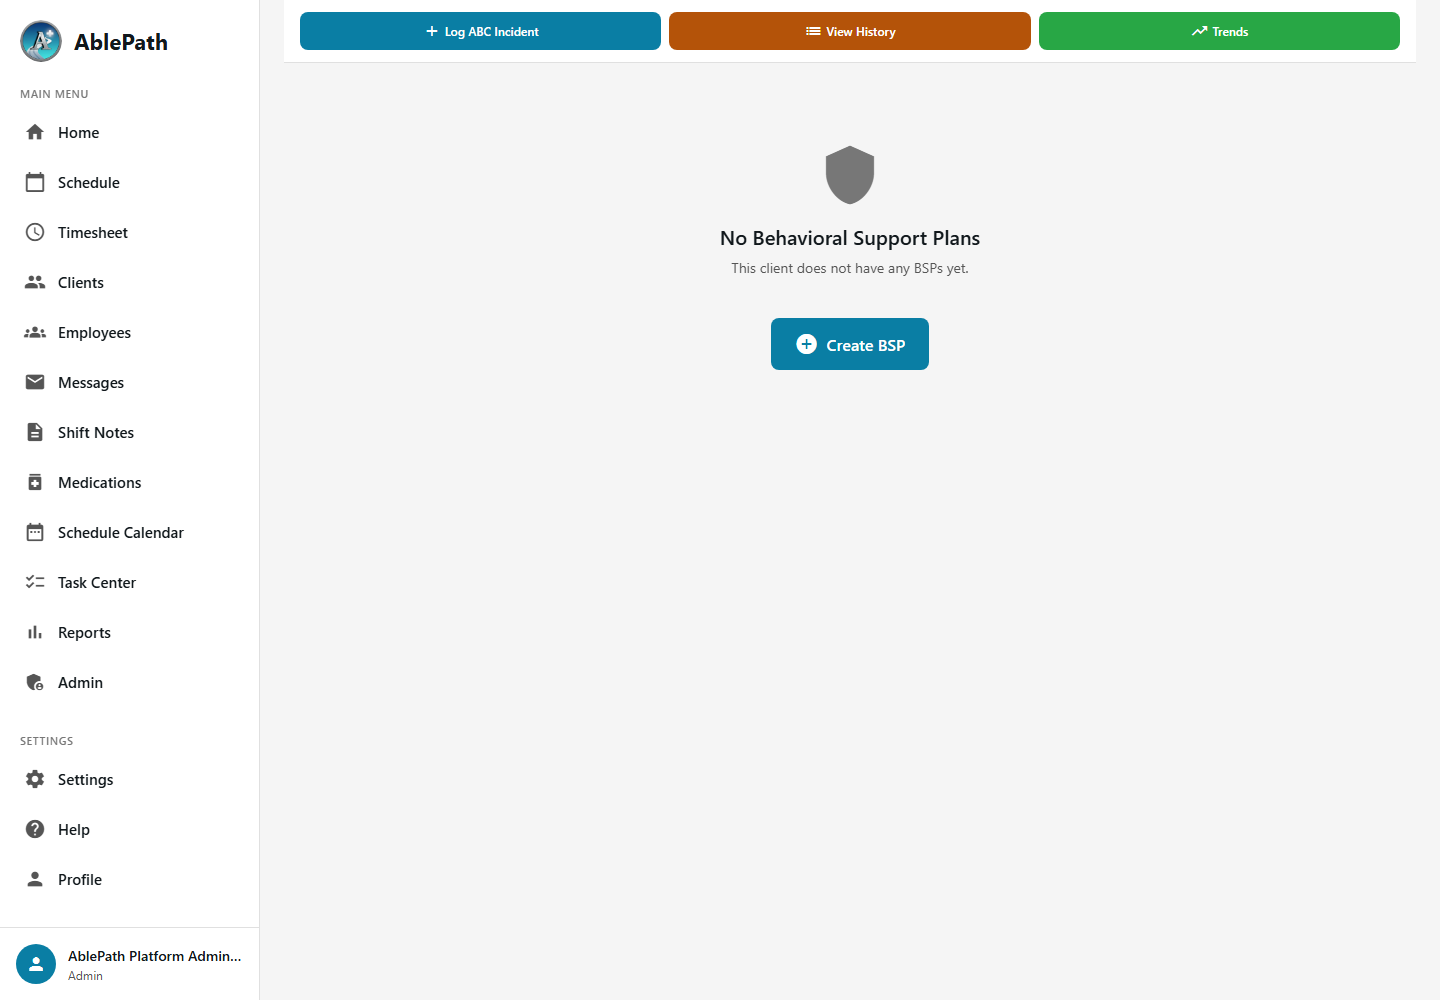
BSPs are structured plans that document behavioral triggers, prevention strategies, and intervention protocols for clients. Staff can view active BSPs, log ABC (Antecedent-Behavior-Consequence) incidents, and track behavior trends over time.
BSP Features
Plan Overview
View active BSPs with target behaviors, triggers, and de-escalation strategies
Triggers & Strategies
Quick reference for known triggers and approved intervention strategies
ABC Logging
Record behavioral incidents with Antecedent, Behavior, and Consequence details
Behavior Trends
View charts and summaries of behavior frequency and patterns over time
- Open the client's BSP page Navigate to the client profile and click on the BSP section
- Click "Log ABC" Opens the ABC incident logging form
- Select the BSP plan Choose which behavior support plan this incident relates to
- Document the Antecedent Describe what happened immediately before the behavior
- Document the Behavior Describe the specific behavior observed, including intensity and duration
- Document the Consequence Describe the intervention used and the outcome
- Submit The entry is saved and contributes to the behavior trends analysis
- Open the client's BSP page Navigate to the client profile and click on BSP
- Click "Trends" Opens the behavior trends dashboard
- Select date range Choose the time period to analyze
- Review charts and data View frequency charts, pattern analysis, and incident summaries
Client Connects
Client connects are case notes documenting interactions and meetings related to a client's care. They help track community involvement, team meetings, home visits, and other touchpoints in the care process.
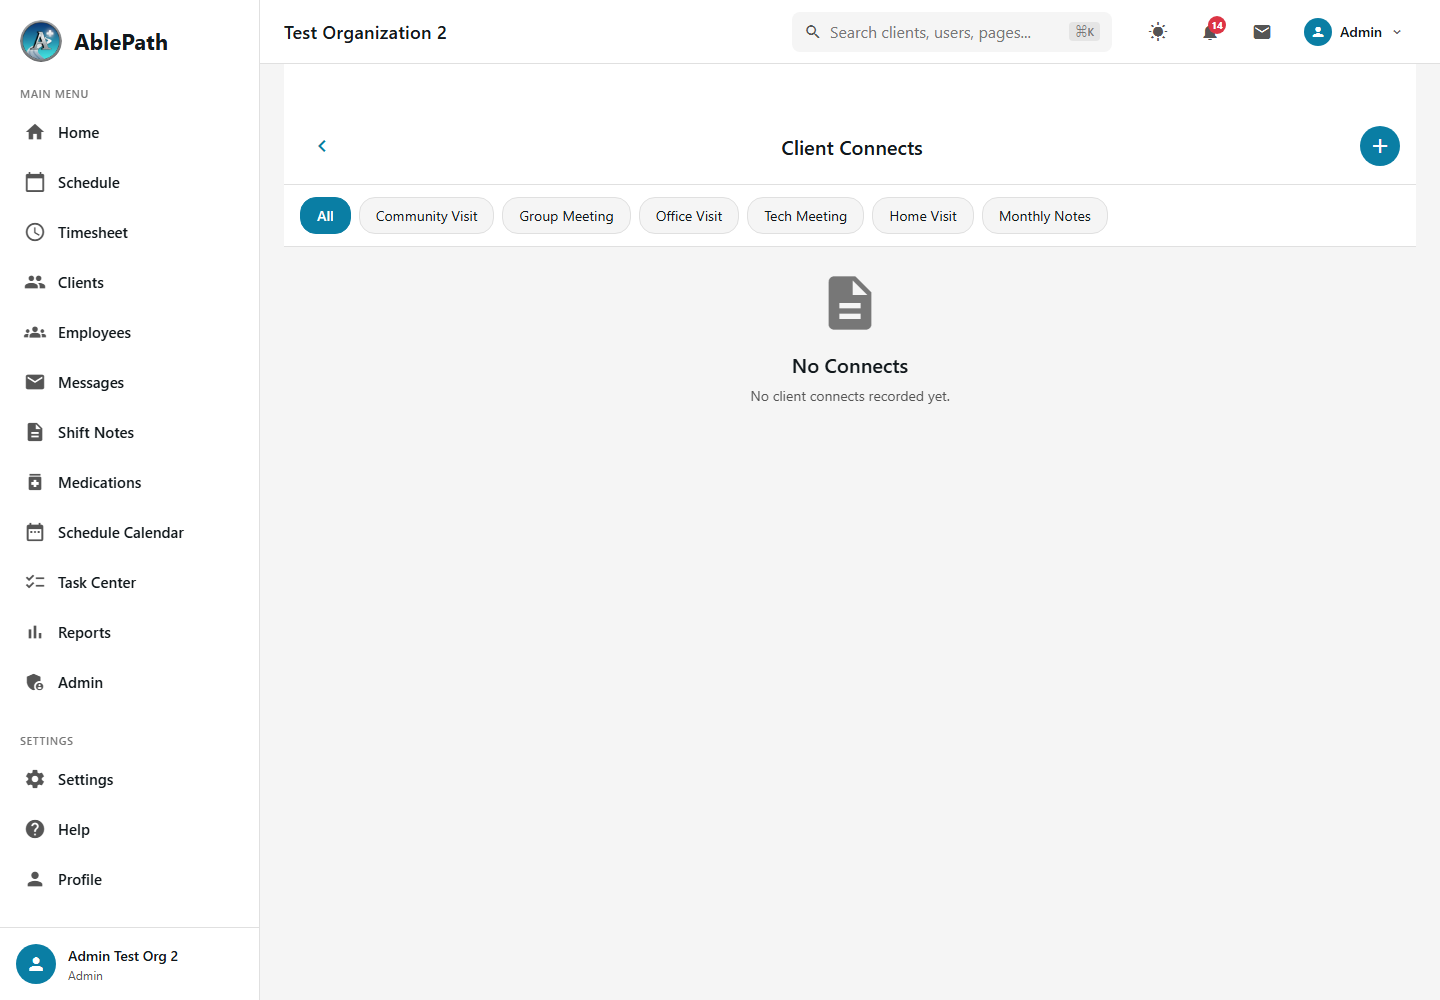
Connect Types
Community Visit
Document outings and community integration activities
Group Meeting
Record team discussions about client care
Office Visit
Document office-based meetings with the client or their contacts
Home Visit
Record home visit observations and outcomes
Tech Meeting
Document technology-assisted meetings (video calls, etc.)
Monthly Notes
Periodic summary notes on client progress and status
- Open the client's profile Search for the client and open their detail page
- Navigate to Connects Click the "Connects" link on the client page
- Click "New Connect" Opens the connect entry form
- Select the connect type Choose from Community Visit, Group Meeting, Office Visit, Home Visit, Tech Meeting, or Monthly Notes
- Enter details Document the date, participants, and notes about the interaction
- Save The connect entry is saved to the client's record
Employee Management
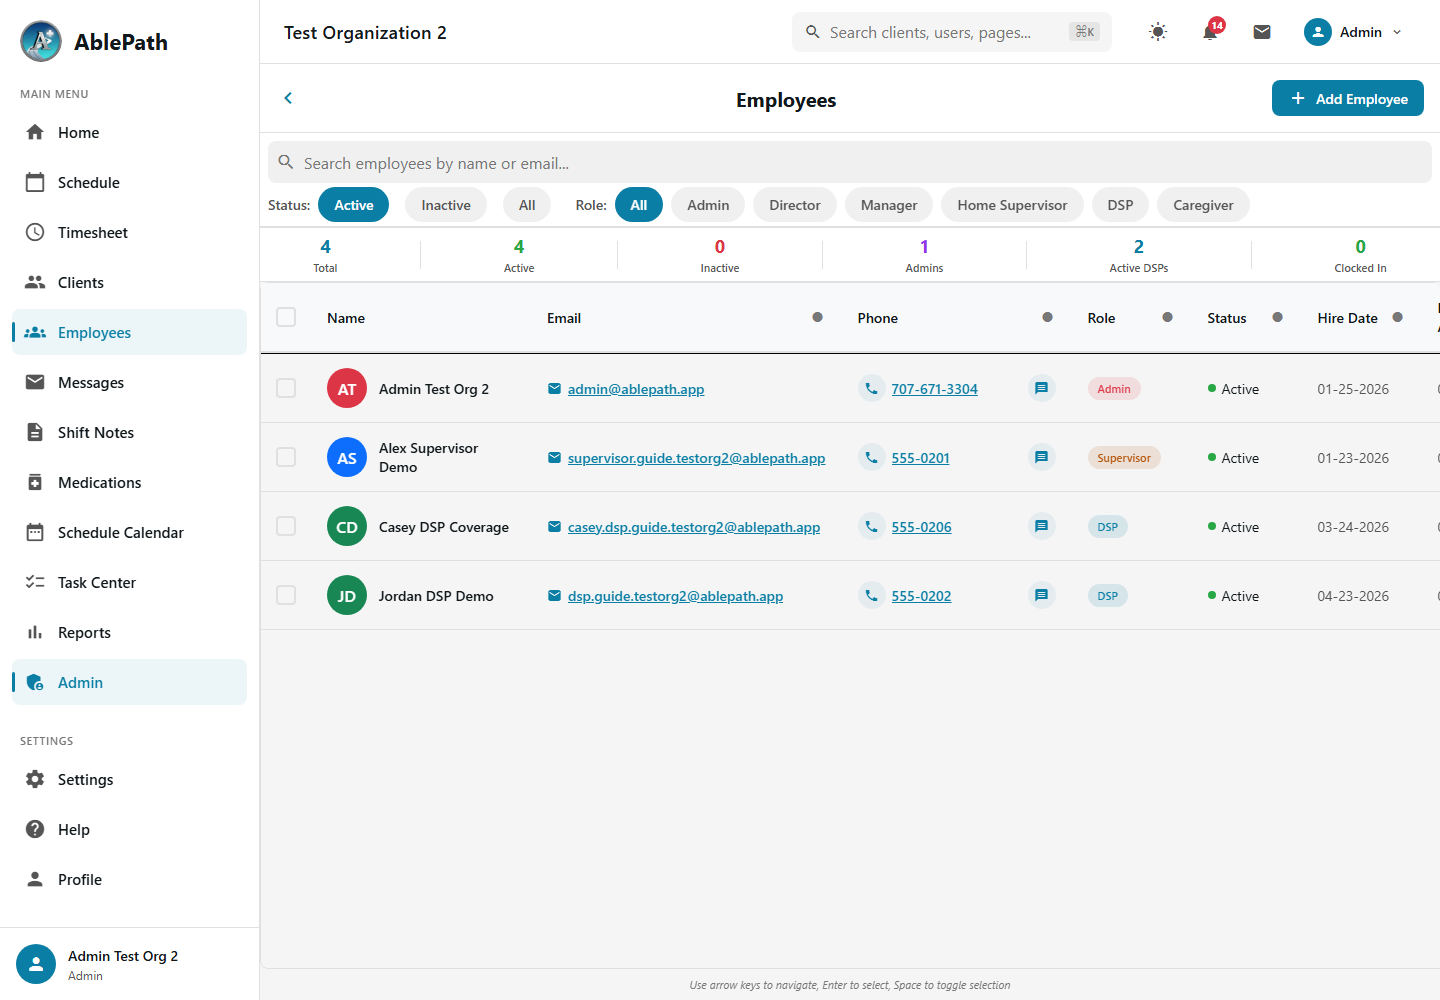
Manage your workforce with comprehensive employee profiles, role assignments, compliance tracking, and performance monitoring.
Employee Features
Role Management
Assign roles: Admin, Director, Manager, Supervisor, DSP, Caregiver
Compliance Tracking
Monitor certifications, training, and background checks
Client Assignments
Assign employees to specific clients for care team management
Availability
Set recurring availability for scheduling
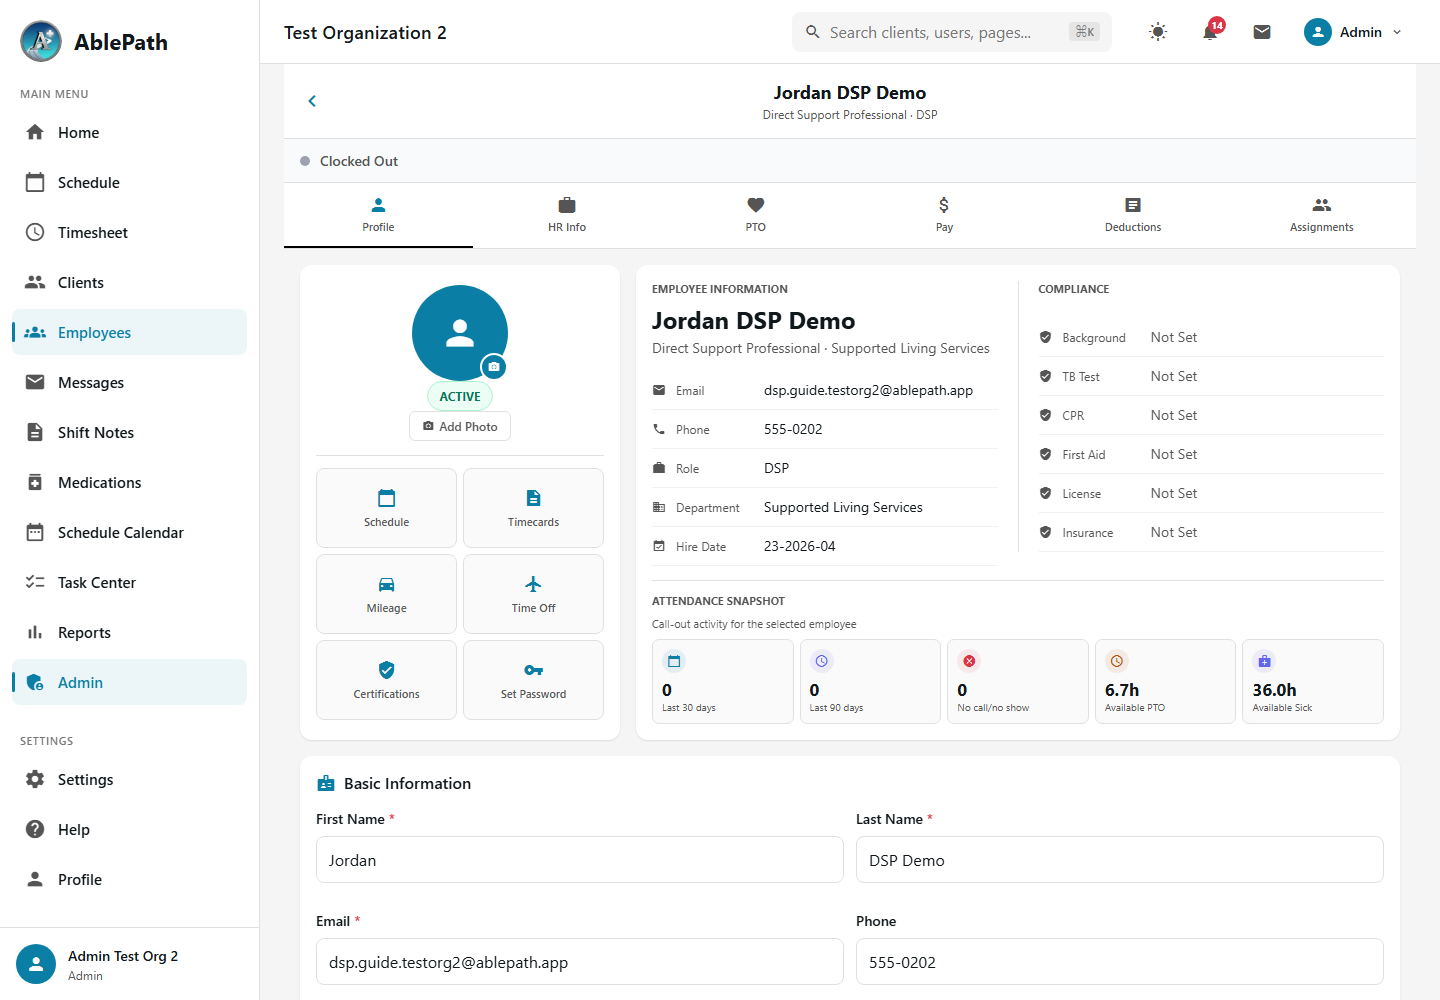
Employee Detail Page
Each employee has a detailed profile with contact information, employment details, and assigned clients.
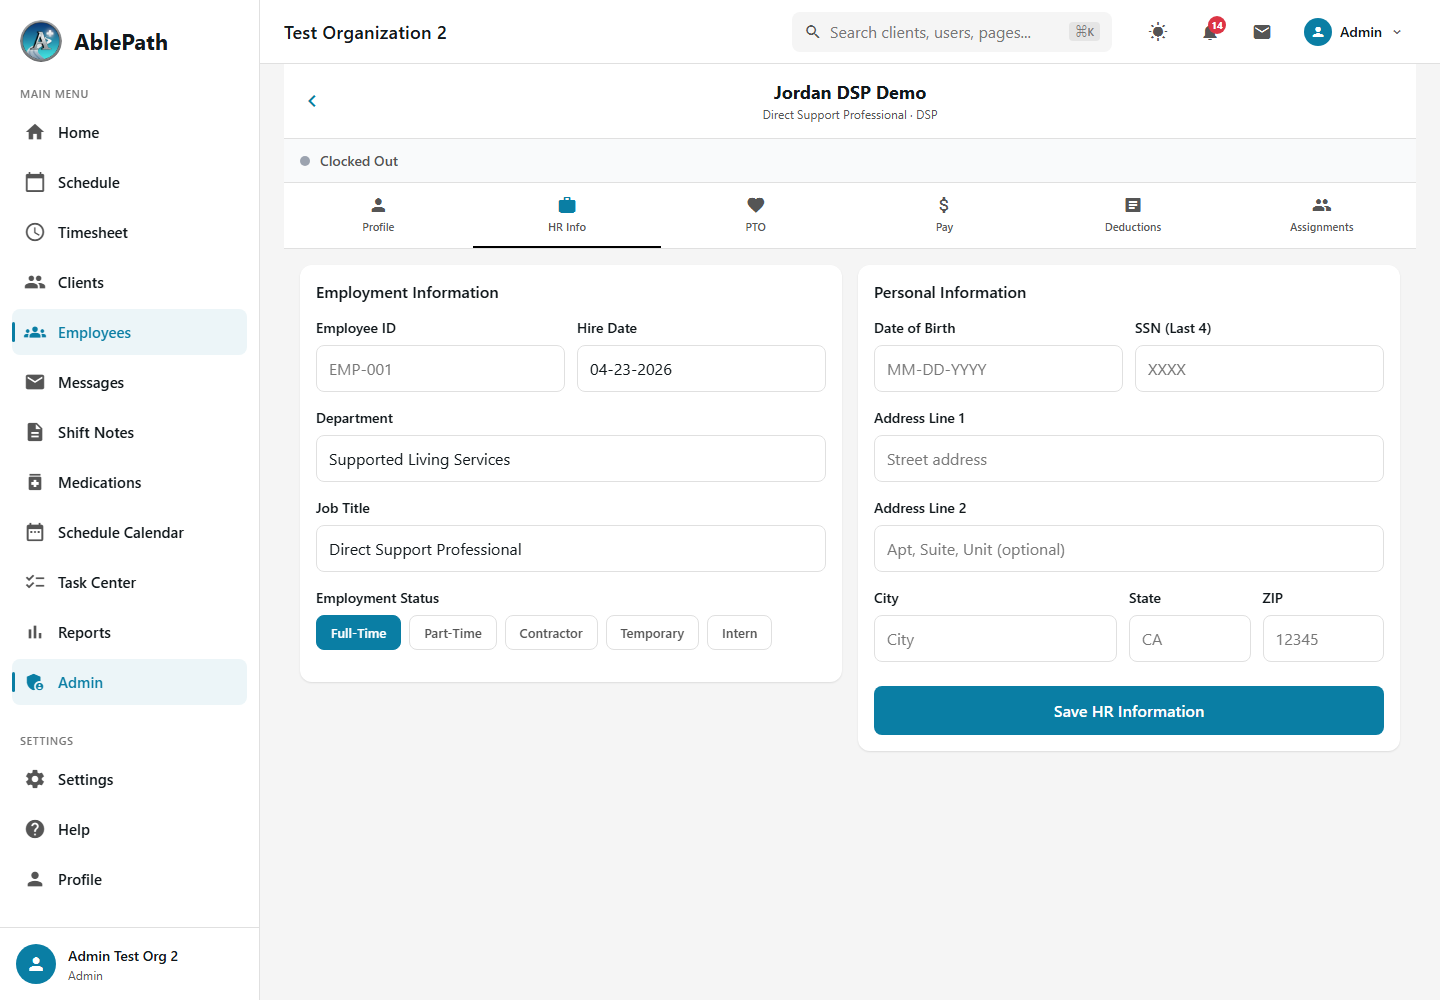
HR Information
View and manage HR details including department, job title, employment dates, and compensation information.
- Go to Employees page Click "Employees" in the sidebar navigation
- Click "Add Employee" Button located at the top right of the employee list
- Enter personal information Fill in name, email, phone, and address
- Set role and permissions Choose role (DSP, Caregiver, Supervisor, etc.) which determines access
- Enter HR details Add hire date, department, job title, and pay rate
- Assign to clients Add the clients this employee will work with
- Send invitation Employee receives email to set up their account password
- Open employee profile Search for and click on the employee's name
- Go to Clients tab Click the "Assigned Clients" section
- Click "Assign Client" Opens the client selection dialog
- Select clients Choose one or more clients from the list
- Set assignment type Choose Primary, Secondary, or Backup assignment
- Save assignments Employee can now be scheduled for shifts with these clients
- Open employee profile Search for and click on the employee's name
- Go to Compliance tab View all compliance items and their status
- Update expiration dates Click on an item to update its expiration date
- Upload documentation Attach copies of certificates or clearance documents
- Monitor dashboard alerts Expiring items appear on the dashboard Compliance widget
Employee Connects
Employee connects are structured interactions between supervisors and staff. They cover 1:1 meetings, performance reviews, coaching, recognition, and disciplinary meetings, providing a documented history of staff development and follow-up commitments.
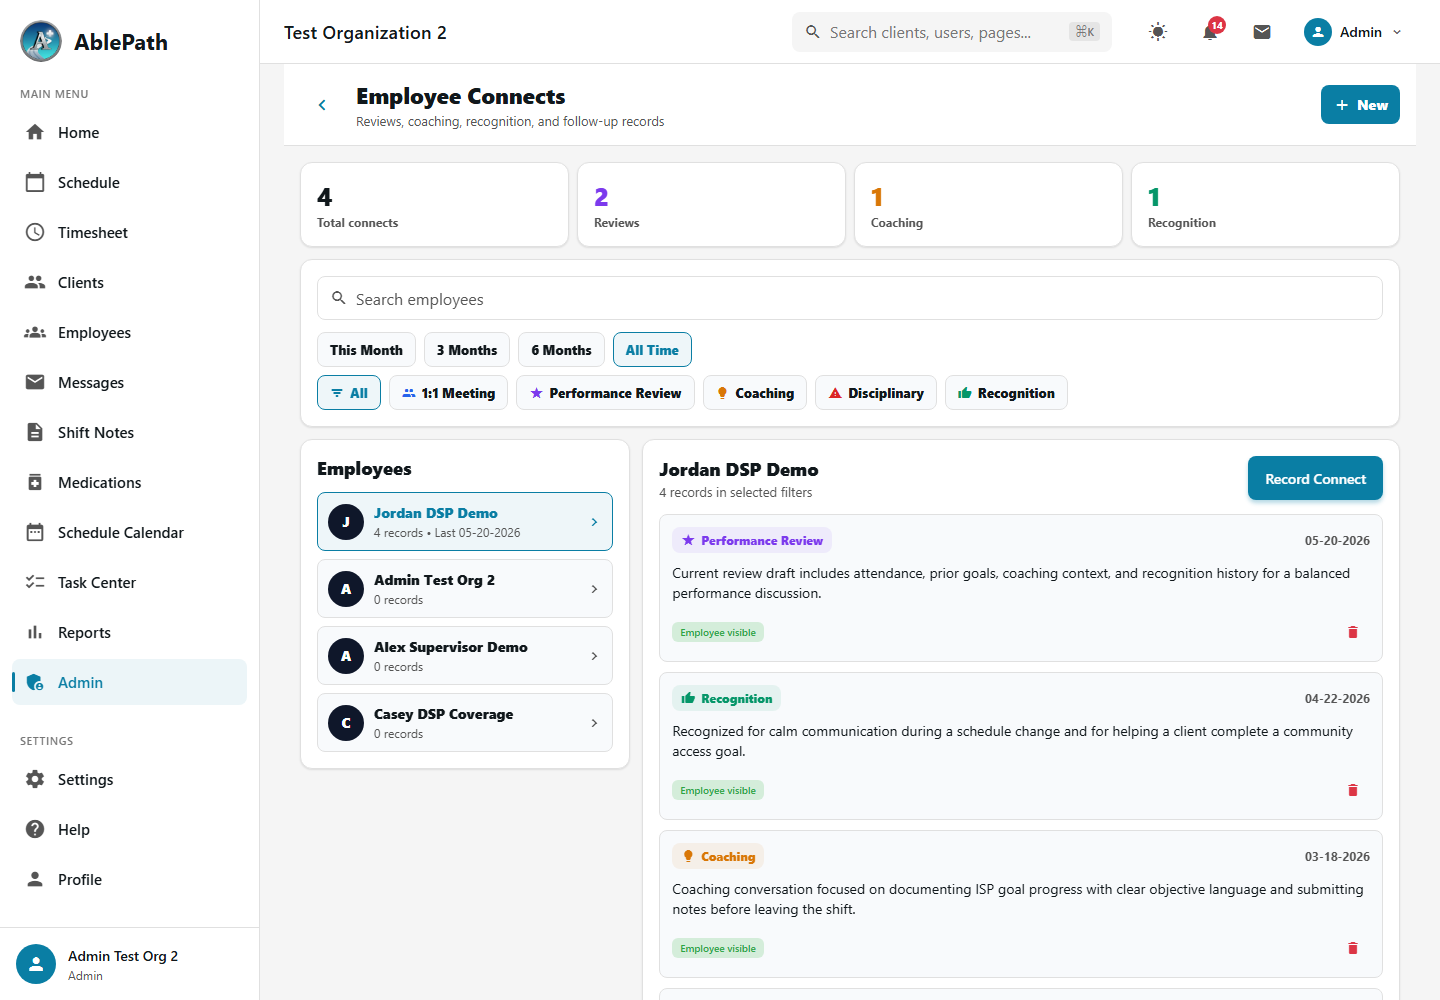
Connect Types
1:1 Meeting
Regular check-in meetings between supervisor and staff
Performance Review
Formal evaluations with rating, review period, attendance summary, prior goal outcomes, new goals, and AI-assisted notes
Coaching
Skill development and mentoring conversations
Disciplinary
Documented disciplinary discussions with corrective actions
Recognition
Positive recognition for outstanding performance or achievements
Performance Reviews
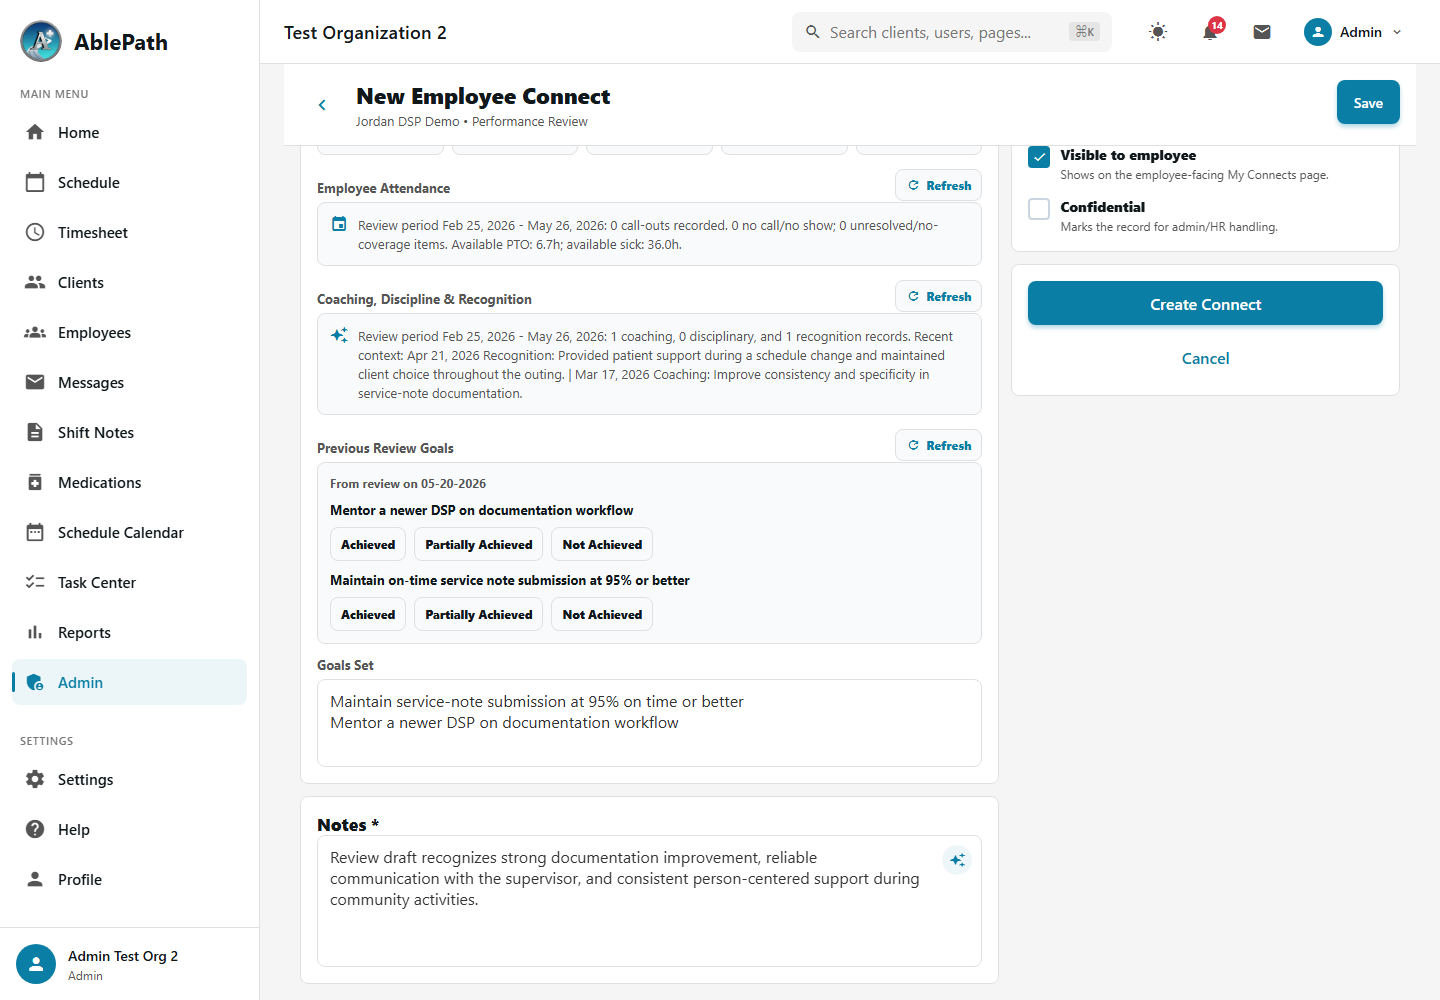
The performance review form brings together the data supervisors need for a balanced review. After selecting an employee and review dates, AblePath can summarize attendance information from call-outs and PTO data, pull context from coaching, disciplinary, and recognition records, and show goals from the previous review so each goal can be marked Achieved, Partially Achieved, or Not Achieved.
Employee Visibility
Use the "Visible to employee" option to share appropriate connects with the staff member. Shared records appear under Profile → My Connects, giving employees access to reviews, coaching notes, recognitions, and documented follow-up items.
For performance reviews, the sparkle button inside the Notes box sends the loaded review context to the configured Grok AI assistant and returns a polished draft. Review and edit the generated text before saving.
- Go to Admin → Employee Connects Access the employee connects management page
- Click "New" or "Record Connect" Opens the connect entry form
- Select the employee Choose the staff member this connect is about
- Select connect type Choose 1:1, Performance Review, Coaching, Disciplinary, or Recognition
- Document the session Enter notes, action items, review details, goals, and any follow-up tasks discussed
- Choose employee visibility Leave "Visible to employee" enabled for shared records, or mark sensitive records confidential for admin/HR handling
- Save The connect is recorded in the employee's history
Communication & Messages
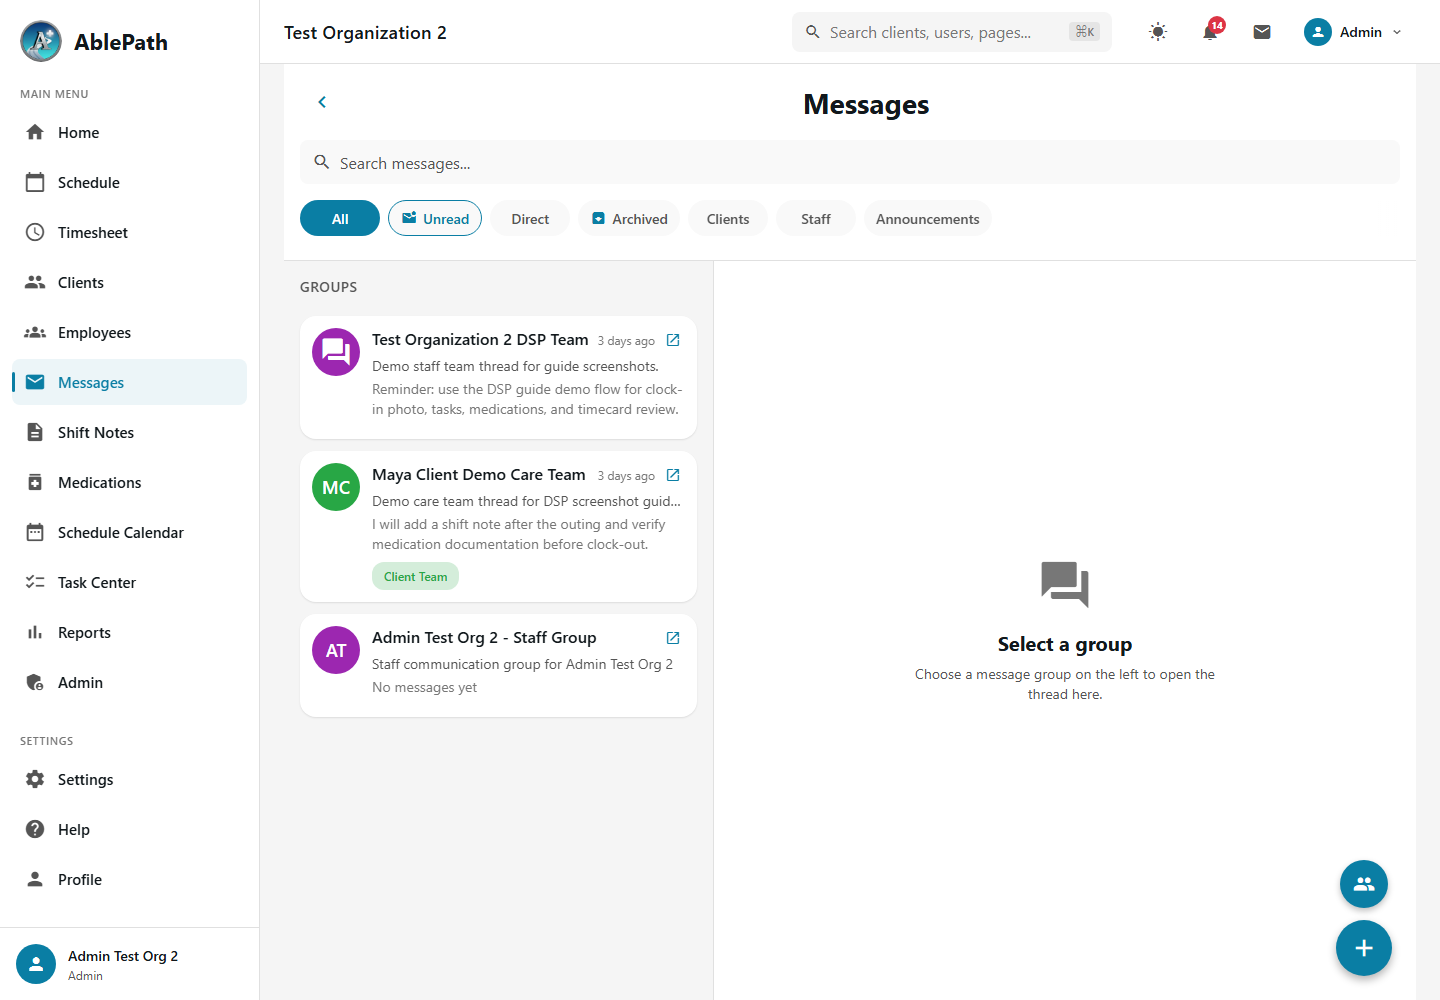
AblePath provides secure messaging for staff communication. Send direct messages, create group chats, and communicate with client care teams.
Message Types
Direct Messages
One-on-one private conversations
Staff Groups
Team-based group messaging
Client Care Teams
Communication channels for each client's care team
Announcements
Organization-wide broadcasts and updates
- Go to Messages Click "Messages" in the sidebar navigation
- Click "New Message" Button at the bottom of the message list
- Select recipient Search for and select the person you want to message
- Type your message Enter your message in the text field
- Send Click the send button. Recipient receives push notification
- Go to Messages Click "Messages" in the sidebar navigation
- Filter by "Client Team" Click the Client Team filter button to see care team channels
- Select the client's care team Click on the client name (marked with green "Client Team" badge)
- Send your message All care team members assigned to this client will receive it
Announcements
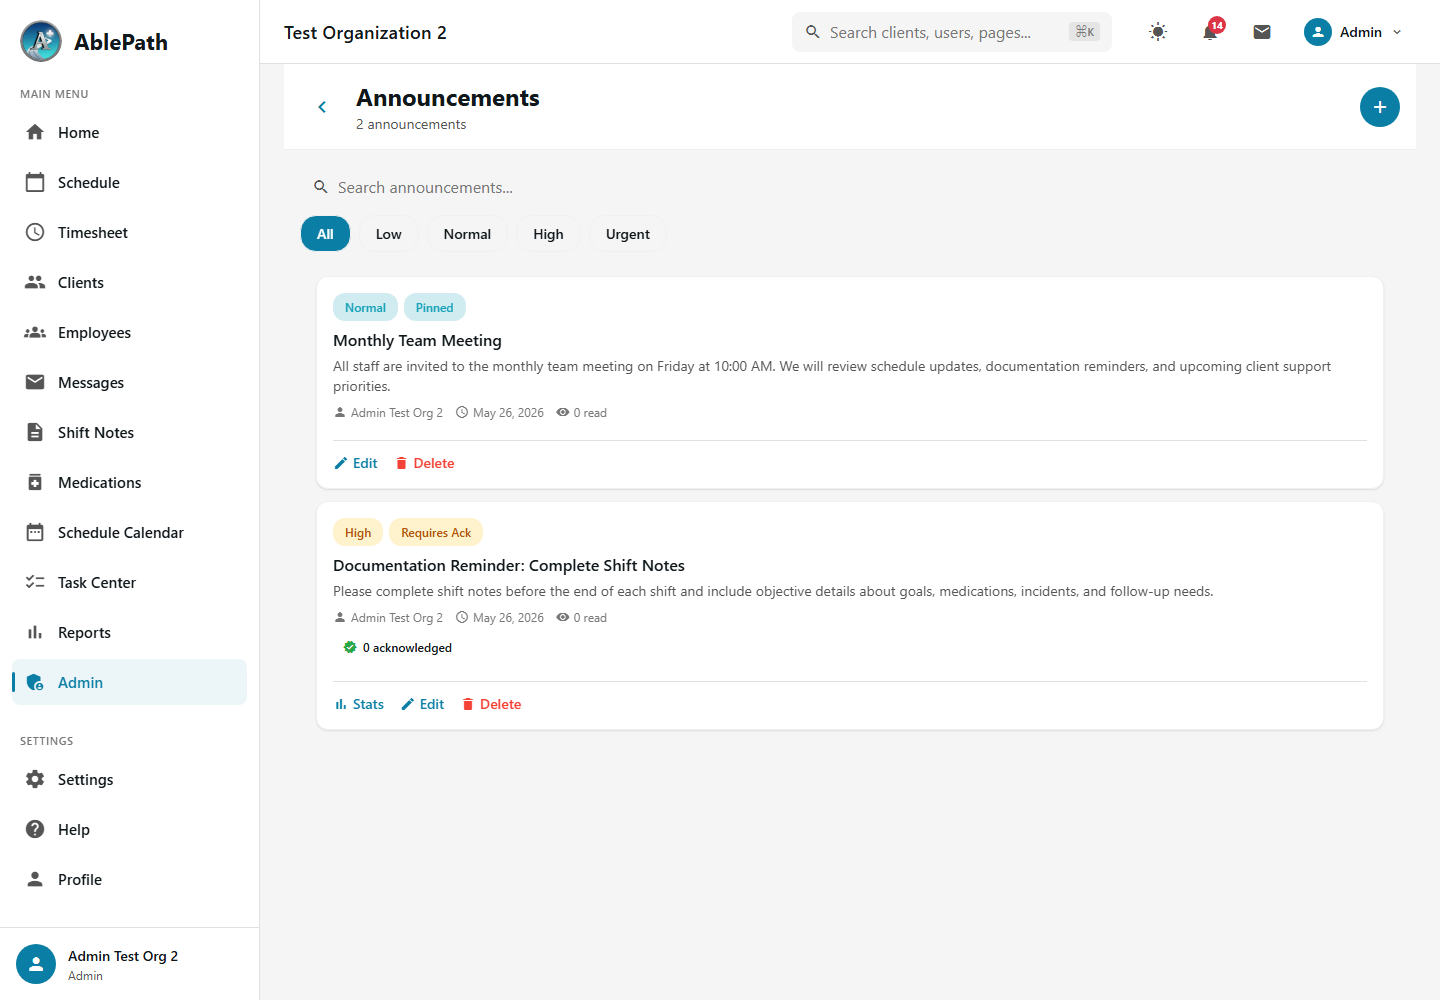
Create and manage organization-wide announcements. Announcements can require acknowledgment to ensure staff have read important updates, and administrators can track who has acknowledged each announcement.
Announcement Features
Priority Levels
Set Low, Normal, High, or Urgent priority to highlight important announcements
Required Acknowledgment
Require staff to acknowledge they've read important announcements
Acknowledgment Stats
Track who has read and acknowledged each announcement
Role Targeting
Target announcements to specific roles or all staff
Acknowledgment Tracking
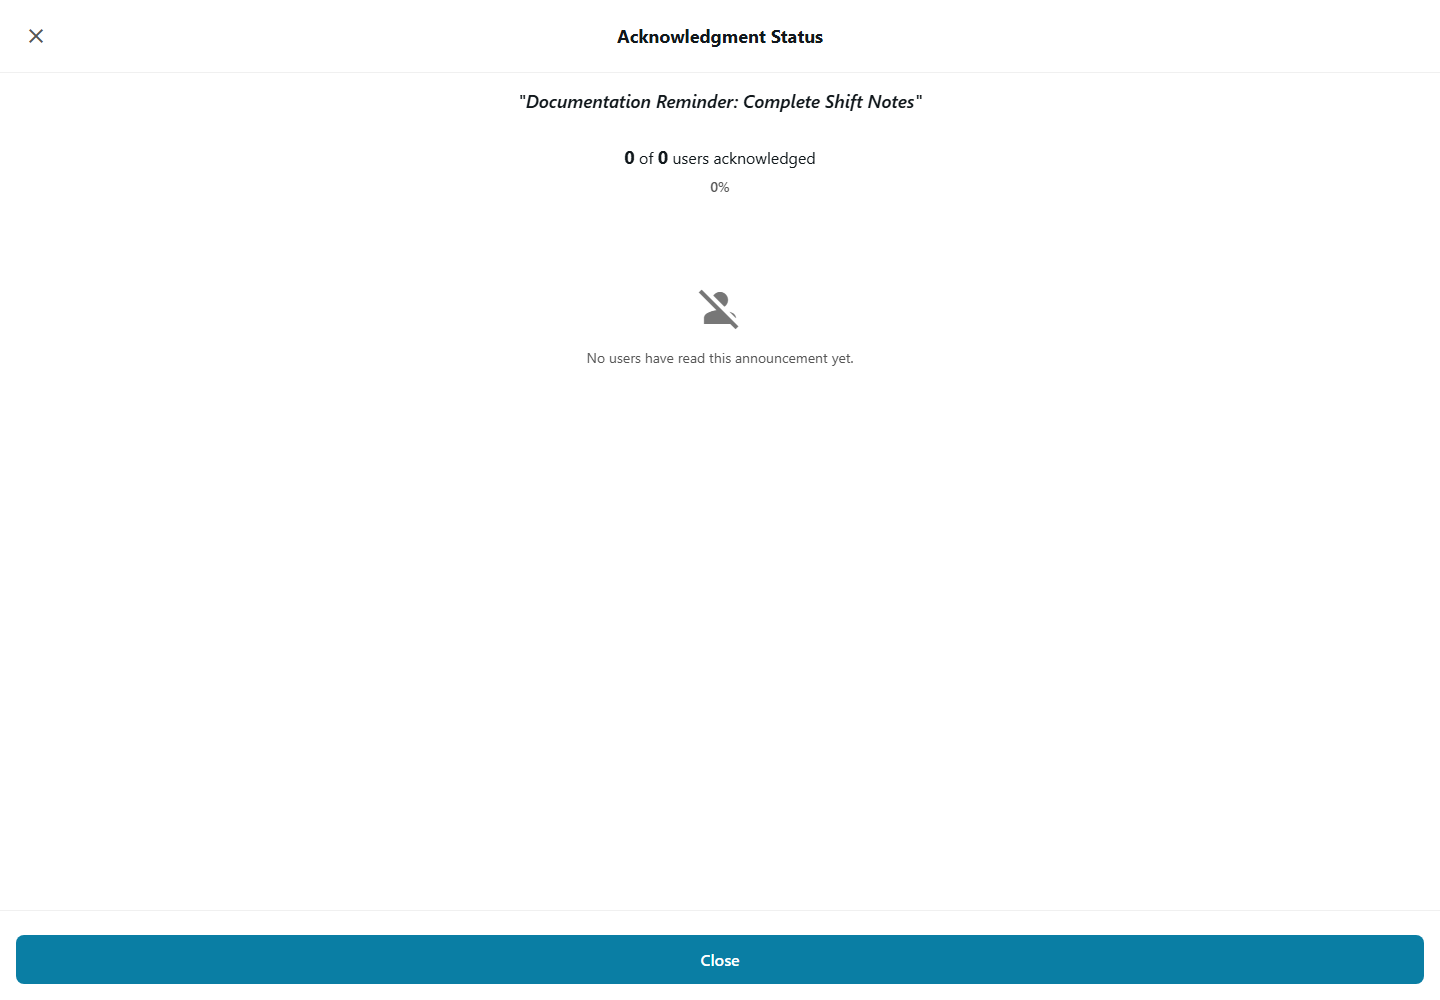
For announcements requiring acknowledgment, view detailed statistics showing who has acknowledged and when.
- Go to Admin → Announcements Access the announcements management page
- Click "Create New Announcement" Button at the top right of the page
- Enter title and content Write a clear title and detailed message body
- Set priority level Choose Low, Normal, High, or Urgent
- Enable acknowledgment (optional) Toggle "Requires Acknowledgment" for important announcements
- Select target audience Choose specific roles or all staff
- Publish Click "Create" to publish. Staff receive push notifications
- Find the announcement Locate the announcement in the list (shows "Requires Ack" badge)
- Click "Stats" Button appears next to Edit and Delete
- View acknowledgment details See who has acknowledged and when, plus completion percentage
- Follow up if needed Send reminders to staff who haven't acknowledged
Service Notes
Document daily care activities with structured service notes. Track behaviors, skills training, activities, and shift observations.
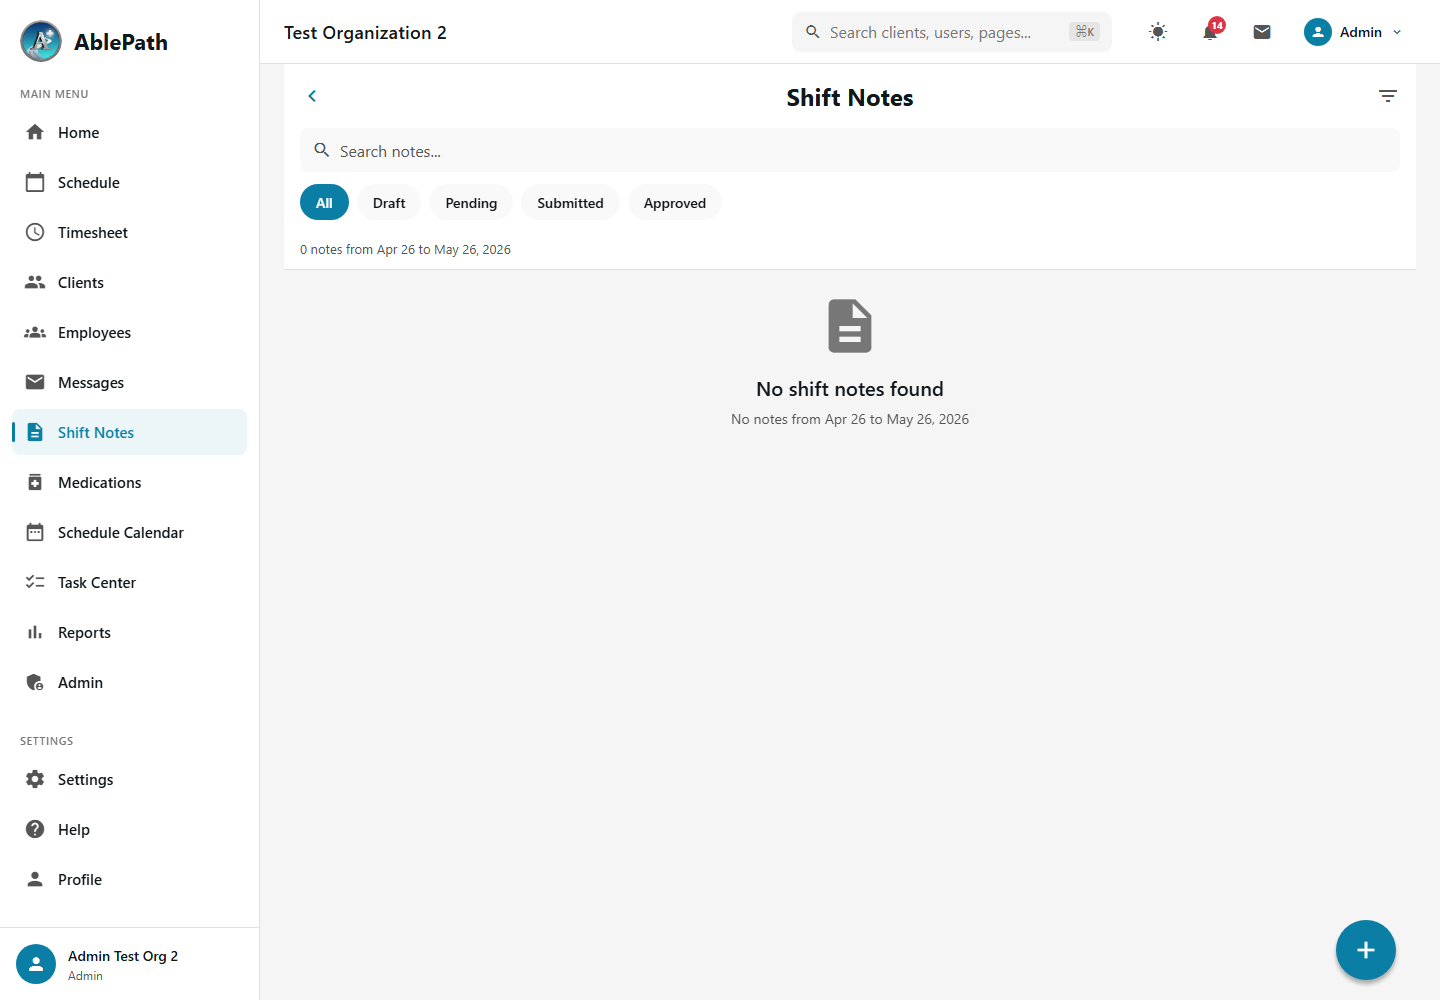
Note Components
Shift Summary
Overview of the shift activities and observations
Behavior Tracking
Document behaviors with antecedents and interventions
Skills Training
Track ISP goal progress and skill development
Care Tasks
Document completion of daily care activities
- Clock out of your shift You'll be prompted to complete service notes after clocking out
- Write shift summary Describe the main activities and observations from the shift
- Document behaviors (if any) Record any behavioral incidents with antecedent, behavior, and intervention
- Log ISP goal progress Select goals worked on and document specific progress
- Complete care task checklist Check off daily care activities that were completed
- Submit for review Click "Submit" to save the note for supervisor review
- Go to Service Notes Click "Service Notes" in the sidebar navigation
- Filter by status Click "Pending" to see notes awaiting review
- Click on a note to review Open the full note to read all documentation
- Add feedback if needed Leave comments for the staff member if corrections are needed
- Approve or return Click "Approve" or "Return for Revision" based on quality
Medication Administration
Manage client medications with electronic MAR (Medication Administration Record). Track scheduled doses, document administration, and monitor compliance.
MAR Features
Medication Schedules
Define dosing times and frequencies
Administration Logging
Record given, refused, or missed doses with notes
PRN Tracking
Document as-needed medications with effectiveness
Medication Alerts
Push notifications for upcoming medication times
- Go to Medications Click "Medications" in the sidebar or from the client profile
- Select the client Click on the client who needs medication administered
- Find the scheduled medication Locate the medication that is due for administration
- Verify the 5 Rights Confirm right patient, medication, dose, route, and time
- Click "Administer" Opens the administration logging screen
- Record administration Select "Given", "Refused", or "Held" with required notes
- Sign and submit Your electronic signature is recorded with timestamp
- Go to client's Medications tab Open the client profile and click Medications
- Click "Add PRN" Button to log an as-needed medication
- Select the PRN medication Choose from the client's approved PRN medications
- Document the reason Describe why the PRN was given (e.g., pain level, symptoms)
- Record administration Enter dose given and time
- Follow up with effectiveness Return later to document if the medication was effective
Medication Tabs
When you select a client from the medications list, three tabs organize their medication information:
Scheduled Medications
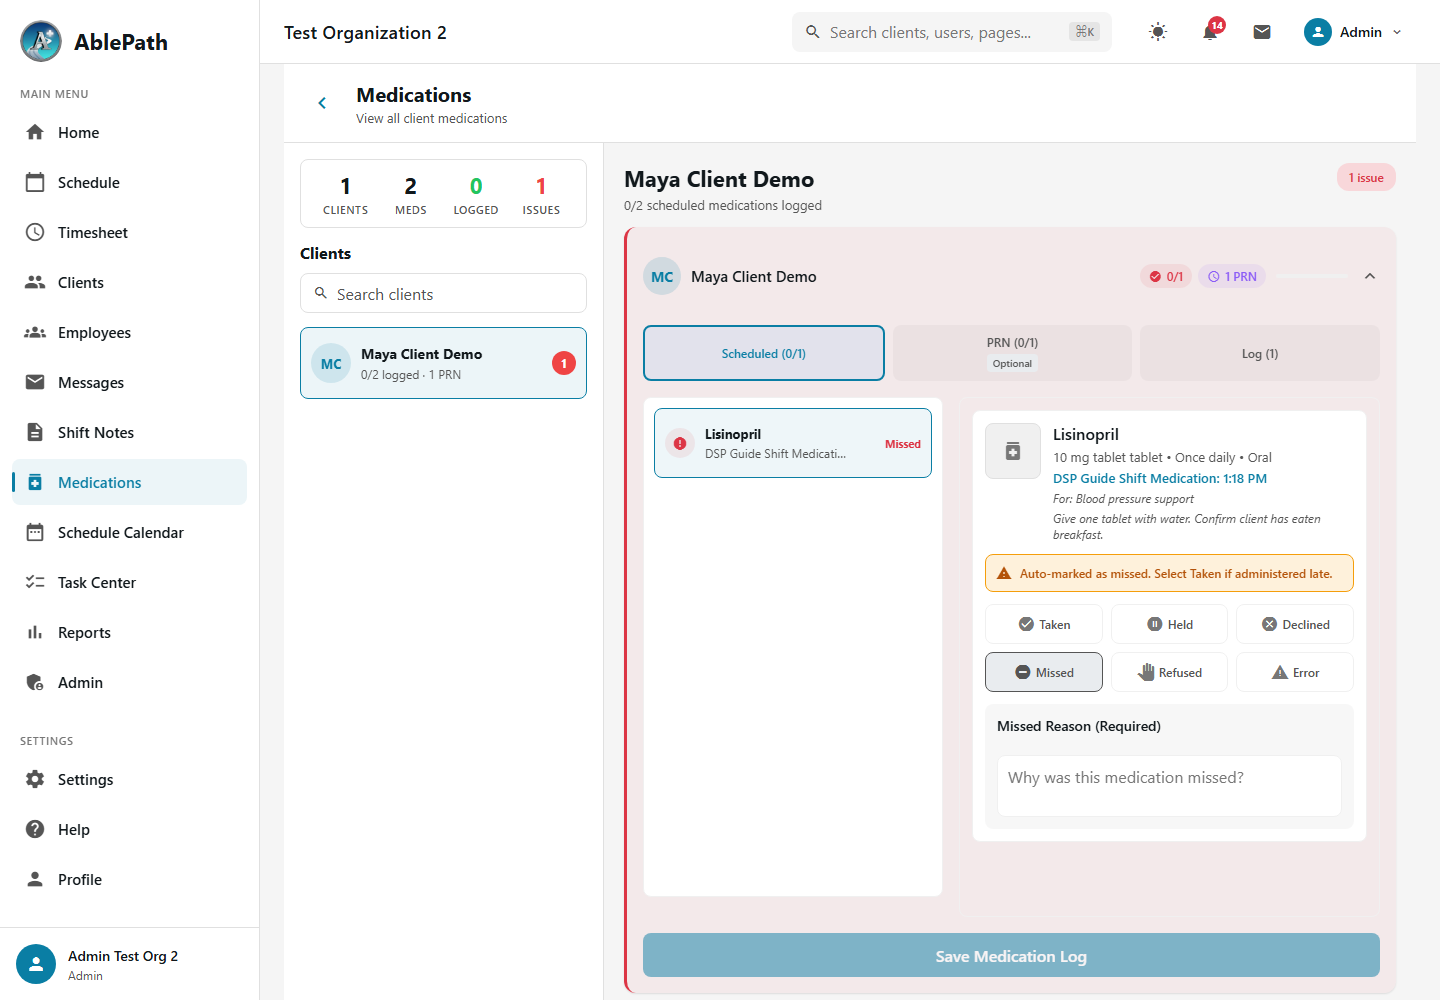
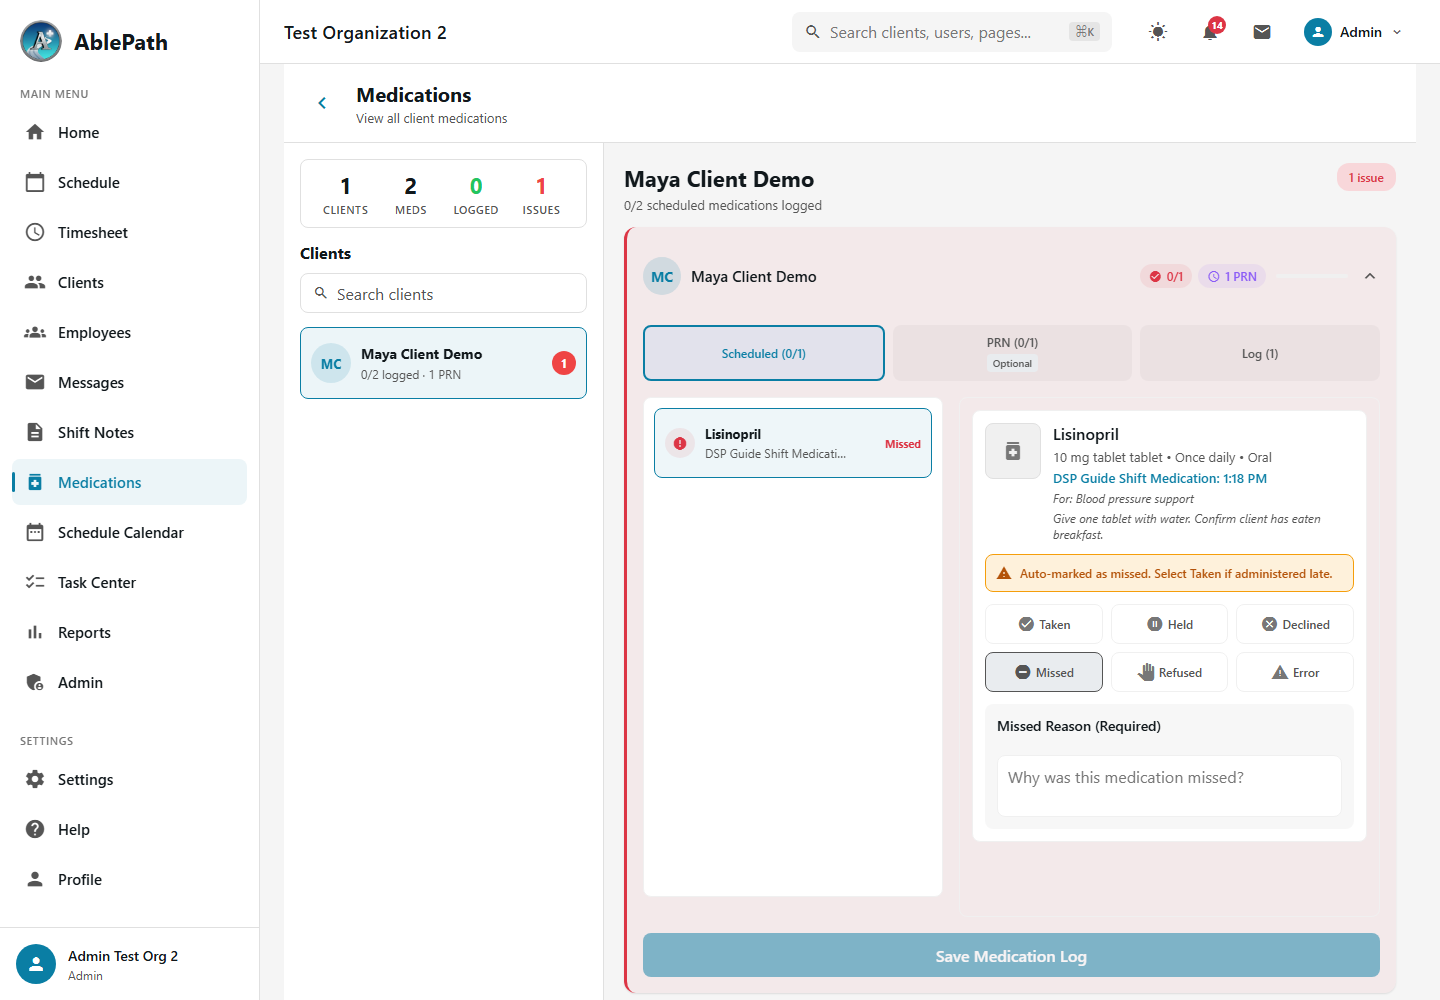
Shows medications with specific dosing schedules. These are required to be logged during shifts. Each medication displays the scheduled time, dosage, frequency, route, and special instructions. Status buttons allow you to mark each as Taken, Held, Declined, Missed, Refused, or report an Error.
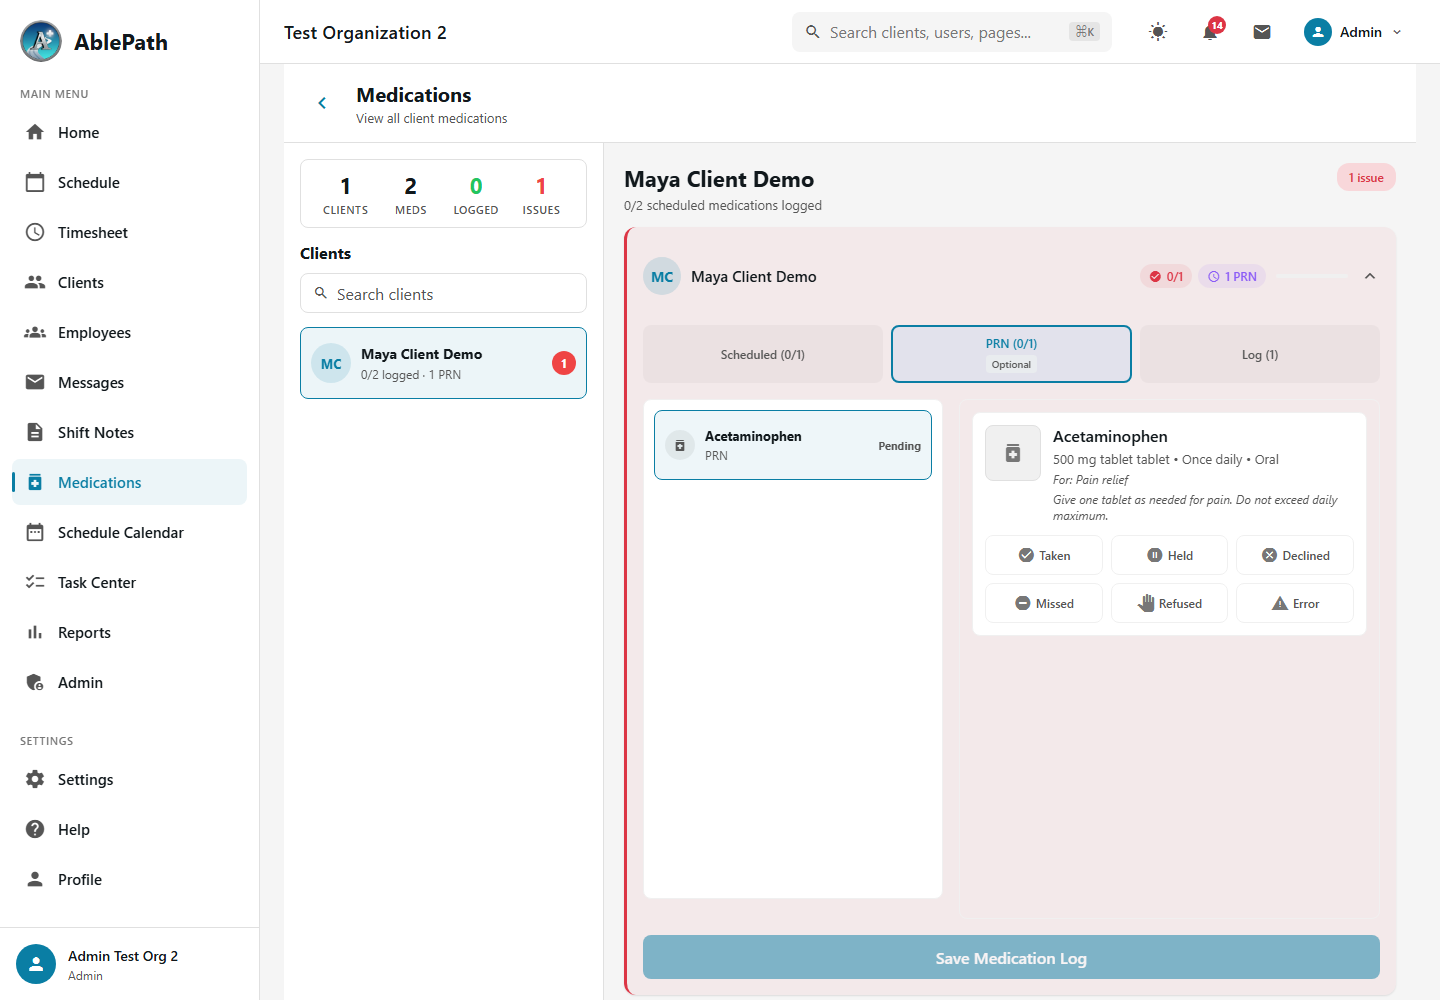
PRN Medications
PRN (pro re nata / "as needed") medications are optional and can be logged multiple times per day when the situation warrants. Common PRN medications include pain relievers, anti-anxiety medications, and sleep aids. Each entry shows how many times the medication has been logged today.
Medication Log
The Log tab shows a history of all medication administrations for the selected date. Administrators can use the date selector to view logs from previous days and can edit existing log entries to correct mistakes.
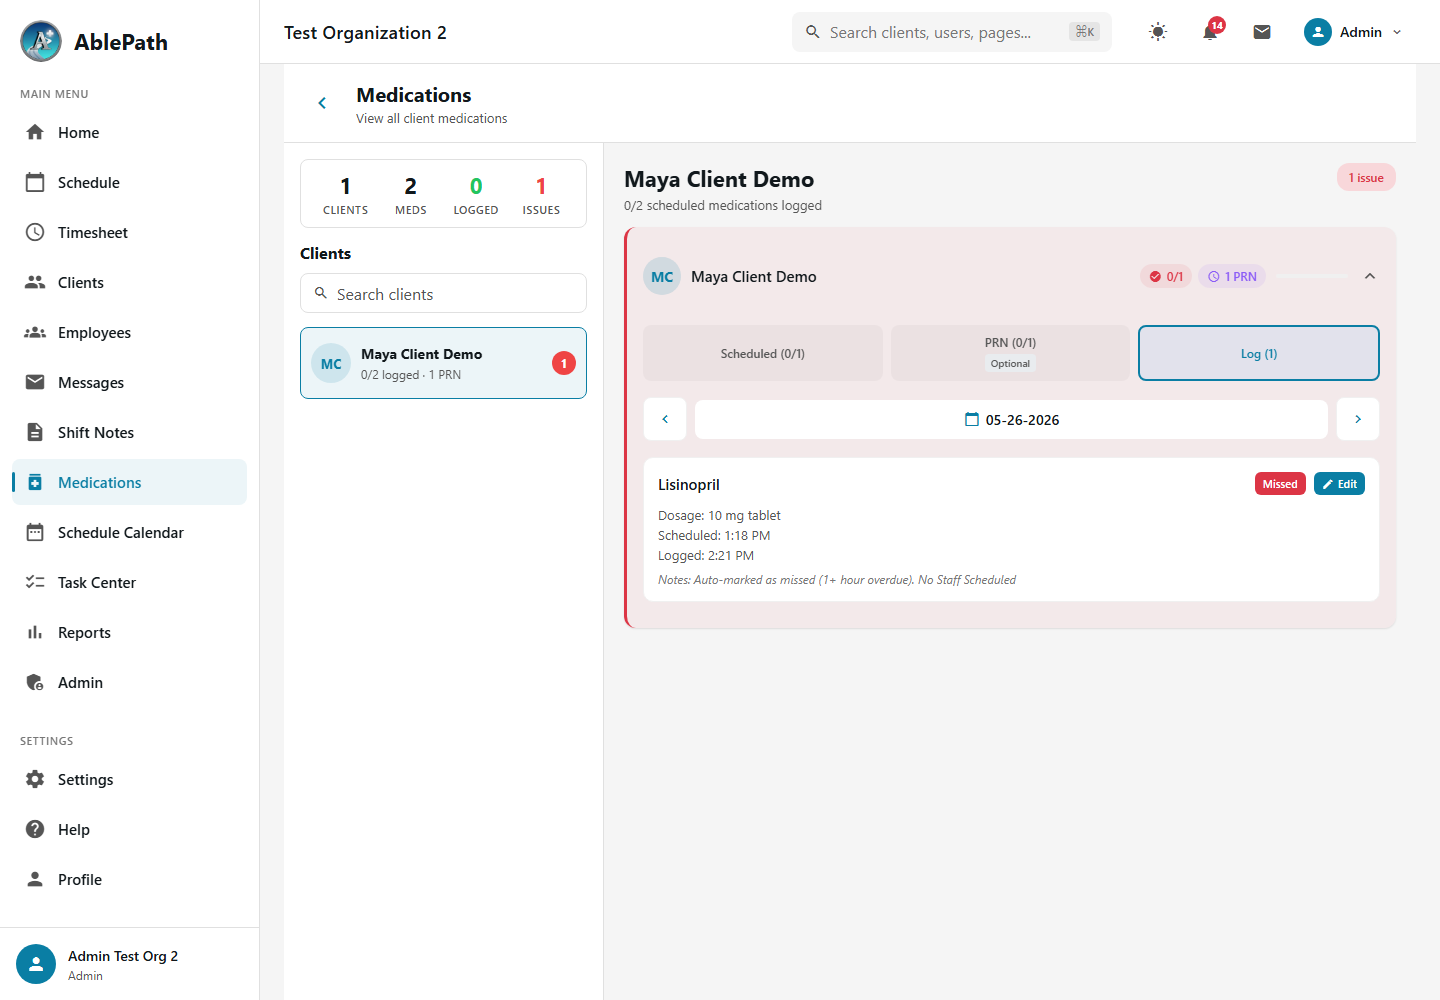
- Find the medication Look for the yellow "Auto-marked as missed" banner on the medication
- Verify it was given late Confirm the medication was actually administered after the scheduled time
- Click "Taken" Select the Taken status button to correct the record
- Add notes Document why the medication was given late (optional but recommended)
- Save Click "Save Medications" to update the record
- Go to Medications Click "Medications" in the sidebar
- Select a client Click on the client whose history you want to review
- Click the "Log" tab Switch to the Log tab to see administration history
- Use the date selector Click the arrows or date display to navigate to previous days
- Review or edit entries Click "Edit" on any entry to correct status or logged time
Incident Reports
Document and track incidents including behavioral events, medical issues, falls, and other safety concerns. Incidents are tracked through investigation and resolution for compliance reporting.
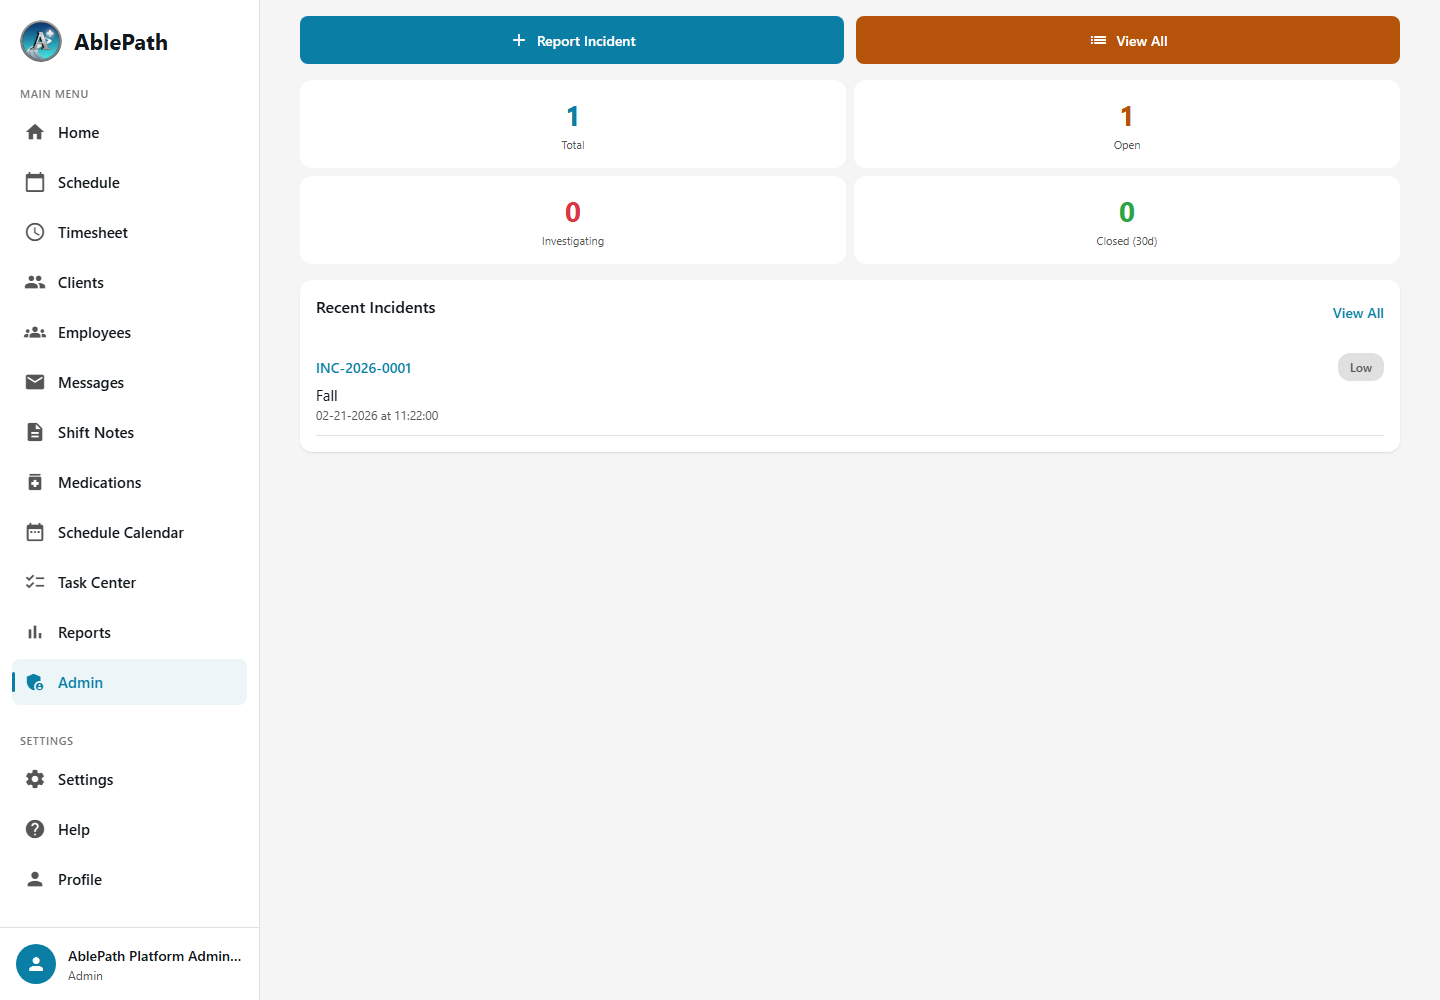
Incident Types
Behavioral
Document behavioral incidents with antecedents and interventions
Medical
Track medical incidents, symptoms, and outcomes
Fall
Document falls with injury assessment and follow-up care
Medication Error
Report medication administration errors
Other
Document miscellaneous incidents that don't fit standard categories
General Incidents
Non-client-specific workplace incidents such as property damage or staff injuries
- Go to Incidents Click "New Incident" from dashboard Quick Links or Admin menu
- Select incident type Choose Behavioral, Medical, Fall, Medication Error, or Other
- Select affected client Choose the client involved in the incident
- Enter date and time Record when the incident occurred
- Describe the incident Provide detailed objective description of what happened
- Document immediate actions Record what steps were taken in response
- Note witnesses List any staff or others who witnessed the incident
- Submit report Click "Submit" to send for supervisor review
- Go to Admin → Incidents Access the incident management page
- Filter by "Under Review" See incidents requiring investigation
- Click on the incident Open the full incident report
- Review all documentation Read the description, witness statements, and attachments
- Add investigation notes Document your findings and root cause analysis
- Create corrective actions Assign follow-up tasks to prevent recurrence
- Close the incident Mark as resolved once investigation is complete
Special Incident Reports (SIRs) requiring Regional Center notification are flagged automatically based on severity and type. Review SIR reports in the Reports section.
EVV Compliance
Electronic Visit Verification (EVV) is required by the 21st Century Cures Act for all Medicaid-funded personal care and home health services. AblePath captures GPS location and optional photo verification at clock-in and clock-out to ensure compliance.
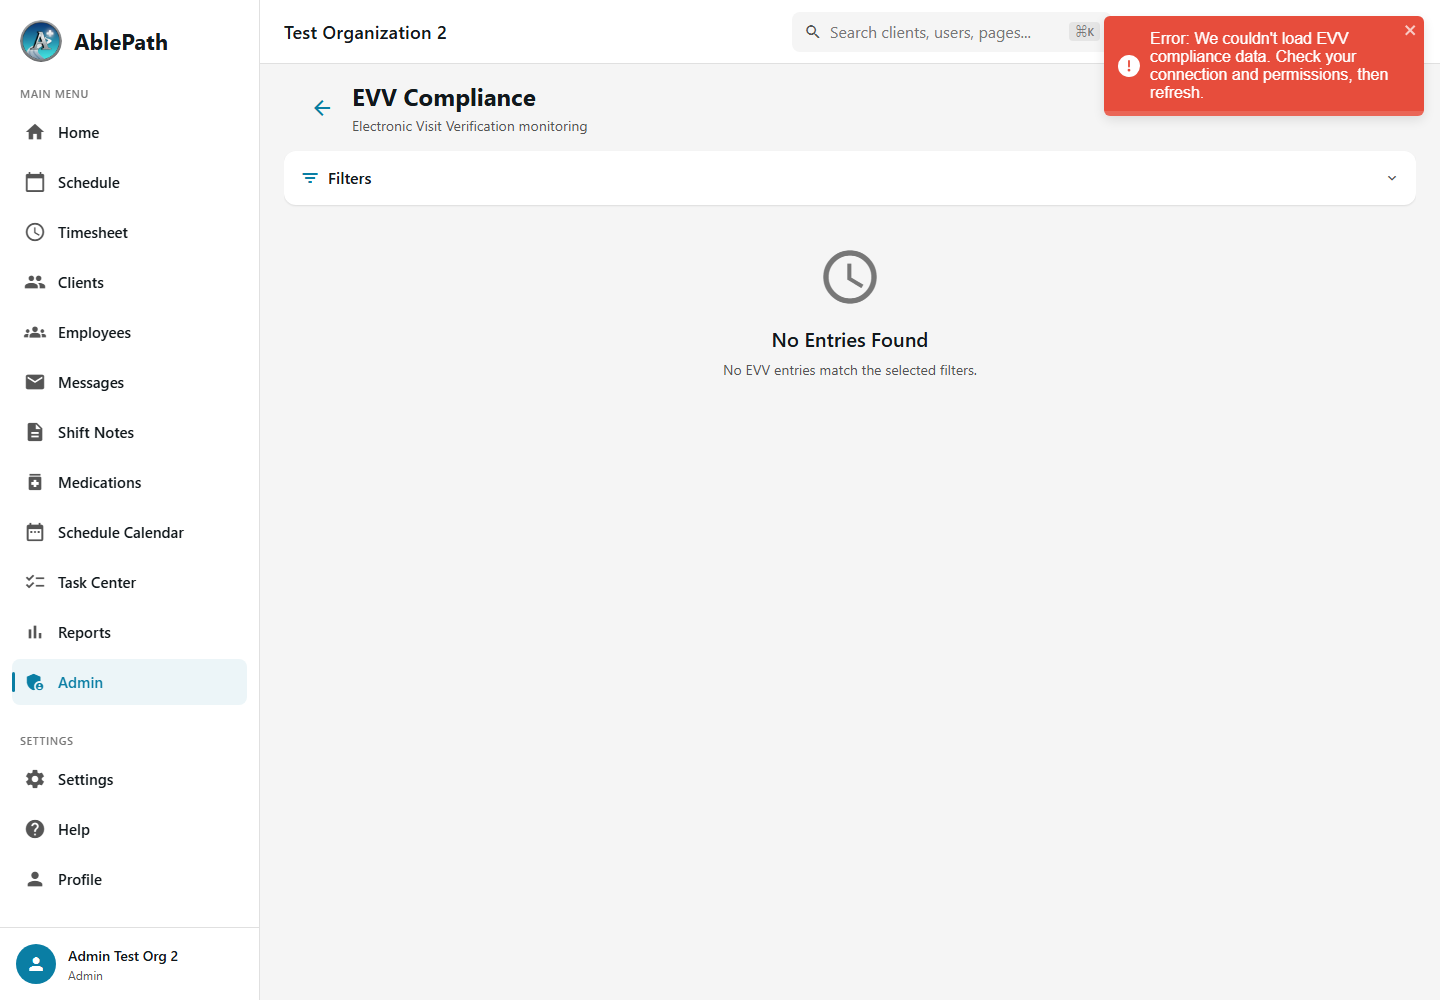
EVV Features
GPS Verification
Automatic location capture at clock-in and clock-out verifies the visit location
Photo Verification
Optional selfie capture for identity verification at the point of service
Compliance Dashboard
Monitor organization-wide EVV compliance rates and identify verification gaps
CalEVV Exports
Generate EVV data exports formatted for California's CalEVV reporting requirements
- Go to Admin → EVV Compliance Access the EVV compliance dashboard
- Set the date range Select the period to review compliance data
- Review compliance rates Check the percentage of visits with complete EVV data (GPS + photo)
- Identify gaps Filter to see visits missing GPS verification or photo capture
- Export data Generate CalEVV-formatted exports for state reporting
Reports & Analytics
Generate comprehensive reports for operations, compliance, billing, and audits. AblePath includes 79+ pre-built reports with Excel and PDF export options.
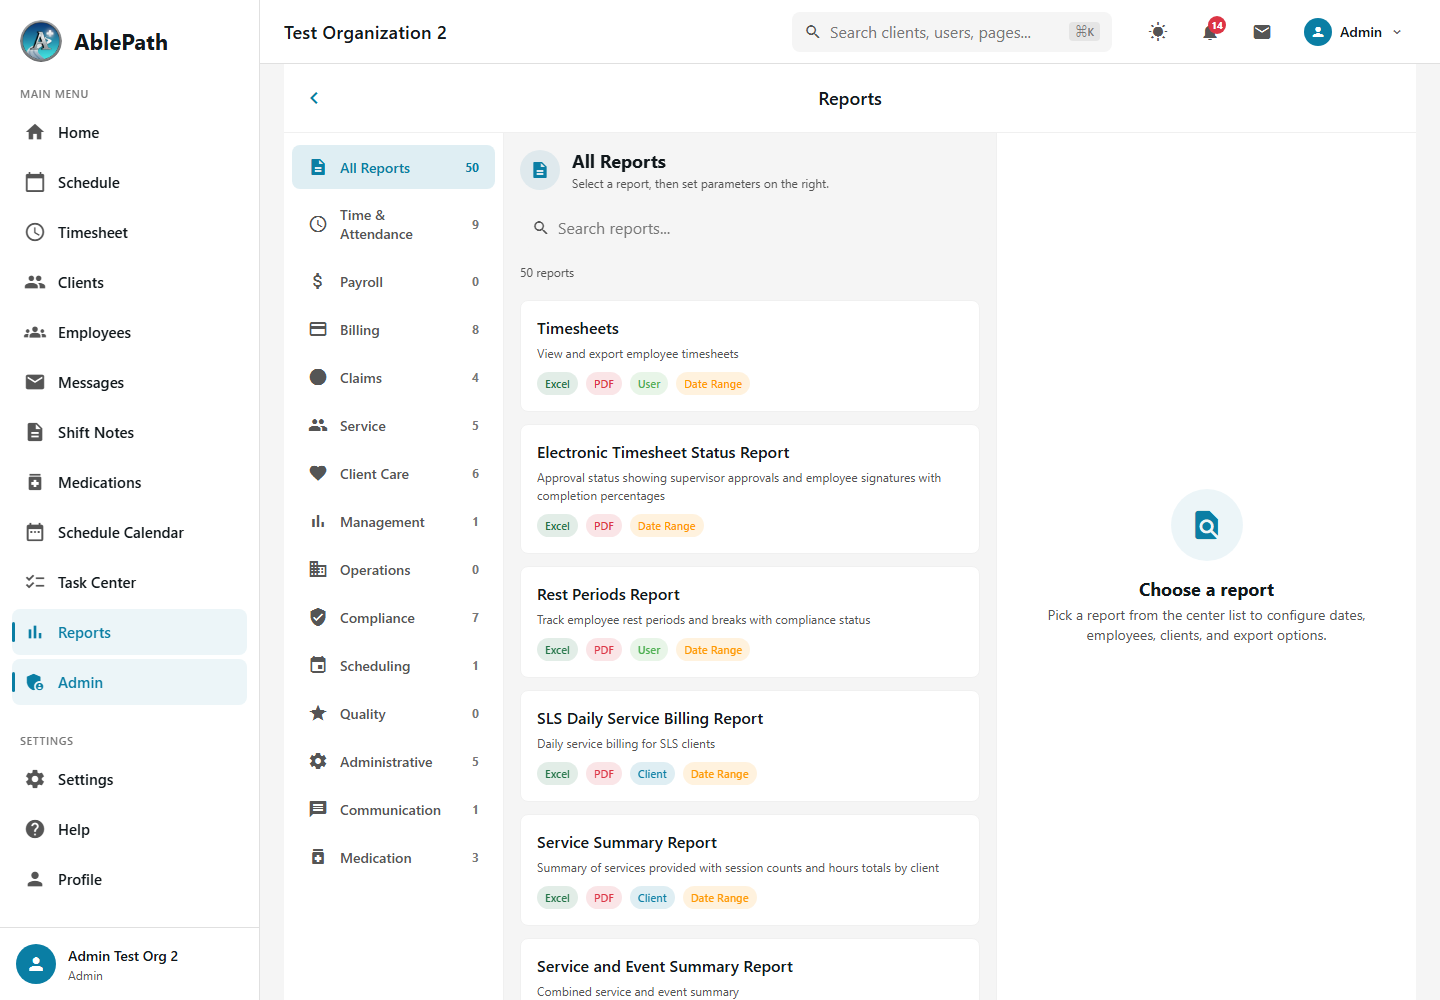
Report Categories
Time & Attendance
Timesheets, overtime tracking, late arrivals
Payroll
Payroll summaries, deductions, shift differentials
Billing
Client invoices, aged receivables, revenue analysis
Compliance
EVV compliance, SIR reports, training status
Client Care
Service notes, goal progress, medication records
RC Audit Package
Complete audit bundle for Regional Center reviews
Scheduled Reports
Automate recurring report delivery to designated recipients
Scheduled Reports
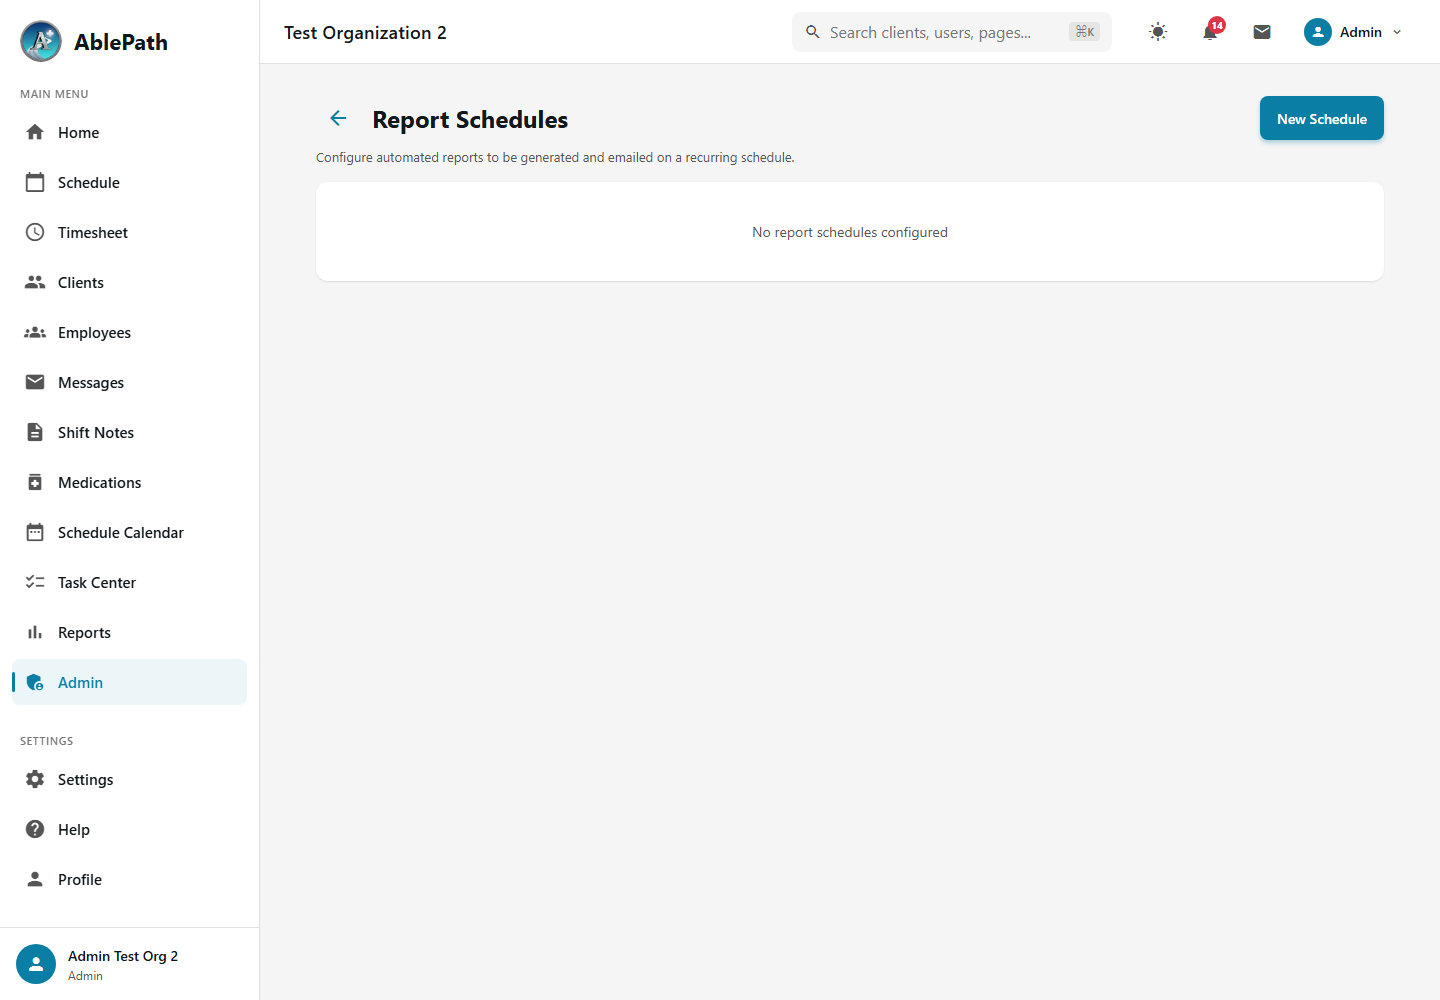
Use Report Schedules to automate recurring report generation. Schedules can define report type, frequency, delivery time, recipients, export format, and report parameters.
- Go to Reports Click "Reports" in the sidebar navigation
- Browse or search for report Use categories or search to find the report you need
- Click on the report name Opens the report configuration page
- Set date range Choose the time period for the report
- Apply filters Select specific clients, employees, or service types
- Generate report Click "Run Report" to generate the data
- Export or print Download as Excel/PDF or print directly
- Go to Reports → RC Audit Package Find the Regional Center audit report bundle
- Select the client Choose the client being audited
- Set the audit period Enter the date range for the audit
- Select report components Choose which reports to include (service notes, MAR, etc.)
- Generate package Creates a compiled PDF with all selected reports
- Review and download Verify completeness and download for submission
Administration
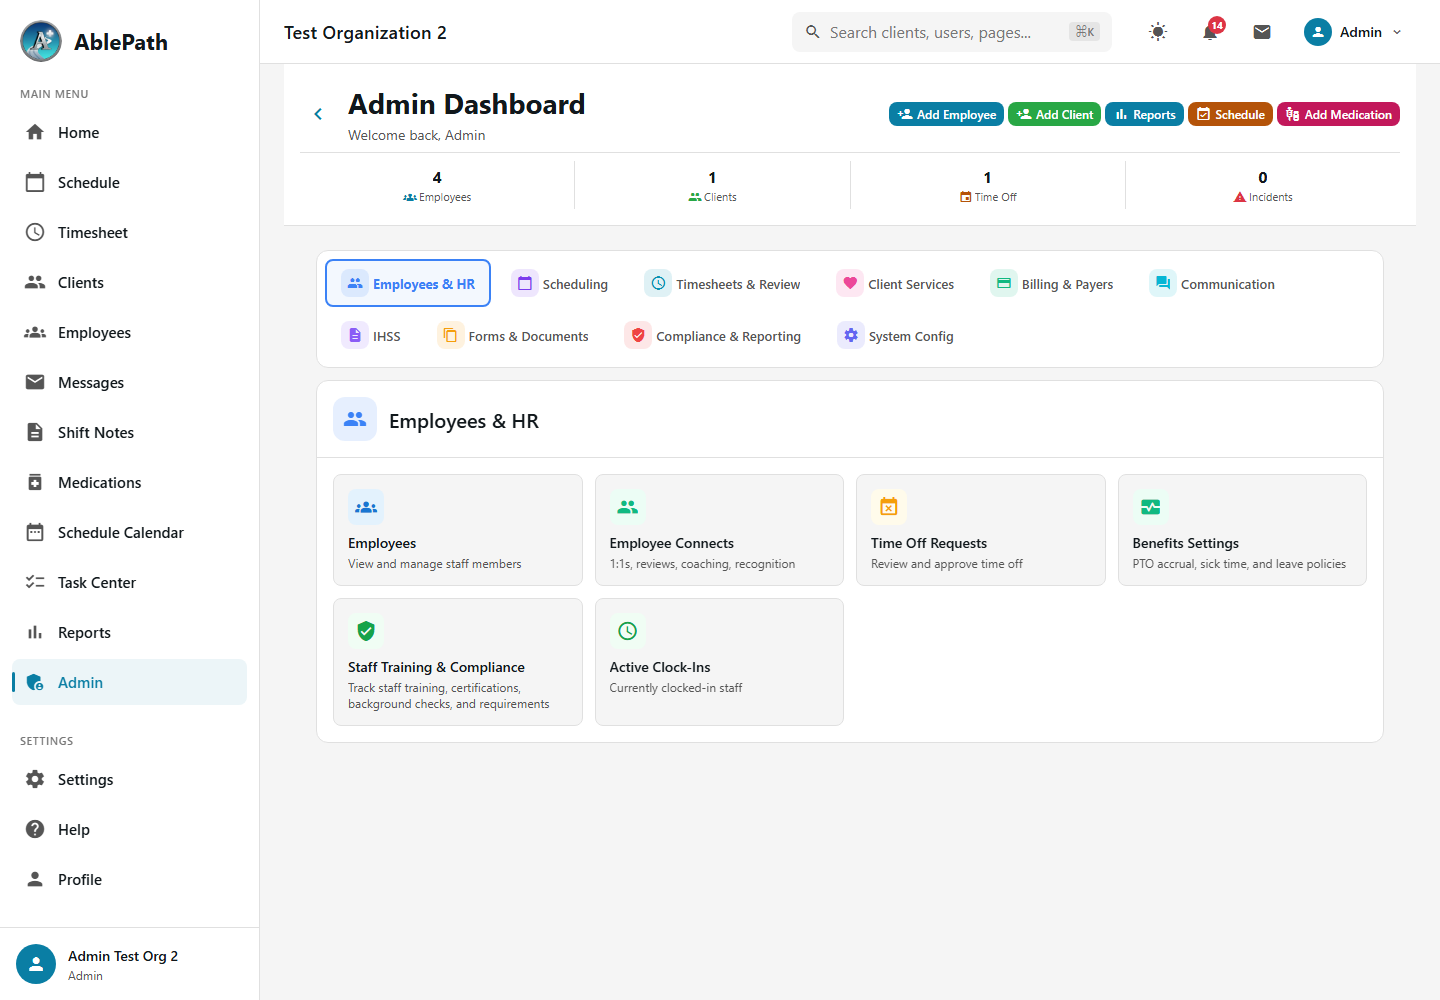
The Admin Dashboard provides centralized access to all administrative functions including staff management, payroll, client services, system configuration, and security settings.
Admin Categories
Staff Management
Employee records, assignments, compliance tracking
Payroll
Pay periods, time approvals, payroll exports
Client Services
Client records, authorizations, care plans
Billing & Payers
Payer management, claims, reconciliation
System Config
Service types, custom forms, staff tasks, organization settings
Security & Compliance
Audit logs, access controls, HIPAA settings
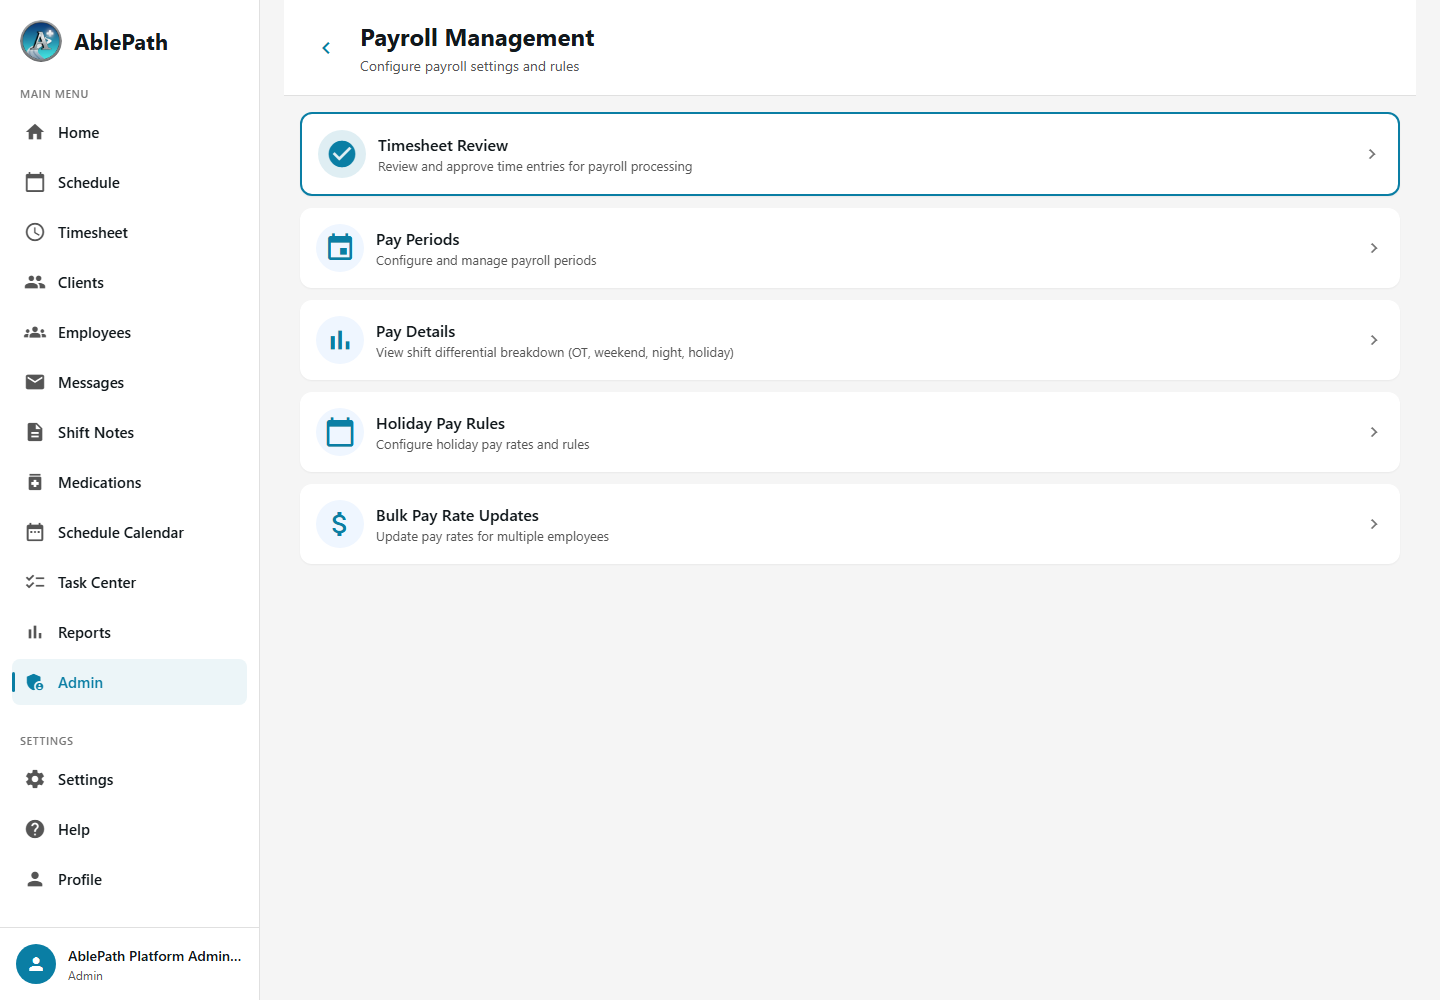
Payroll Management
Access payroll functions including pay period management, time approvals, and payroll exports.
Pay Periods
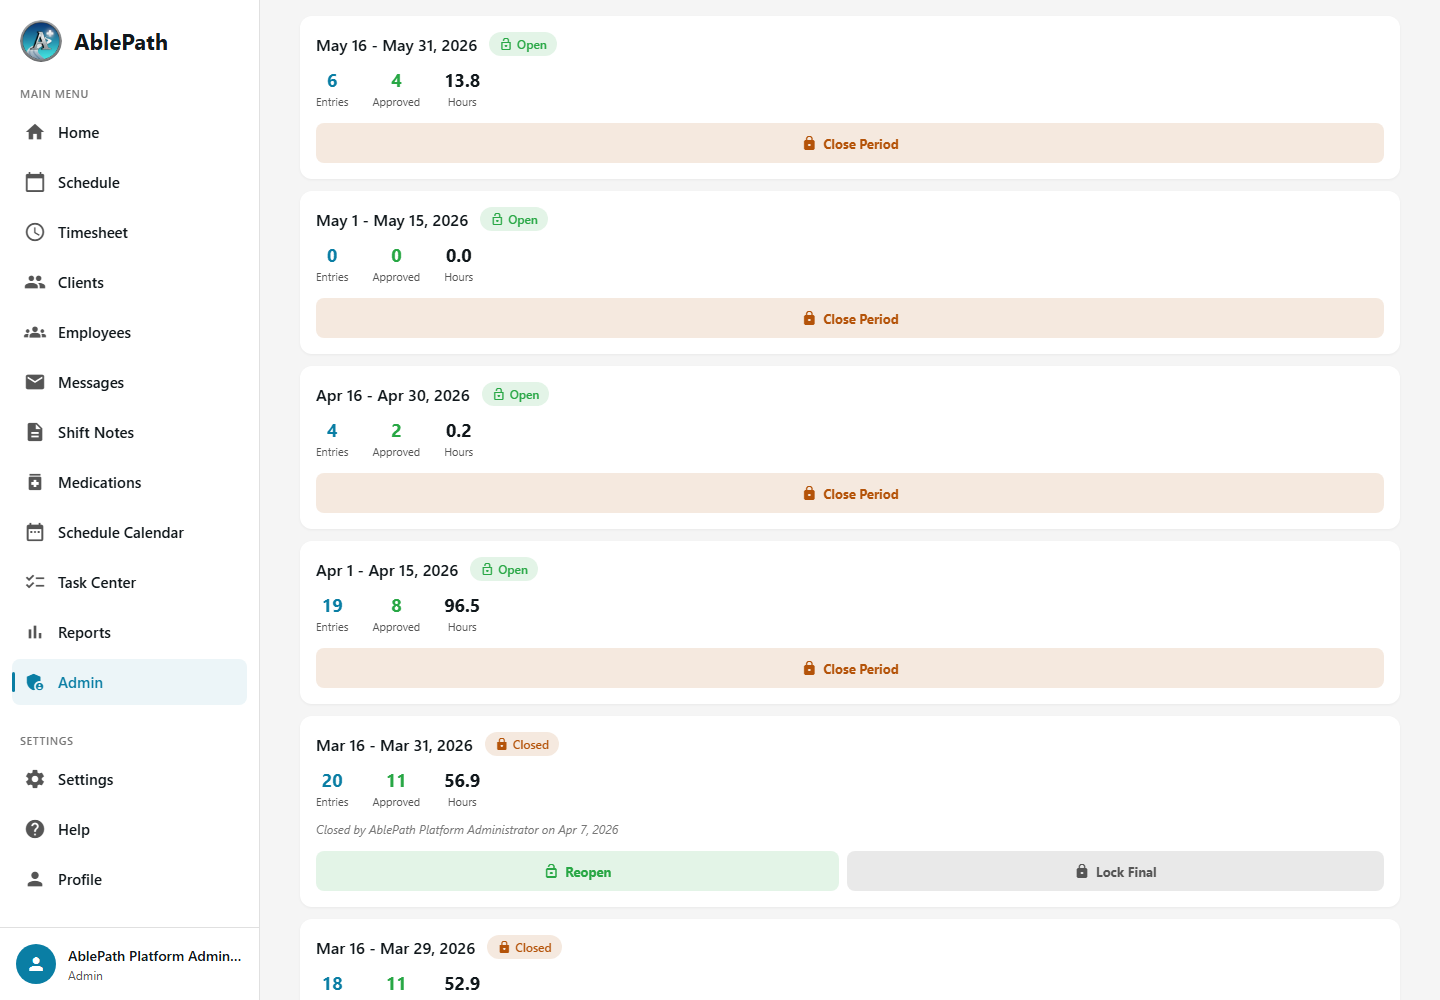
Manage pay periods with status tracking (Open, Closed, Processing, Paid) and quick actions.
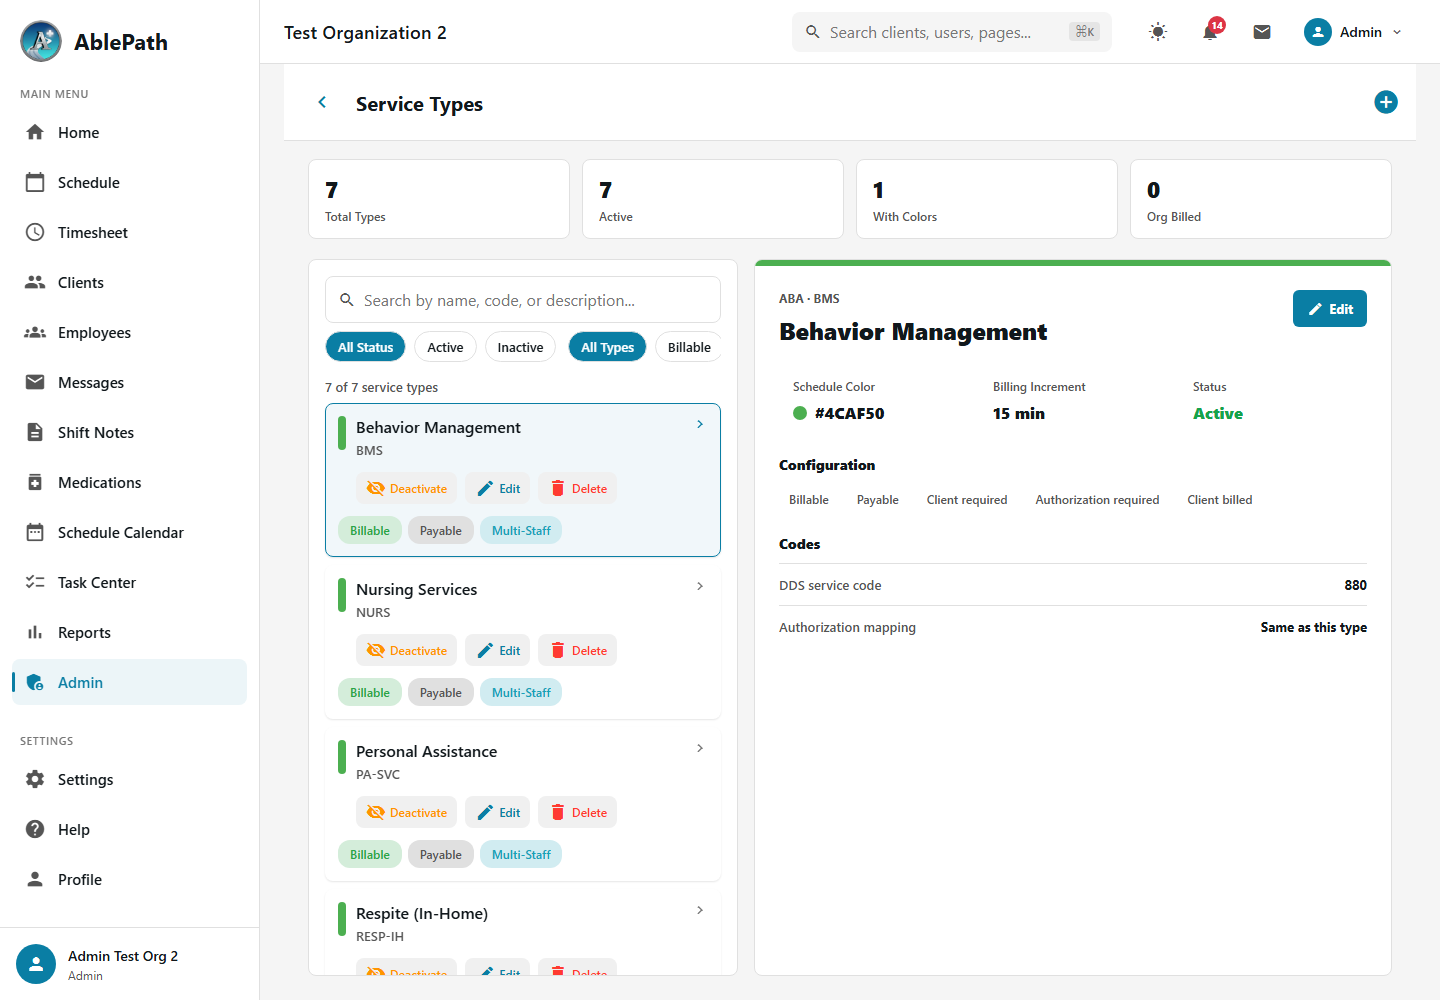
Service Types Configuration
Configure service types with billing rates, client requirements, and feature flags for service notes, objectives, and mileage tracking.
- Go to Admin → Payroll → Pay Periods Access the pay period management page
- Select the current pay period Click on the period you want to process
- Review pending time entries Ensure all entries are approved before processing
- Run reconciliation Check for any discrepancies between scheduled and actual hours
- Review overtime and differentials Verify overtime calculations and shift differentials
- Close the pay period Click "Close Period" to finalize (no more edits allowed)
- Export to payroll system Generate export file for your payroll provider
- Go to Admin → Config → Service Types Access the service type configuration page
- Click "Add New Service Type" or edit existing Opens the service type form
- Enter basic info Set name, code, category, and description
- Configure billing Set if billable, billing rates, and billing target (client/org)
- Set feature flags Enable/disable service notes, objectives, mileage tracking
- Configure client requirement Set whether a client must be assigned for this service type
- Save changes Service type is now available for scheduling
- Go to Admin → Payroll → Time Approvals Access the batch approval page
- Filter by date range Select the pay period or date range to review
- Filter by status "Pending" Show only entries awaiting approval
- Review entries Check hours, breaks, and any flags for each entry
- Select entries to approve Use checkboxes to select multiple entries
- Click "Approve Selected" All selected entries are approved at once
Schedule Templates
Schedule templates allow administrators to save and reuse common shift patterns. Create templates for recurring weekly schedules, then apply them to quickly populate shifts for any time period.
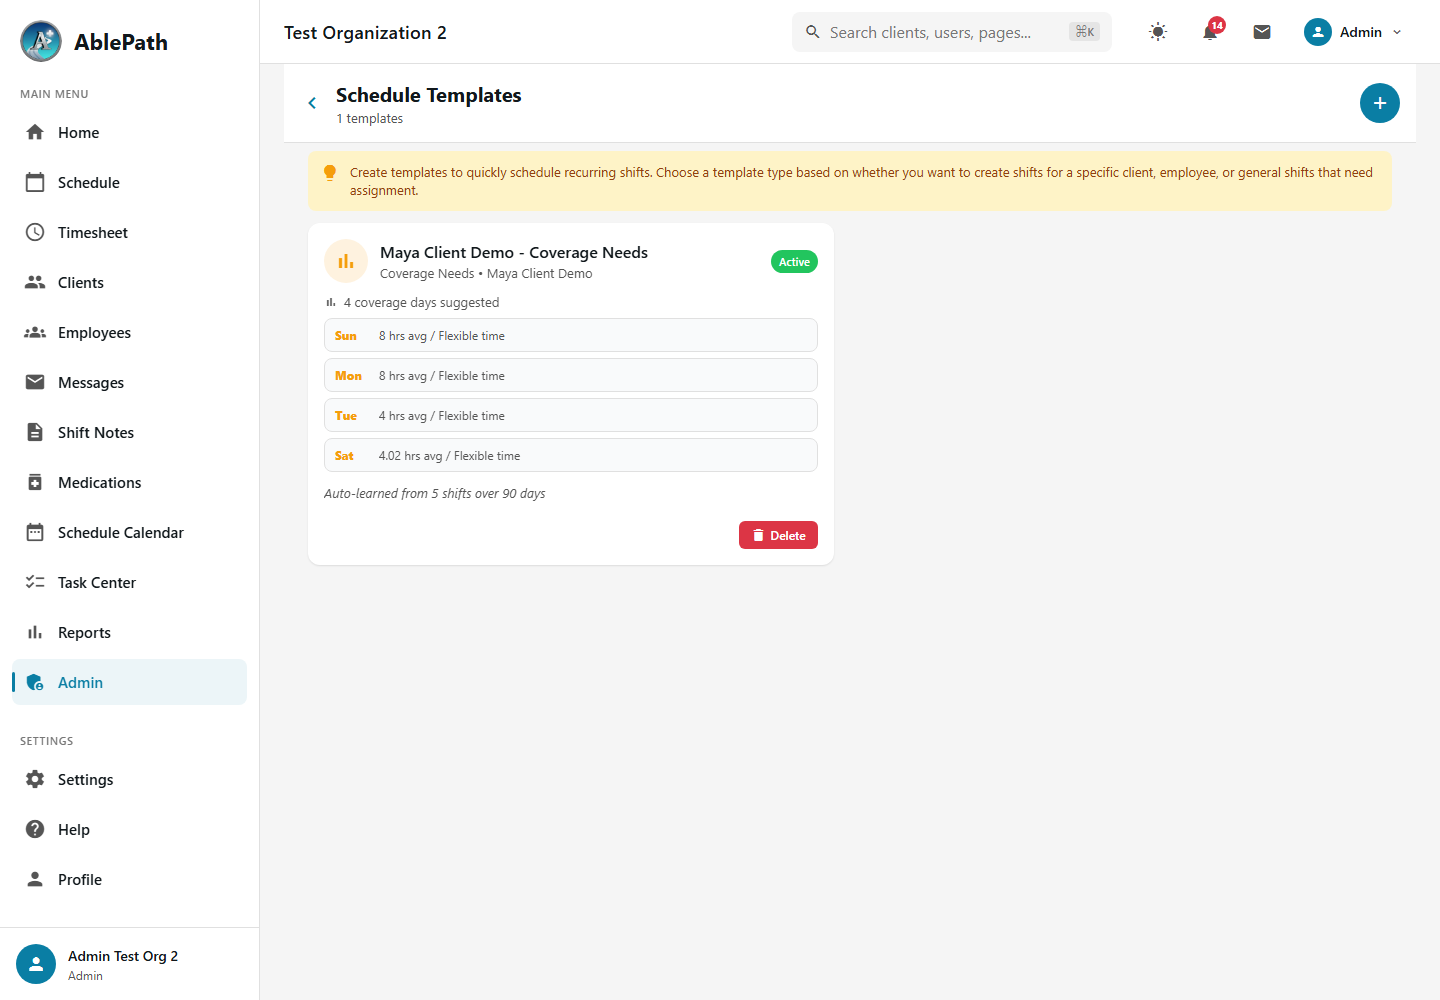
Template Features
Create Templates
Build reusable shift patterns with staff, clients, times, and service types
Apply to Date Range
Apply a template to a week or month to instantly generate shifts
Preview Before Applying
Review all shifts that will be created before confirming
Duplicate Detection
Automatic checks prevent creating overlapping or duplicate shifts
- Go to Schedule Manager Click "Schedule Manager" in the admin navigation
- Click "Apply Template" Opens the template application dialog
- Select a template Choose from your saved schedule templates
- Choose the target week Select the start date for the schedule to be generated
- Preview shifts Review the list of shifts that will be created
- Confirm and apply Click "Generate" to create all shifts from the template
Staff Compliance
The staff compliance dashboard provides a centralized view of employee certification status, background checks, TB tests, training completion, and other required compliance items. Track expiration dates and receive alerts before items expire.
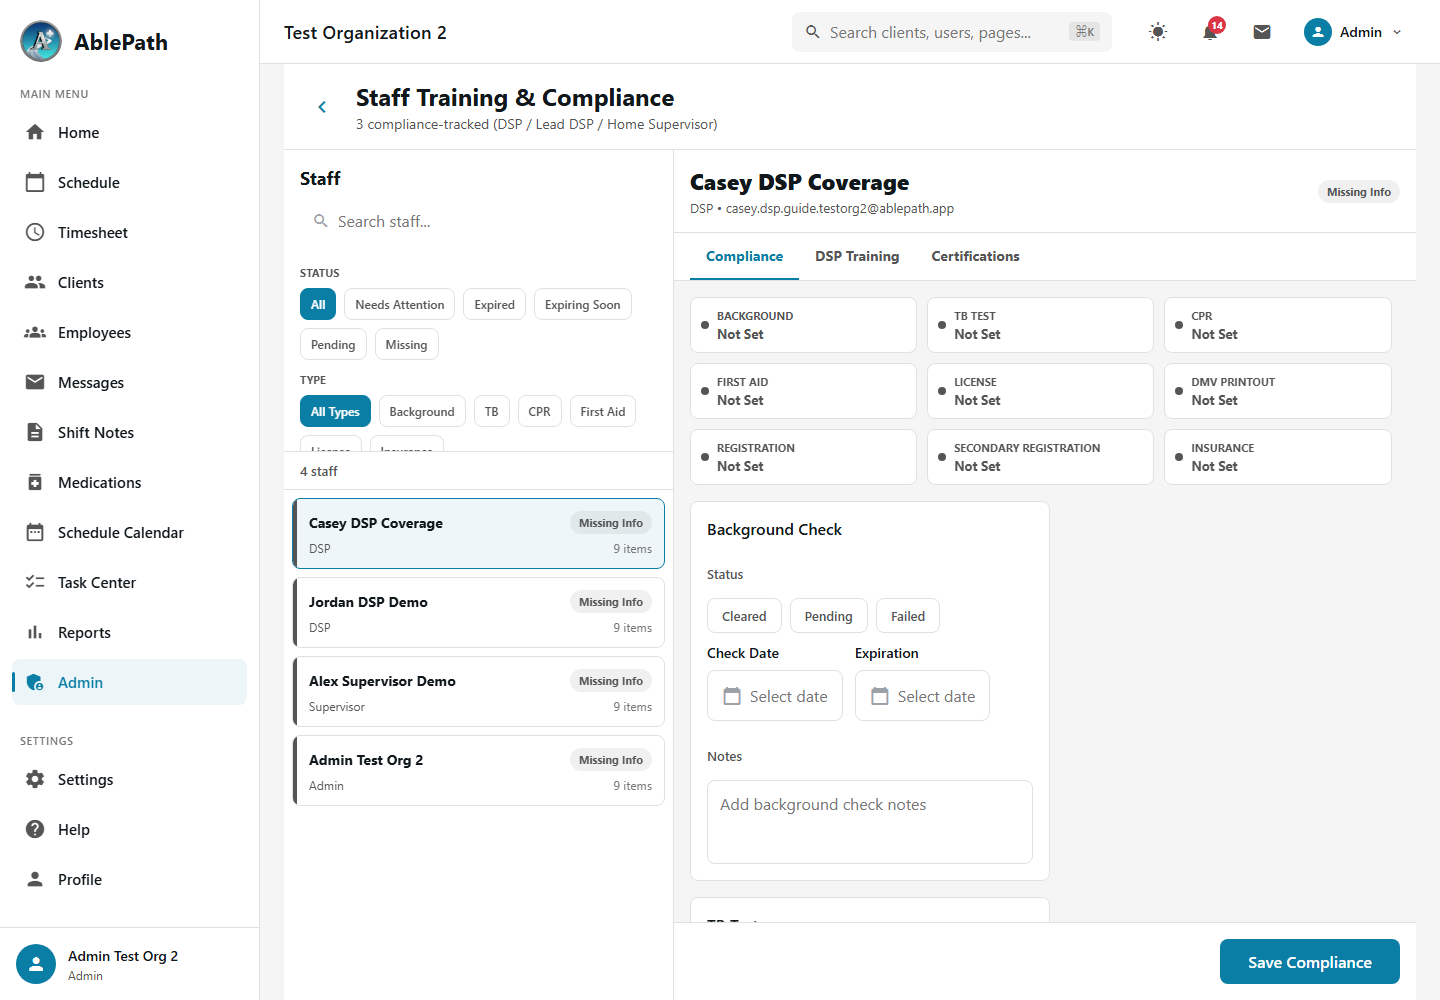
Compliance Features
Certification Tracking
Track CPR, First Aid, DSP certifications, and other required credentials
Background Checks
Monitor LiveScan and DOJ background check status and renewal dates
TB Testing
Track annual TB test requirements and expiration dates
Training Status
Monitor required training completion and upcoming deadlines
- Go to Admin → Staff Compliance Access the compliance dashboard
- Find the employee Search or filter to locate the staff member
- Click on the compliance item Open the item to view or update details
- Update expiration date Enter the new expiration or renewal date
- Upload documentation Attach scanned certificates or clearance documents
- Save The compliance record is updated and expiration alerts are recalculated
Overtime & Rest Break Rules
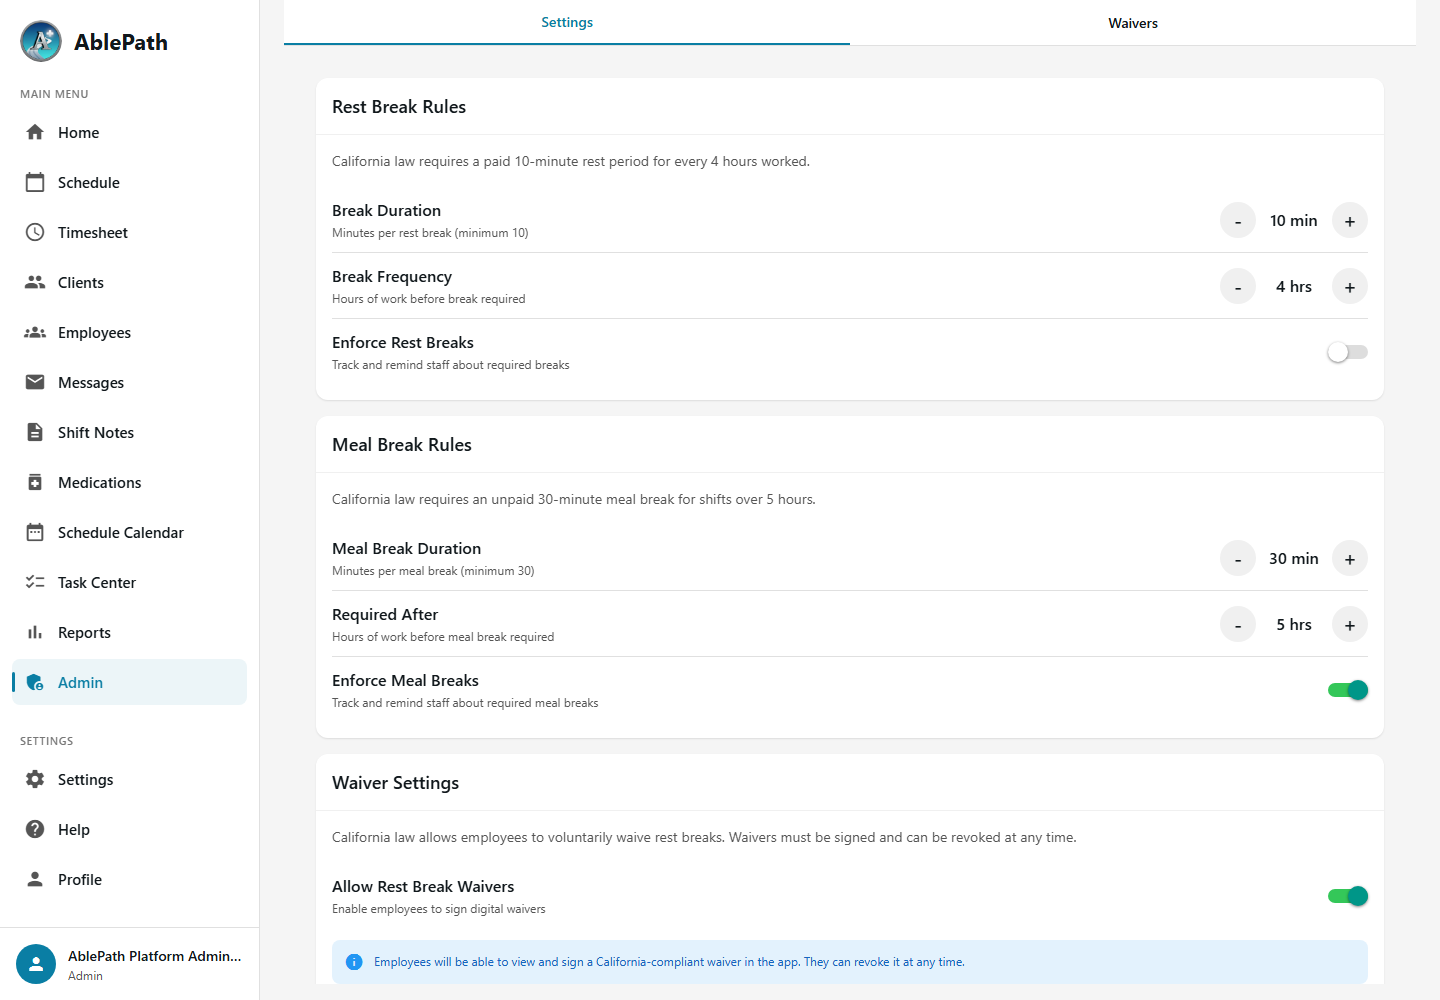
Configure overtime thresholds and rest break rules to ensure California labor law compliance. Set daily and weekly overtime limits, 7th-day overtime rules, and mandatory break durations and frequencies.
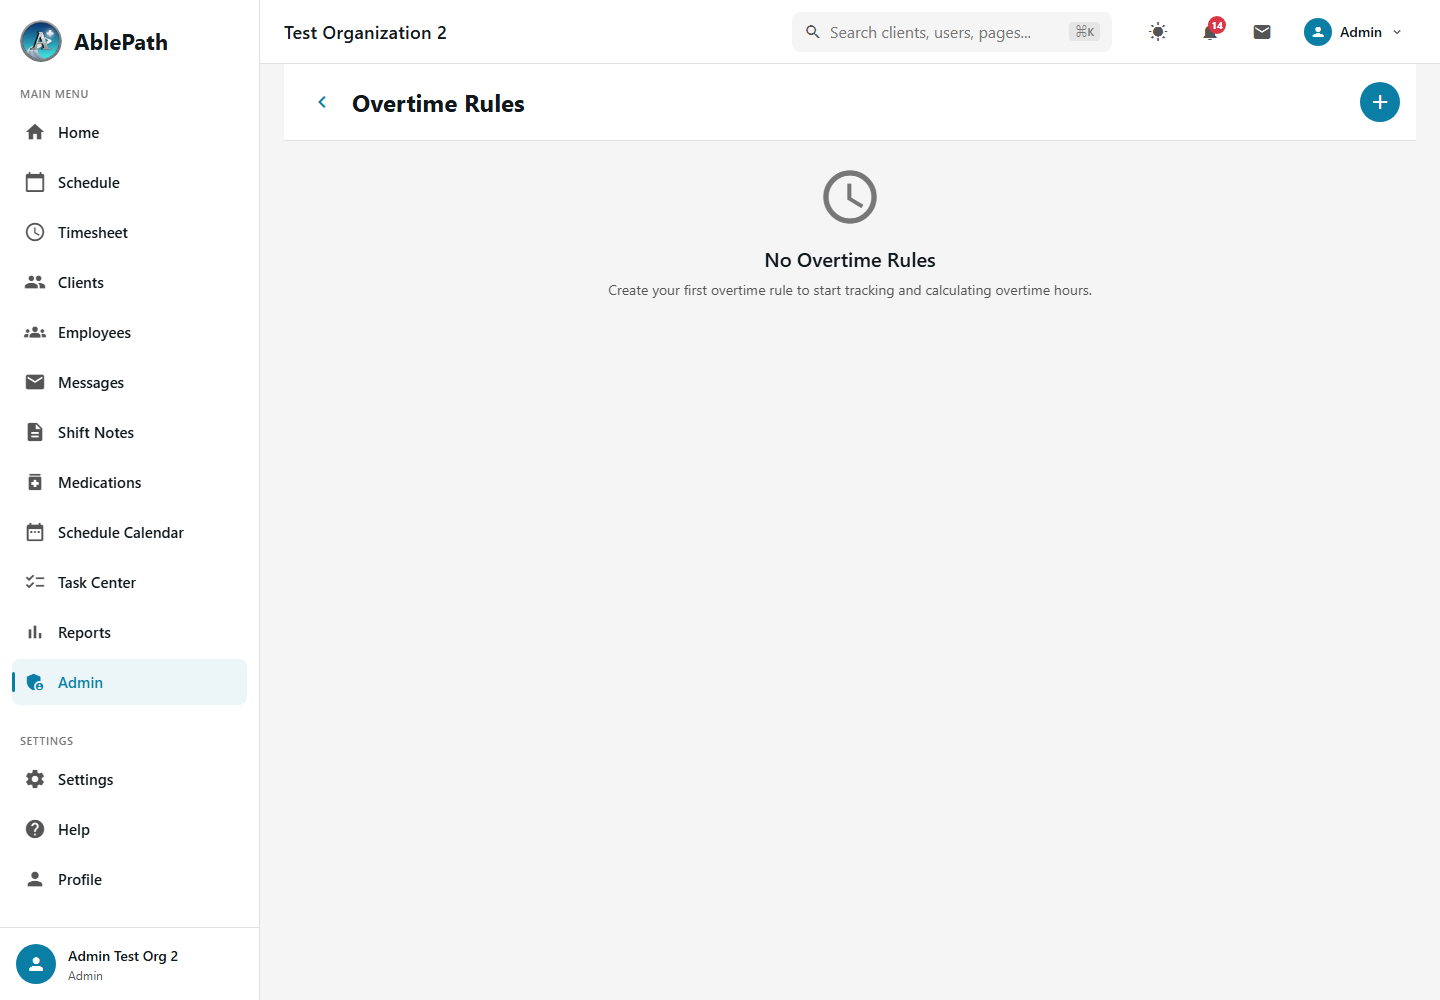
Rule Settings
Weekly Overtime
Set the weekly hours threshold for overtime (typically 40 hours)
Daily Overtime
Set daily hours threshold for overtime (typically 8 hours) and double-time (12 hours)
7th Day Rule
Configure California's 7th consecutive day overtime requirements
Rest Break Settings
Set break duration, frequency, and manage rest break waiver requests
- Go to Admin → Overtime Rules Access the overtime configuration page
- Set weekly overtime threshold Enter the number of hours per week that triggers overtime (default: 40)
- Set daily overtime threshold Enter the number of hours per day that triggers overtime (default: 8)
- Configure 7th day rules Enable or disable California's 7th consecutive workday overtime
- Save rules Rules apply to all future time calculations. Existing entries are not retroactively recalculated
On-Call Scheduling
Manage on-call schedules for staff who need to be available outside regular shift hours. Track on-call entries, stipend payments, and eligible staff for emergency coverage.
On-Call Features
On-Call Entries
Create on-call assignments with date, time, and assigned staff
Stipend Tracking
Automatically calculate on-call stipend amounts for payroll
Eligible Staff
View which employees are available and eligible for on-call duty
Calendar Integration
On-call assignments appear on the schedule calendar for visibility
- Go to Admin → On-Call Access the on-call scheduling page
- Click "Add On-Call Entry" Opens the on-call creation form
- Select the employee Choose an eligible staff member for on-call duty
- Set date and time range Define the on-call period (e.g., 5:00 PM to 8:00 AM)
- Configure stipend (if applicable) Set the on-call stipend amount for this entry
- Save The on-call entry is created and the employee is notified
Custom Forms & Admin Tasks
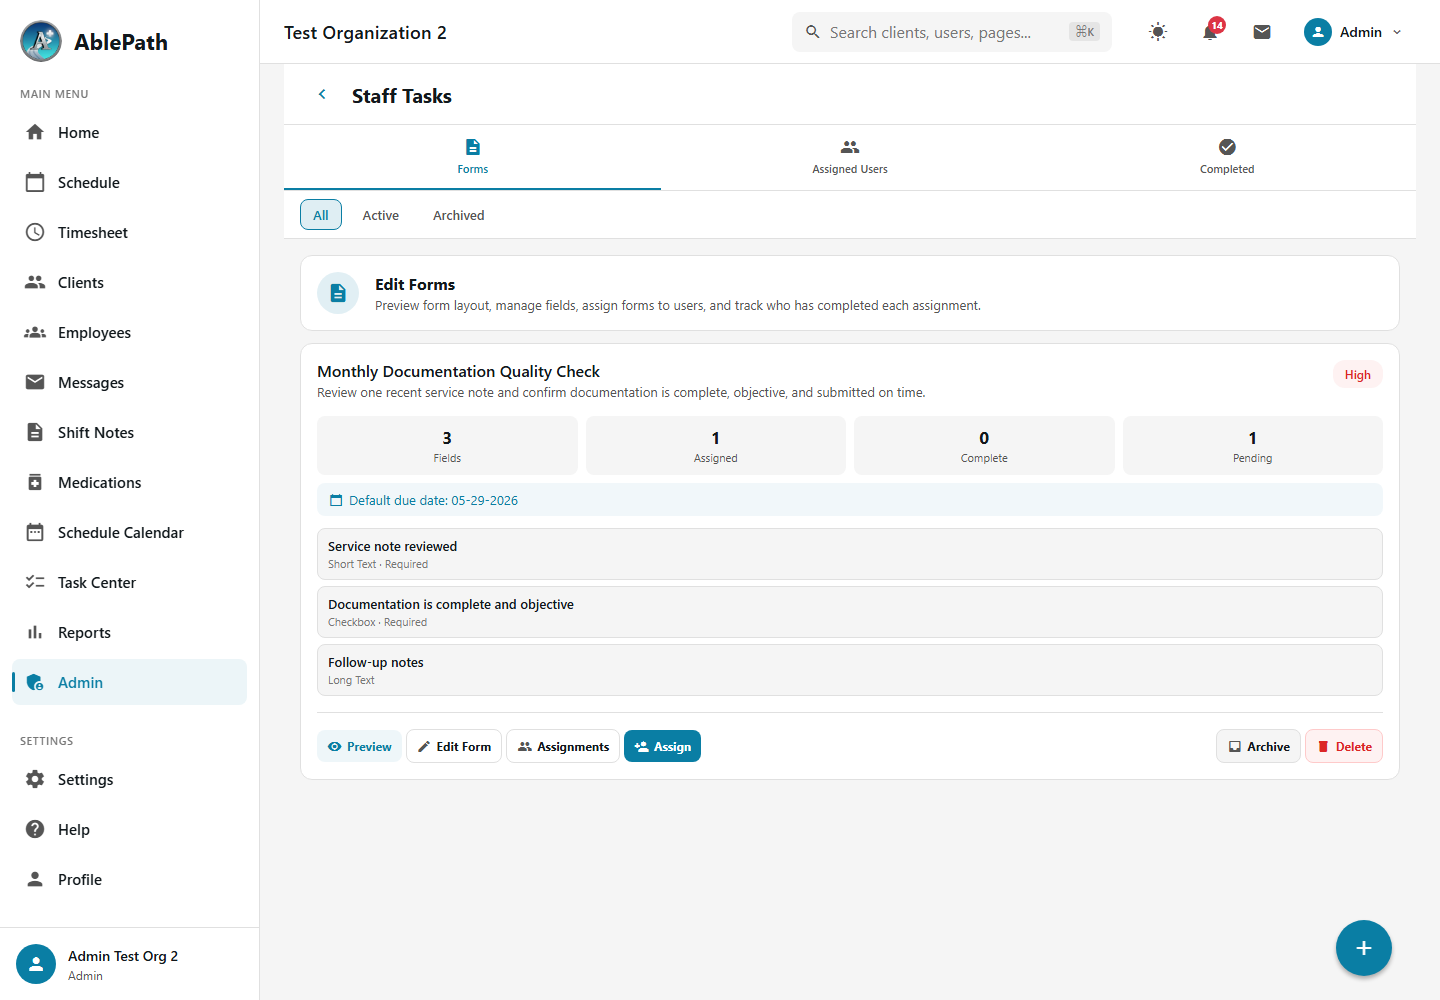
Build custom form templates for data collection during shifts, client interactions, or administrative tasks. Form templates support multiple field types and can be assigned to specific shifts, service types, employees, or recurring admin task workflows.
Form Features
Template Builder
Create forms with text, number, date, checkbox, dropdown, and textarea fields
Shift Assignment
Assign forms to specific shifts or service types for automatic prompting
Response Collection
View all submitted responses with filtering and export options
Admin Task Assignment
Assign forms to employees with due dates, recurrence, and completion tracking
Required Fields
Mark fields as required to ensure complete data collection
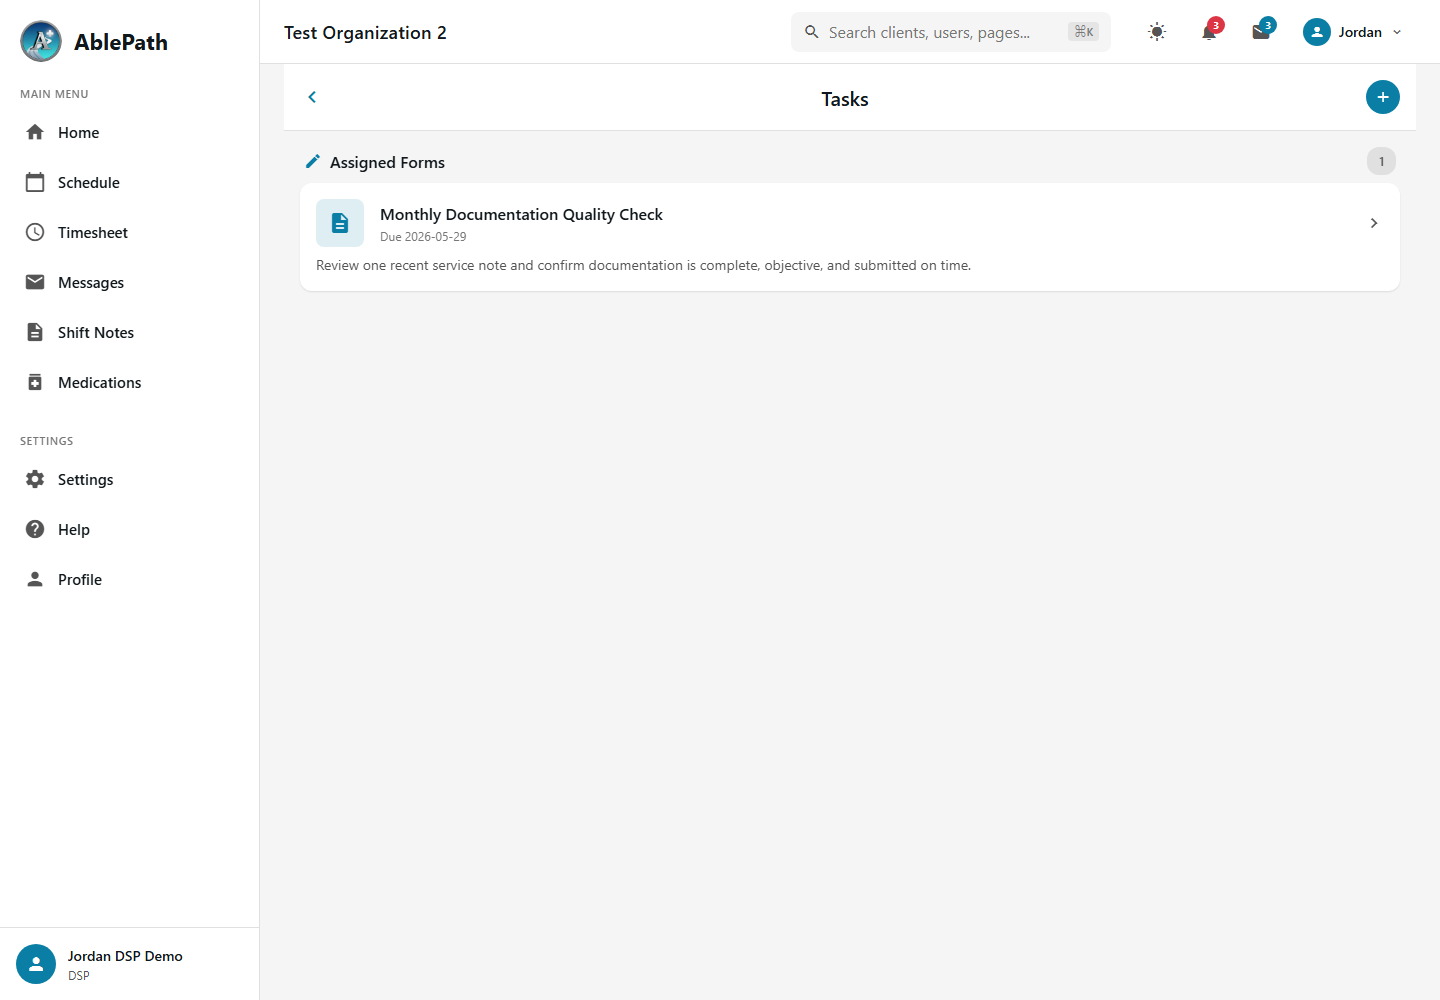
Employee Task Center
Assigned administrative forms appear in the employee Task Center. Employees can open the assigned form, complete required fields, and submit the response for supervisor review.
- Go to Admin → Custom Forms Access the custom forms management page
- Click "Create New Template" Opens the form builder
- Enter form title and description Name your form and add instructions for staff
- Add fields Use the field builder to add text, number, date, checkbox, dropdown, or textarea fields
- Configure field options Set labels, placeholder text, required status, and dropdown options
- Save template The form is now available to assign to shifts or fill out manually
- Go to Admin → Staff Tasks Open the task/form assignment workspace
- Create or select a task form Define the title, description, priority, due date, recurrence, and required fields
- Click "Assign" Select one or more employees and confirm the due date
- Monitor assignment status Use Assigned Users and Completed tabs to track pending, overdue, and completed work
Billing Reconciliation
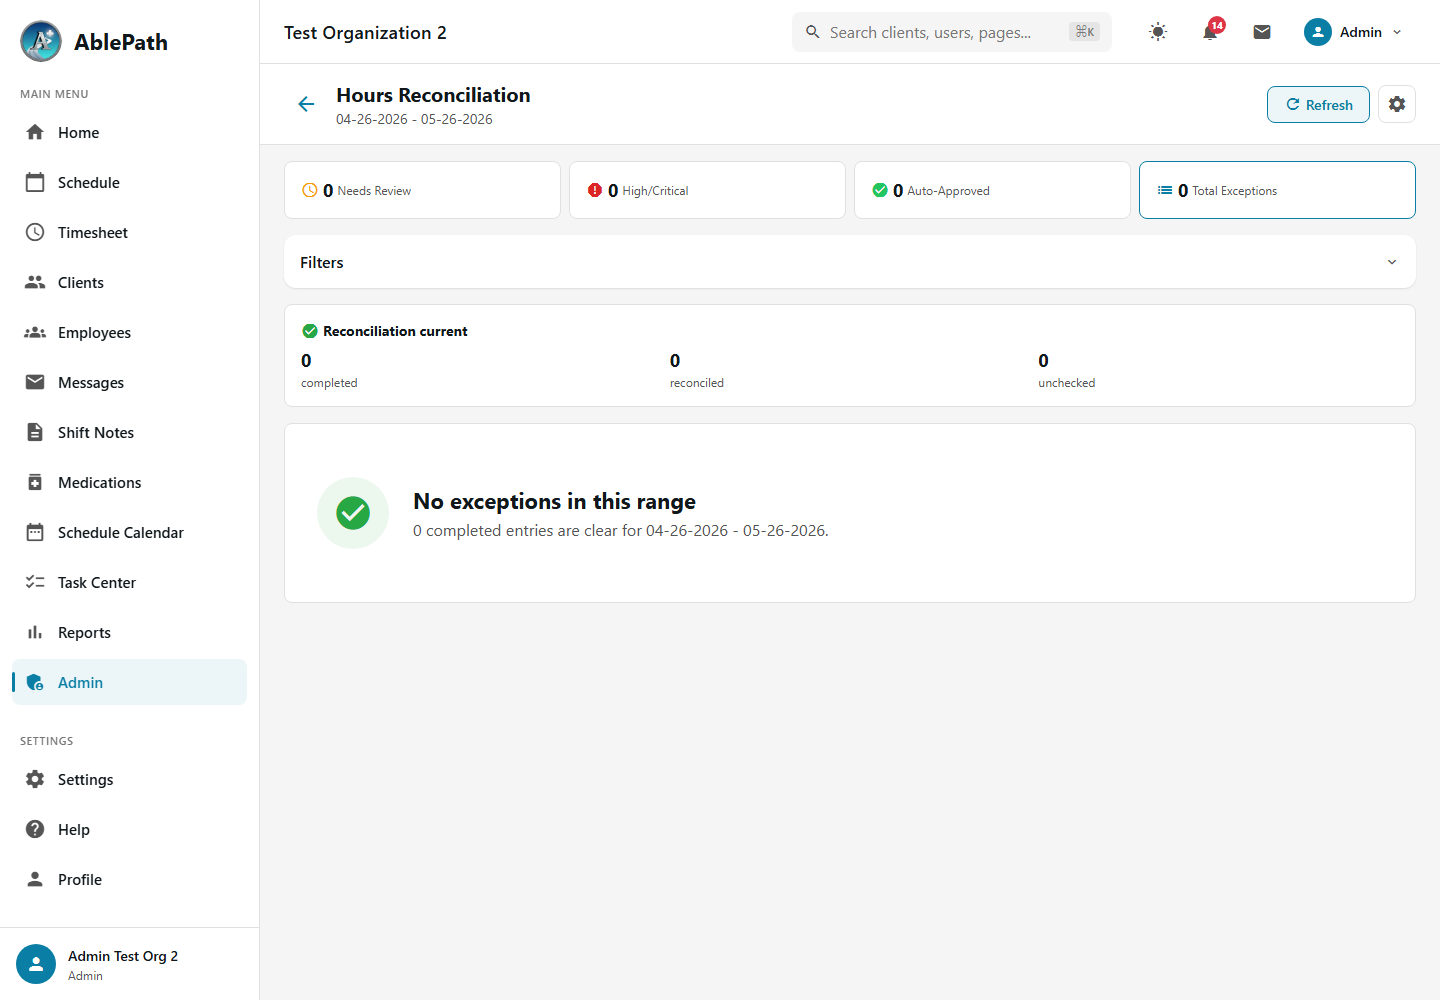
The Hours Reconciliation tool helps identify and resolve discrepancies between scheduled shifts and actual time entries. Scan for exceptions, review variances, and ensure accurate billing.
Reconciliation Workflow
Scan for Exceptions
Analyze time entries against scheduled shifts to find variances
Review Exceptions
View details of each exception including hours difference and severity
Approve or Adjust
Auto-approve minor variances or manually review significant differences
Billing Target Filter
Filter by client-billable vs organization-billable entries
Filters and Search
Use the filter panel to narrow down exceptions by date range, status, type, severity, or billing target.
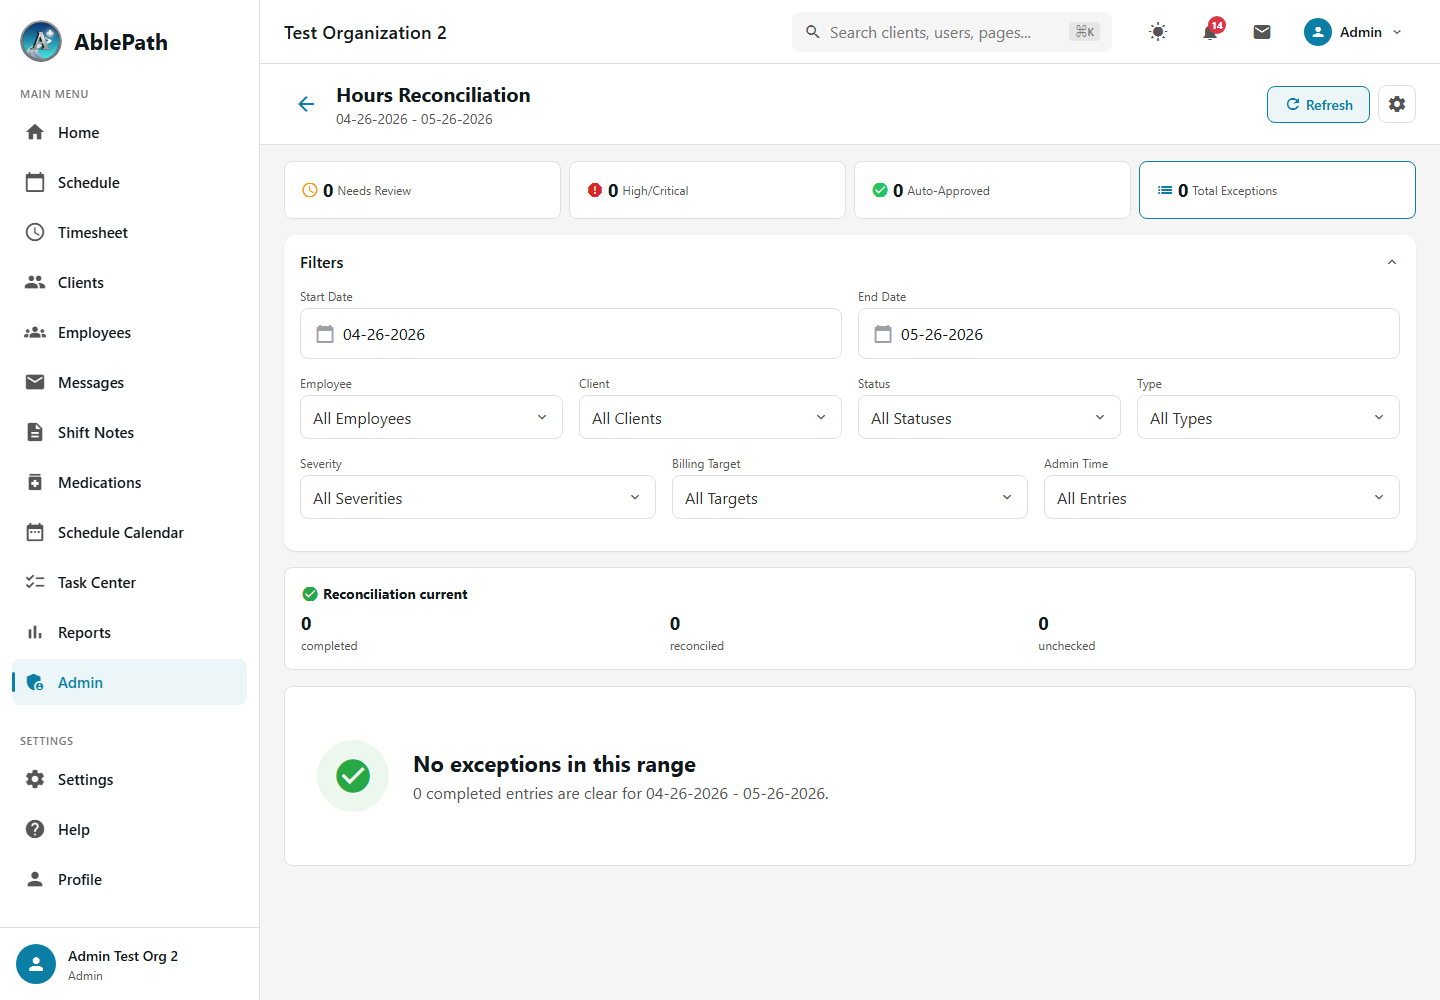
- Go to Admin → Billing → Hours Reconciliation Access the reconciliation dashboard
- Set the date range Select the pay period or custom date range to reconcile
- Click "Scan for Exceptions" System analyzes time entries against scheduled shifts
- Review exception summary See counts by type: Missing Shift, Hours Variance, Missing Time Entry
- Filter by severity Focus on High and Critical exceptions first
- Review each exception Click on an exception to see details and options
- Resolve exceptions Approve, adjust, or dismiss each exception with notes
- Click on the exception Opens the exception detail modal
- Review the details Compare scheduled hours vs. actual hours worked
- Check the reason Look for late clock-in notes or shift adjustment reasons
- Choose resolution action Select Approve, Adjust Time, or Dismiss
- Add resolution notes Document why this resolution was chosen
- Save resolution Exception is marked as resolved
Set up reconciliation thresholds in Settings to auto-approve minor variances (e.g., within 5 minutes) and flag only significant discrepancies for review.
Training
Access your assigned training courses, complete lessons, and track your progress. Administrators can create courses with multiple lessons, assign them to staff, and monitor completion rates.
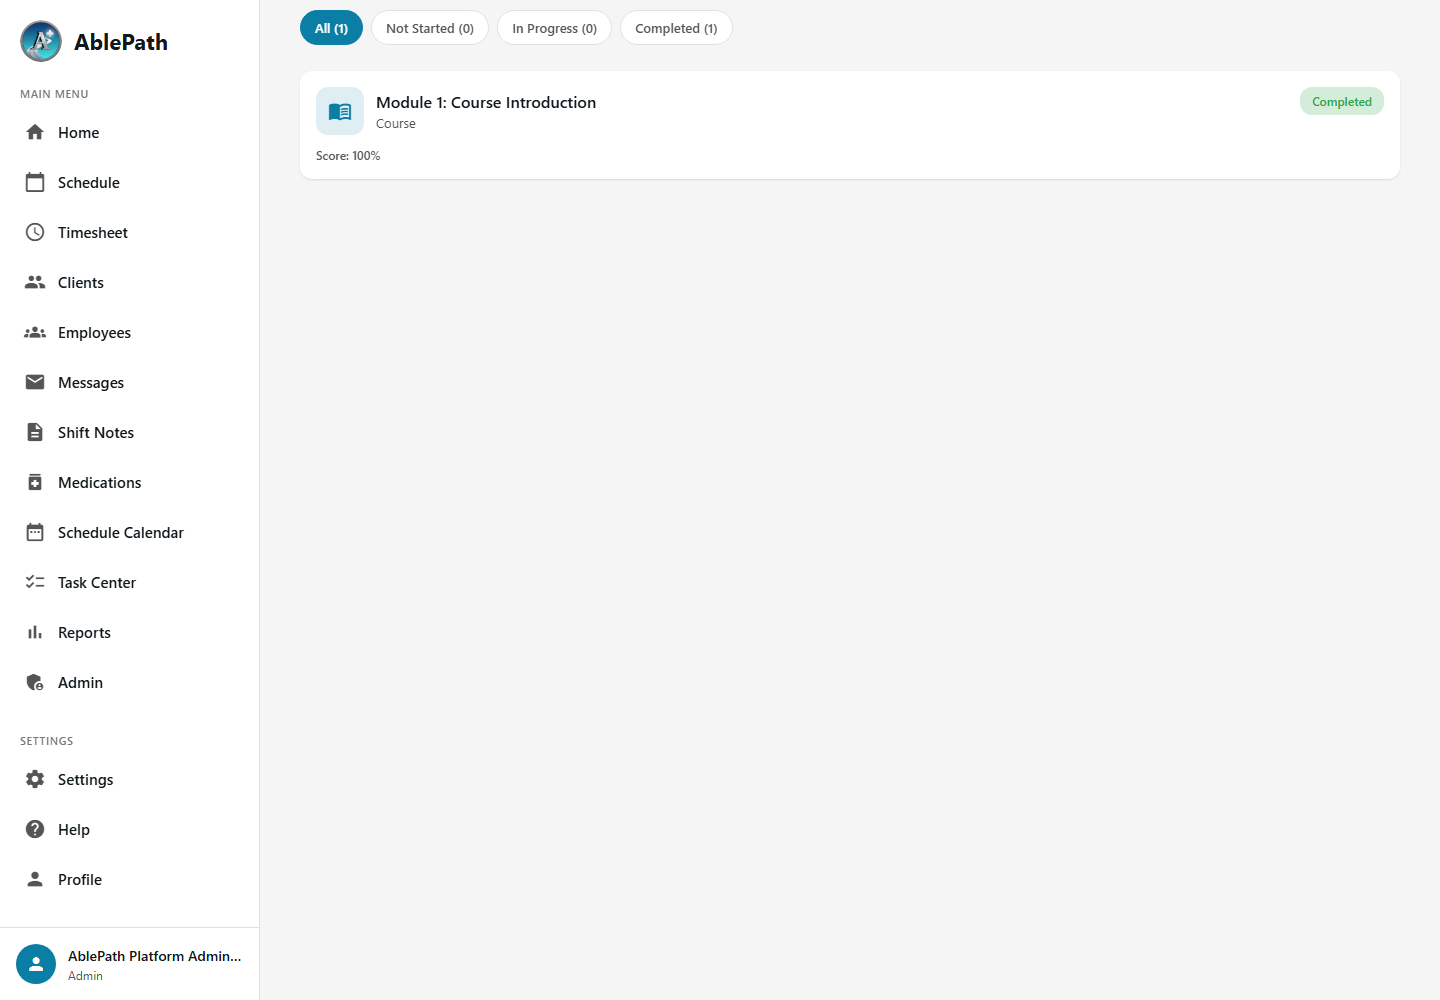
Training Features
Course Library
Browse assigned and available training courses organized by category
Lesson Structure
Courses contain sequential lessons with text content, embedded media, and quizzes
Progress Tracking
Track your completion percentage and see which lessons remain
Status Filters
Filter courses by Not Started, In Progress, and Completed
- Go to Training Click "Training" in the sidebar navigation
- Select a course Click on an assigned course to open it
- Work through lessons Read the content, watch any videos, and complete each lesson sequentially
- Complete any assessments Answer quiz questions if the lesson includes an assessment
- Mark lesson complete Click "Complete" after finishing each lesson to track progress
- Finish the course Once all lessons are complete, the course is marked as finished and your supervisor is notified
Documents
View, upload, and manage organizational documents. Documents can be categorized, filtered, and shared with staff. Client-specific documents are managed within each client's profile.
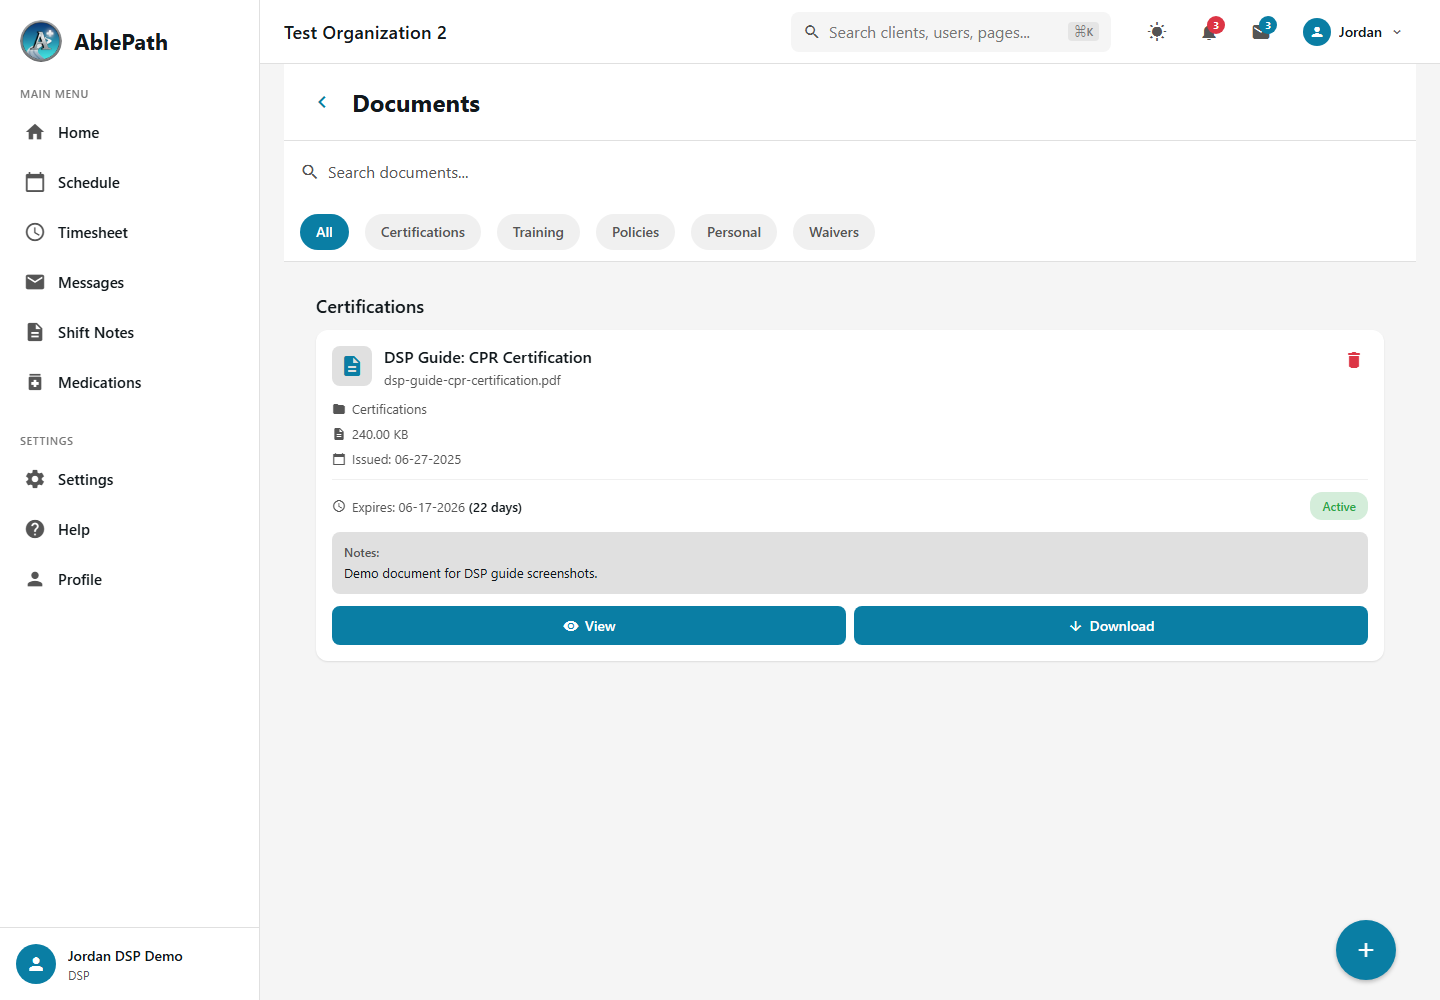
Document Features
Category Filtering
Filter documents by category (Policies, Forms, Training Materials, etc.)
Upload Files
Upload PDFs, images, and other documents with category and description
Download & View
Download files or view supported formats directly in the browser
Access Control
Documents are scoped by organization; only authorized staff can access them
- Go to Documents Click "Documents" in the sidebar navigation
- Click "Upload Document" Opens the upload form
- Select the file Choose a file from your device (PDF, image, or document format)
- Enter details Add a title, select a category, and optionally add a description
- Upload Click "Upload" to save the document. It will be available to all authorized staff
Onboarding
New staff members are guided through a first-login onboarding wizard that helps them set up their account, complete their profile, and review required compliance documents before accessing the full application.
Onboarding Steps
Password Setup
First-time users create a secure password when logging in with their invitation link
Profile Completion
Enter personal details, contact information, emergency contacts, and upload a profile photo
Compliance Documents
Review and acknowledge required policies, agreements, and compliance forms
App Overview
Brief guided tour of key features: schedule, timesheet, messages, and medications
When creating a new employee, they'll receive an email invitation with a link to start the onboarding process. Make sure their email address is correct before sending the invitation.
Profile & Notifications
View and edit your personal profile, and stay informed with real-time notifications for schedule changes, messages, and important alerts.
User Profile
Access your profile to view personal information, update contact details, and manage your account settings.
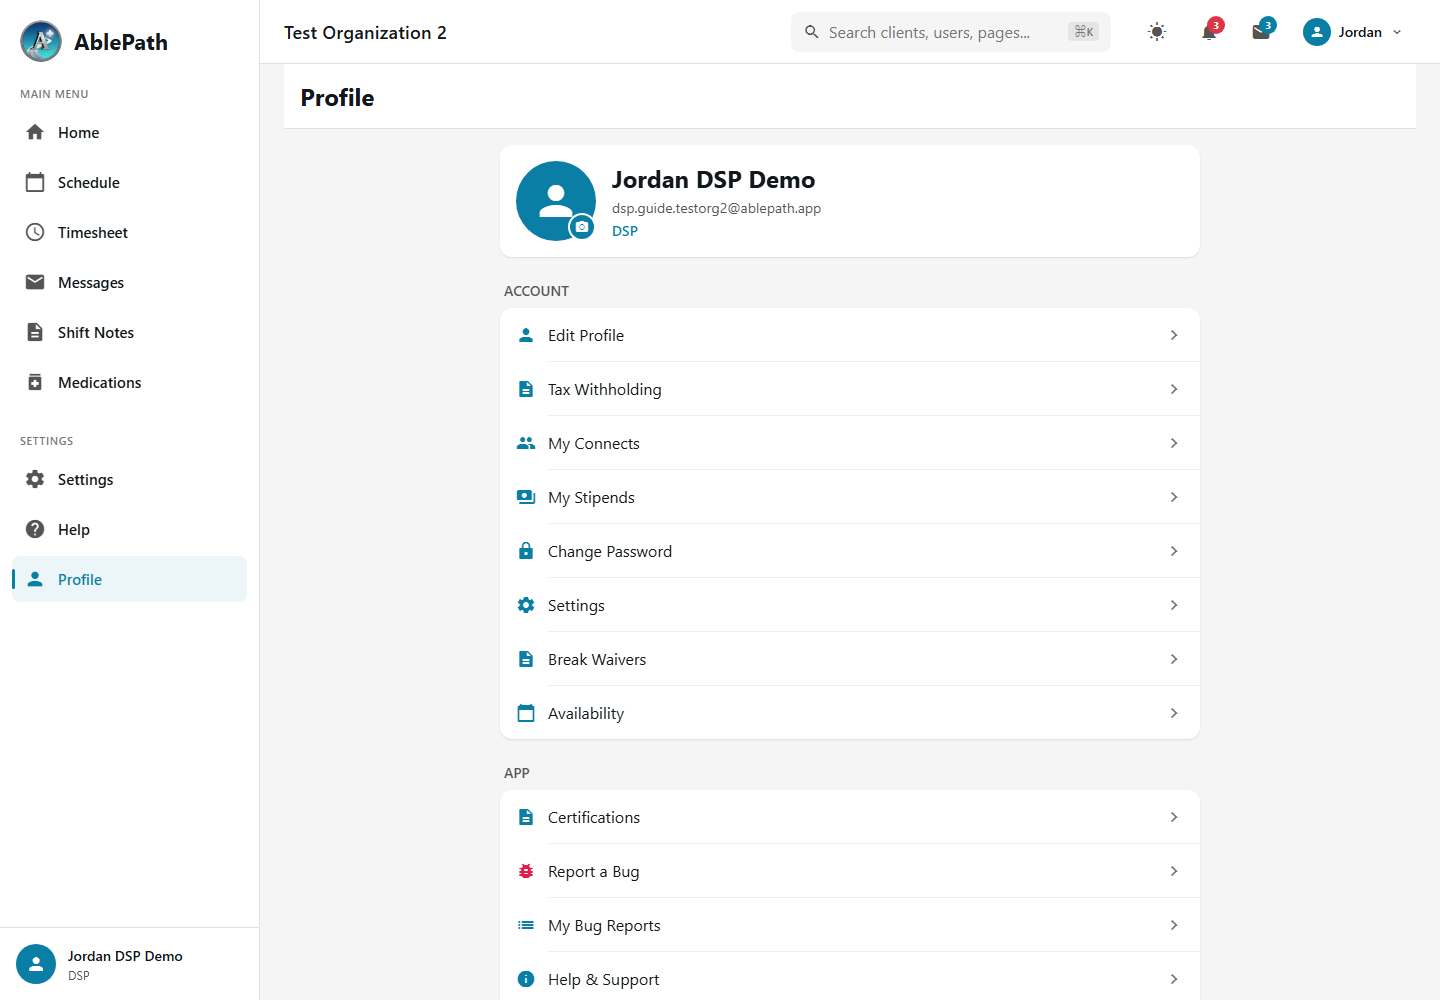
My Connects
Employees can open Profile → My Connects to view employee-connect records that have been shared with them. This includes visible performance reviews, coaching records, recognition, disciplinary records, attendance context, previous goal outcomes, and new goals.
Notifications
View all notifications including schedule updates, messages, approvals, and system alerts. Notifications can be filtered and marked as read.
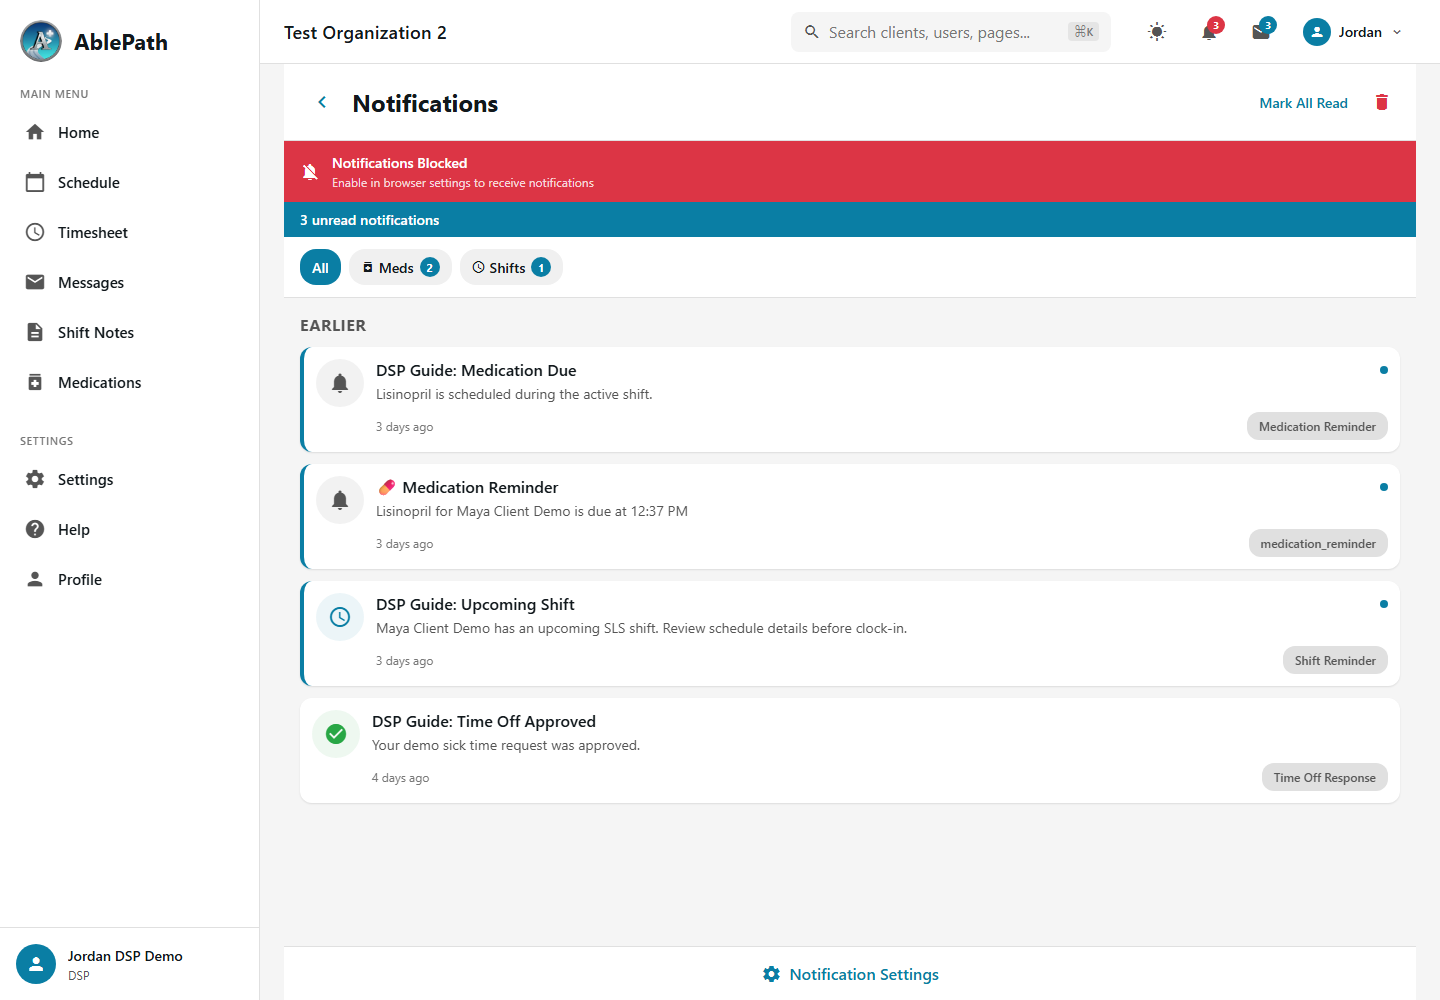
Notification Types
Shift Reminders
Reminders before scheduled shifts begin
Schedule Changes
Alerts when your schedule is modified
Messages
New message notifications from individuals or groups
Timesheet Approvals
Notifications when timesheets are approved or rejected
- Click your name/avatar Located in the top right corner of the screen
- Select "Profile" Opens your personal profile page
- Click "Edit Profile" Enables editing mode
- Update your information Change phone number, email, emergency contact, etc.
- Upload new photo (optional) Click on your avatar to upload a new profile photo
- Save changes Click "Save" to update your profile
- Click the bell icon Located in the top navigation bar
- View recent notifications See all unread and recent notifications
- Click on a notification Opens the related item (shift, message, approval, etc.)
- Mark all as read Click the checkmark icon to clear all notifications
Settings & Preferences
Customize your AblePath experience with personal preferences, notification settings, security options, and theme selection.
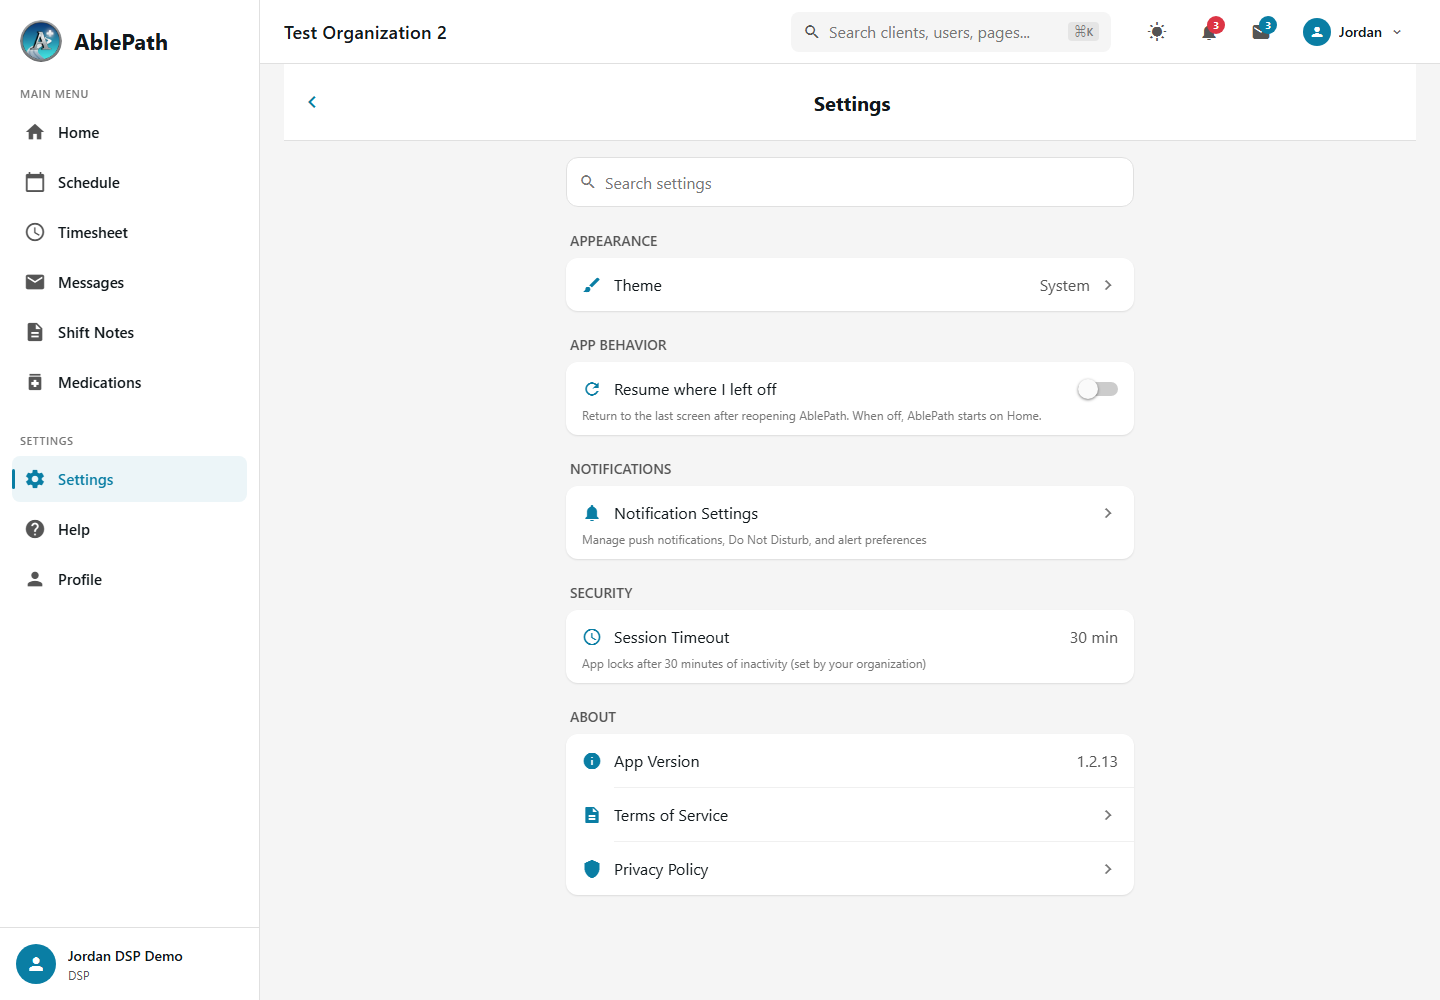
Settings Options
Theme Selection
Choose Light, Dark, or Warm color themes
Push Notifications
Configure which notifications you receive
Do Not Disturb
Temporarily silence all notifications
Security Settings
Lock screen, session timeout, biometric login
- Go to Settings Click "Settings" in the sidebar
- Find Theme option Located in the Appearance section
- Click on Theme Opens theme selection
- Select your preferred theme Choose Light, Dark, or Warm
- Theme applies immediately No save needed - theme changes instantly
- Go to Settings Click "Settings" in the sidebar
- Find Push Notifications section Lists all notification categories
- Toggle notifications on/off Enable or disable each notification type
- Configure notification sound Toggle sound on/off for message alerts
- Enable Do Not Disturb (optional) Temporarily silence all notifications
- Go to Settings Click "Settings" in the sidebar
- Find Security section Located below notification settings
- Enable Lock Screen Toggle on "Lock Screen" for HIPAA compliance
- Set session timeout Choose how long before the app auto-locks (5-60 minutes)
- Enable biometric login (optional) Use Face ID or fingerprint to unlock